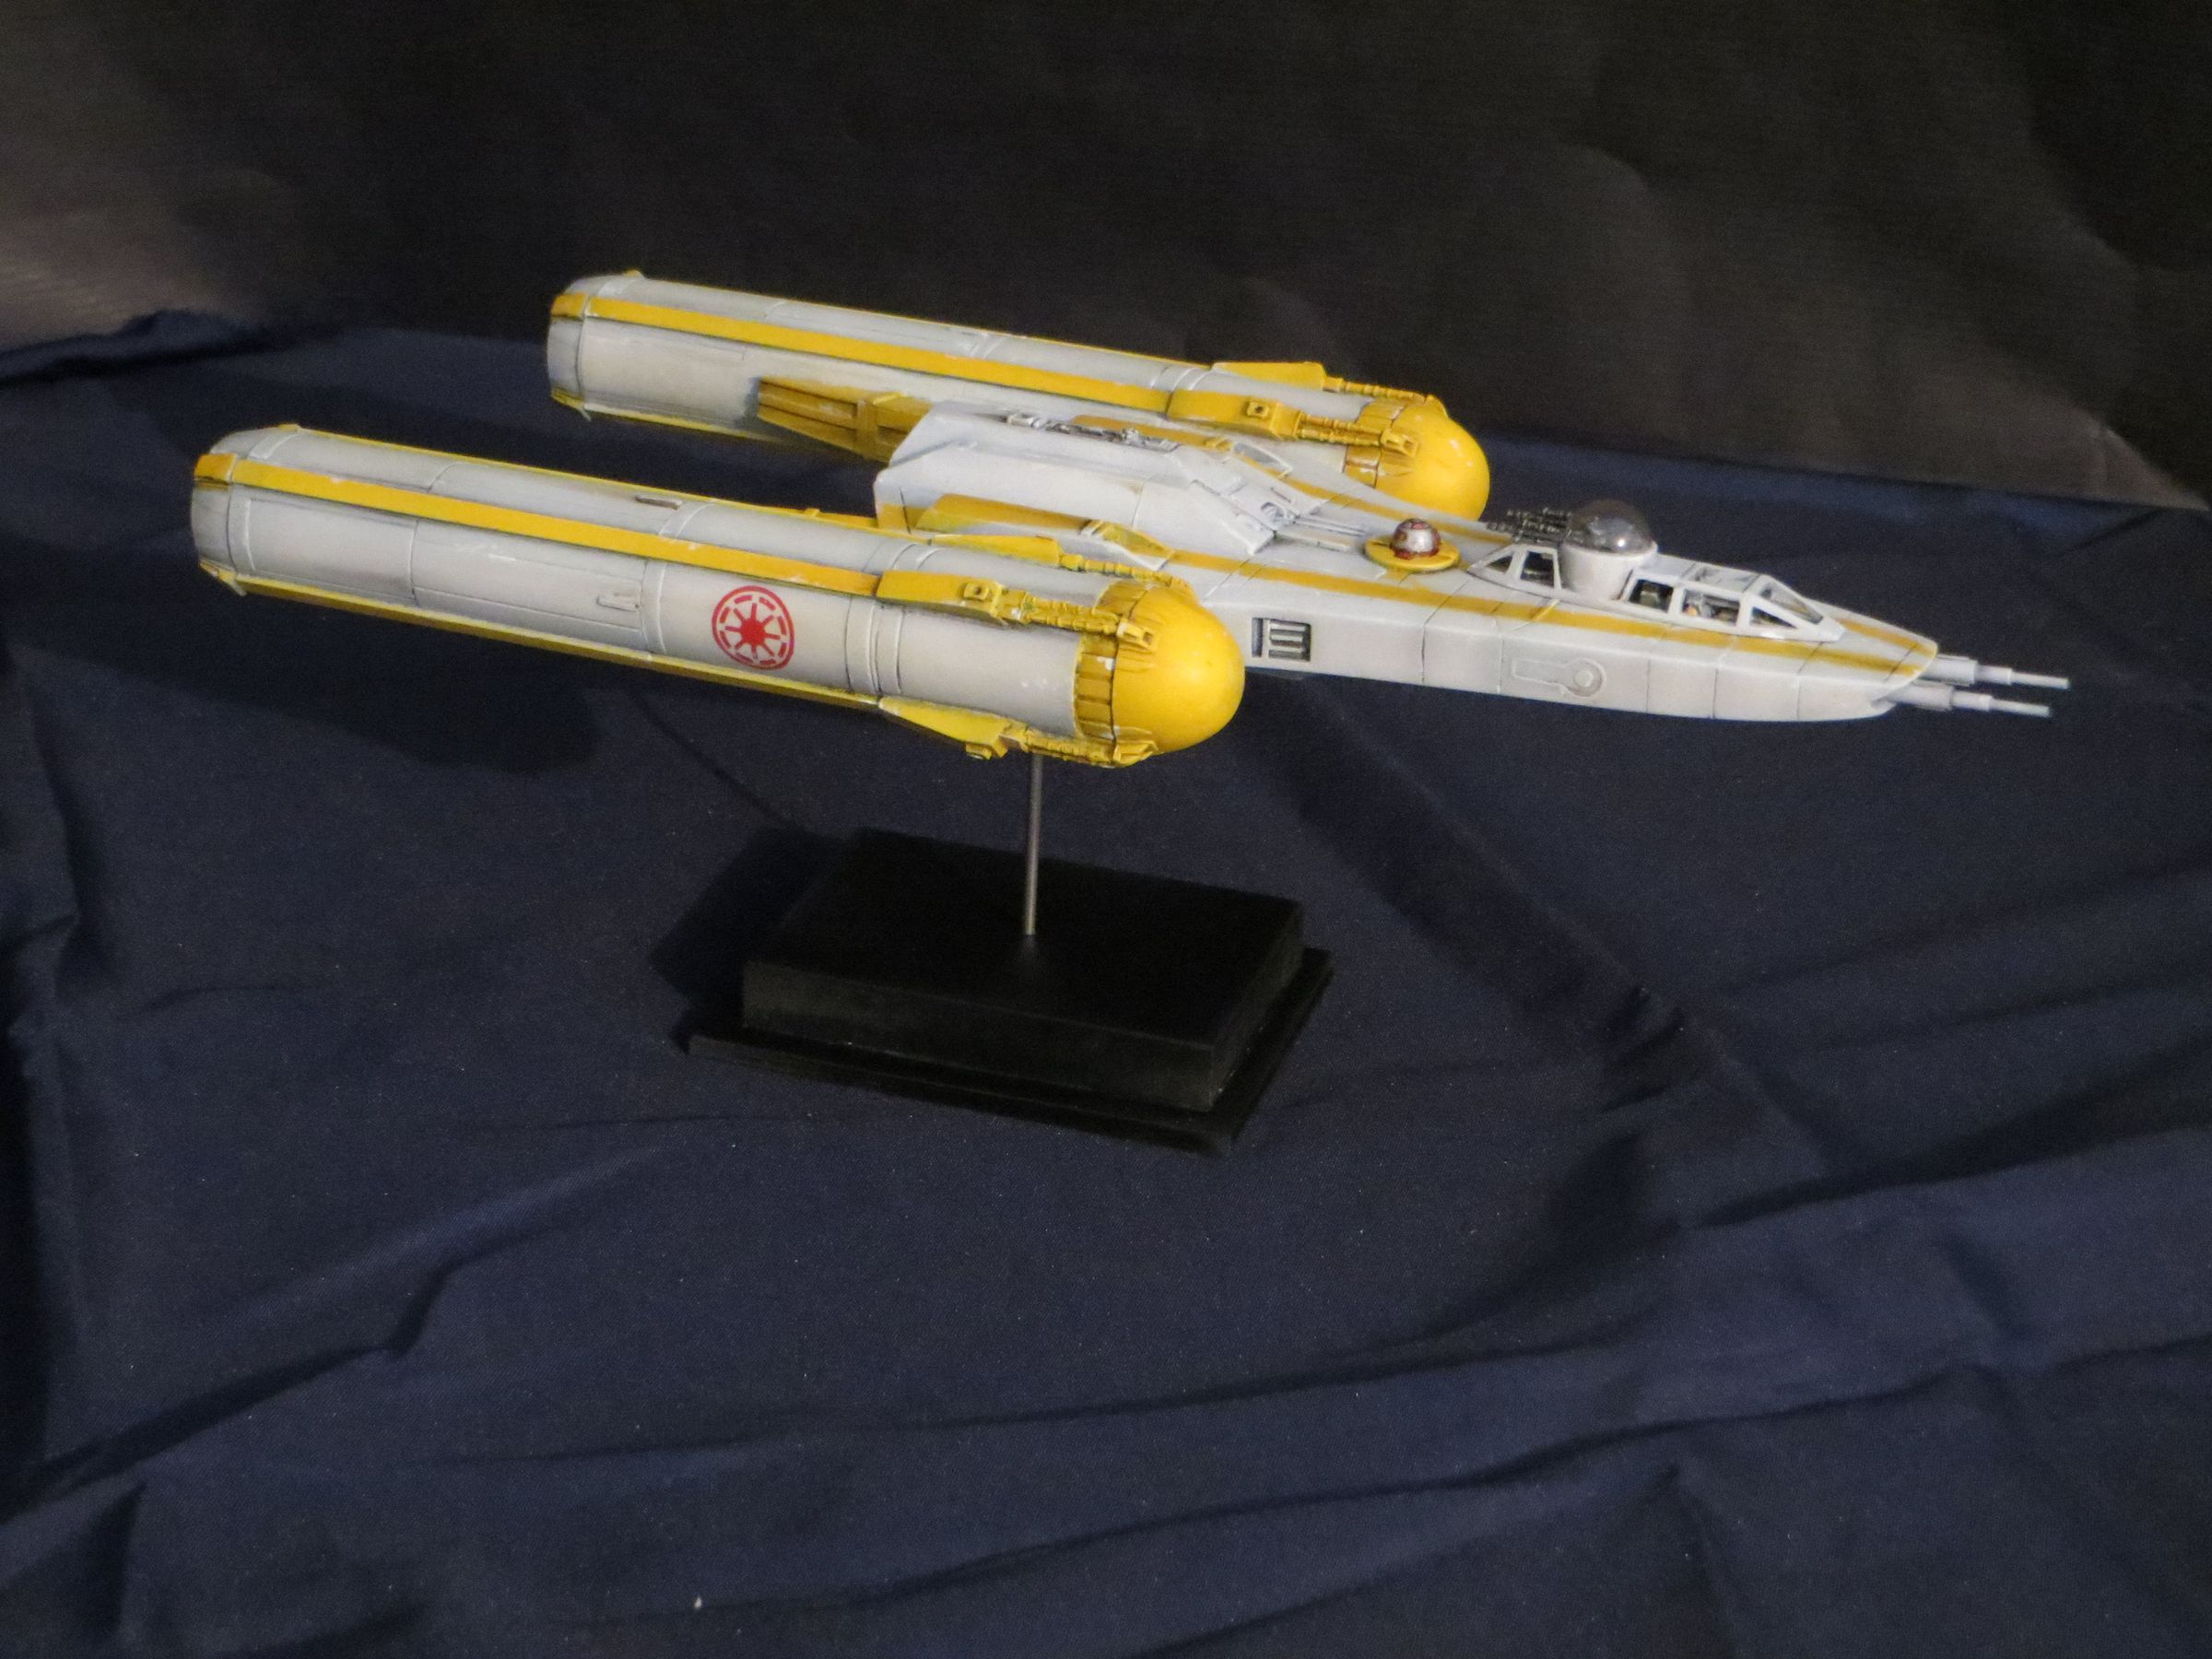
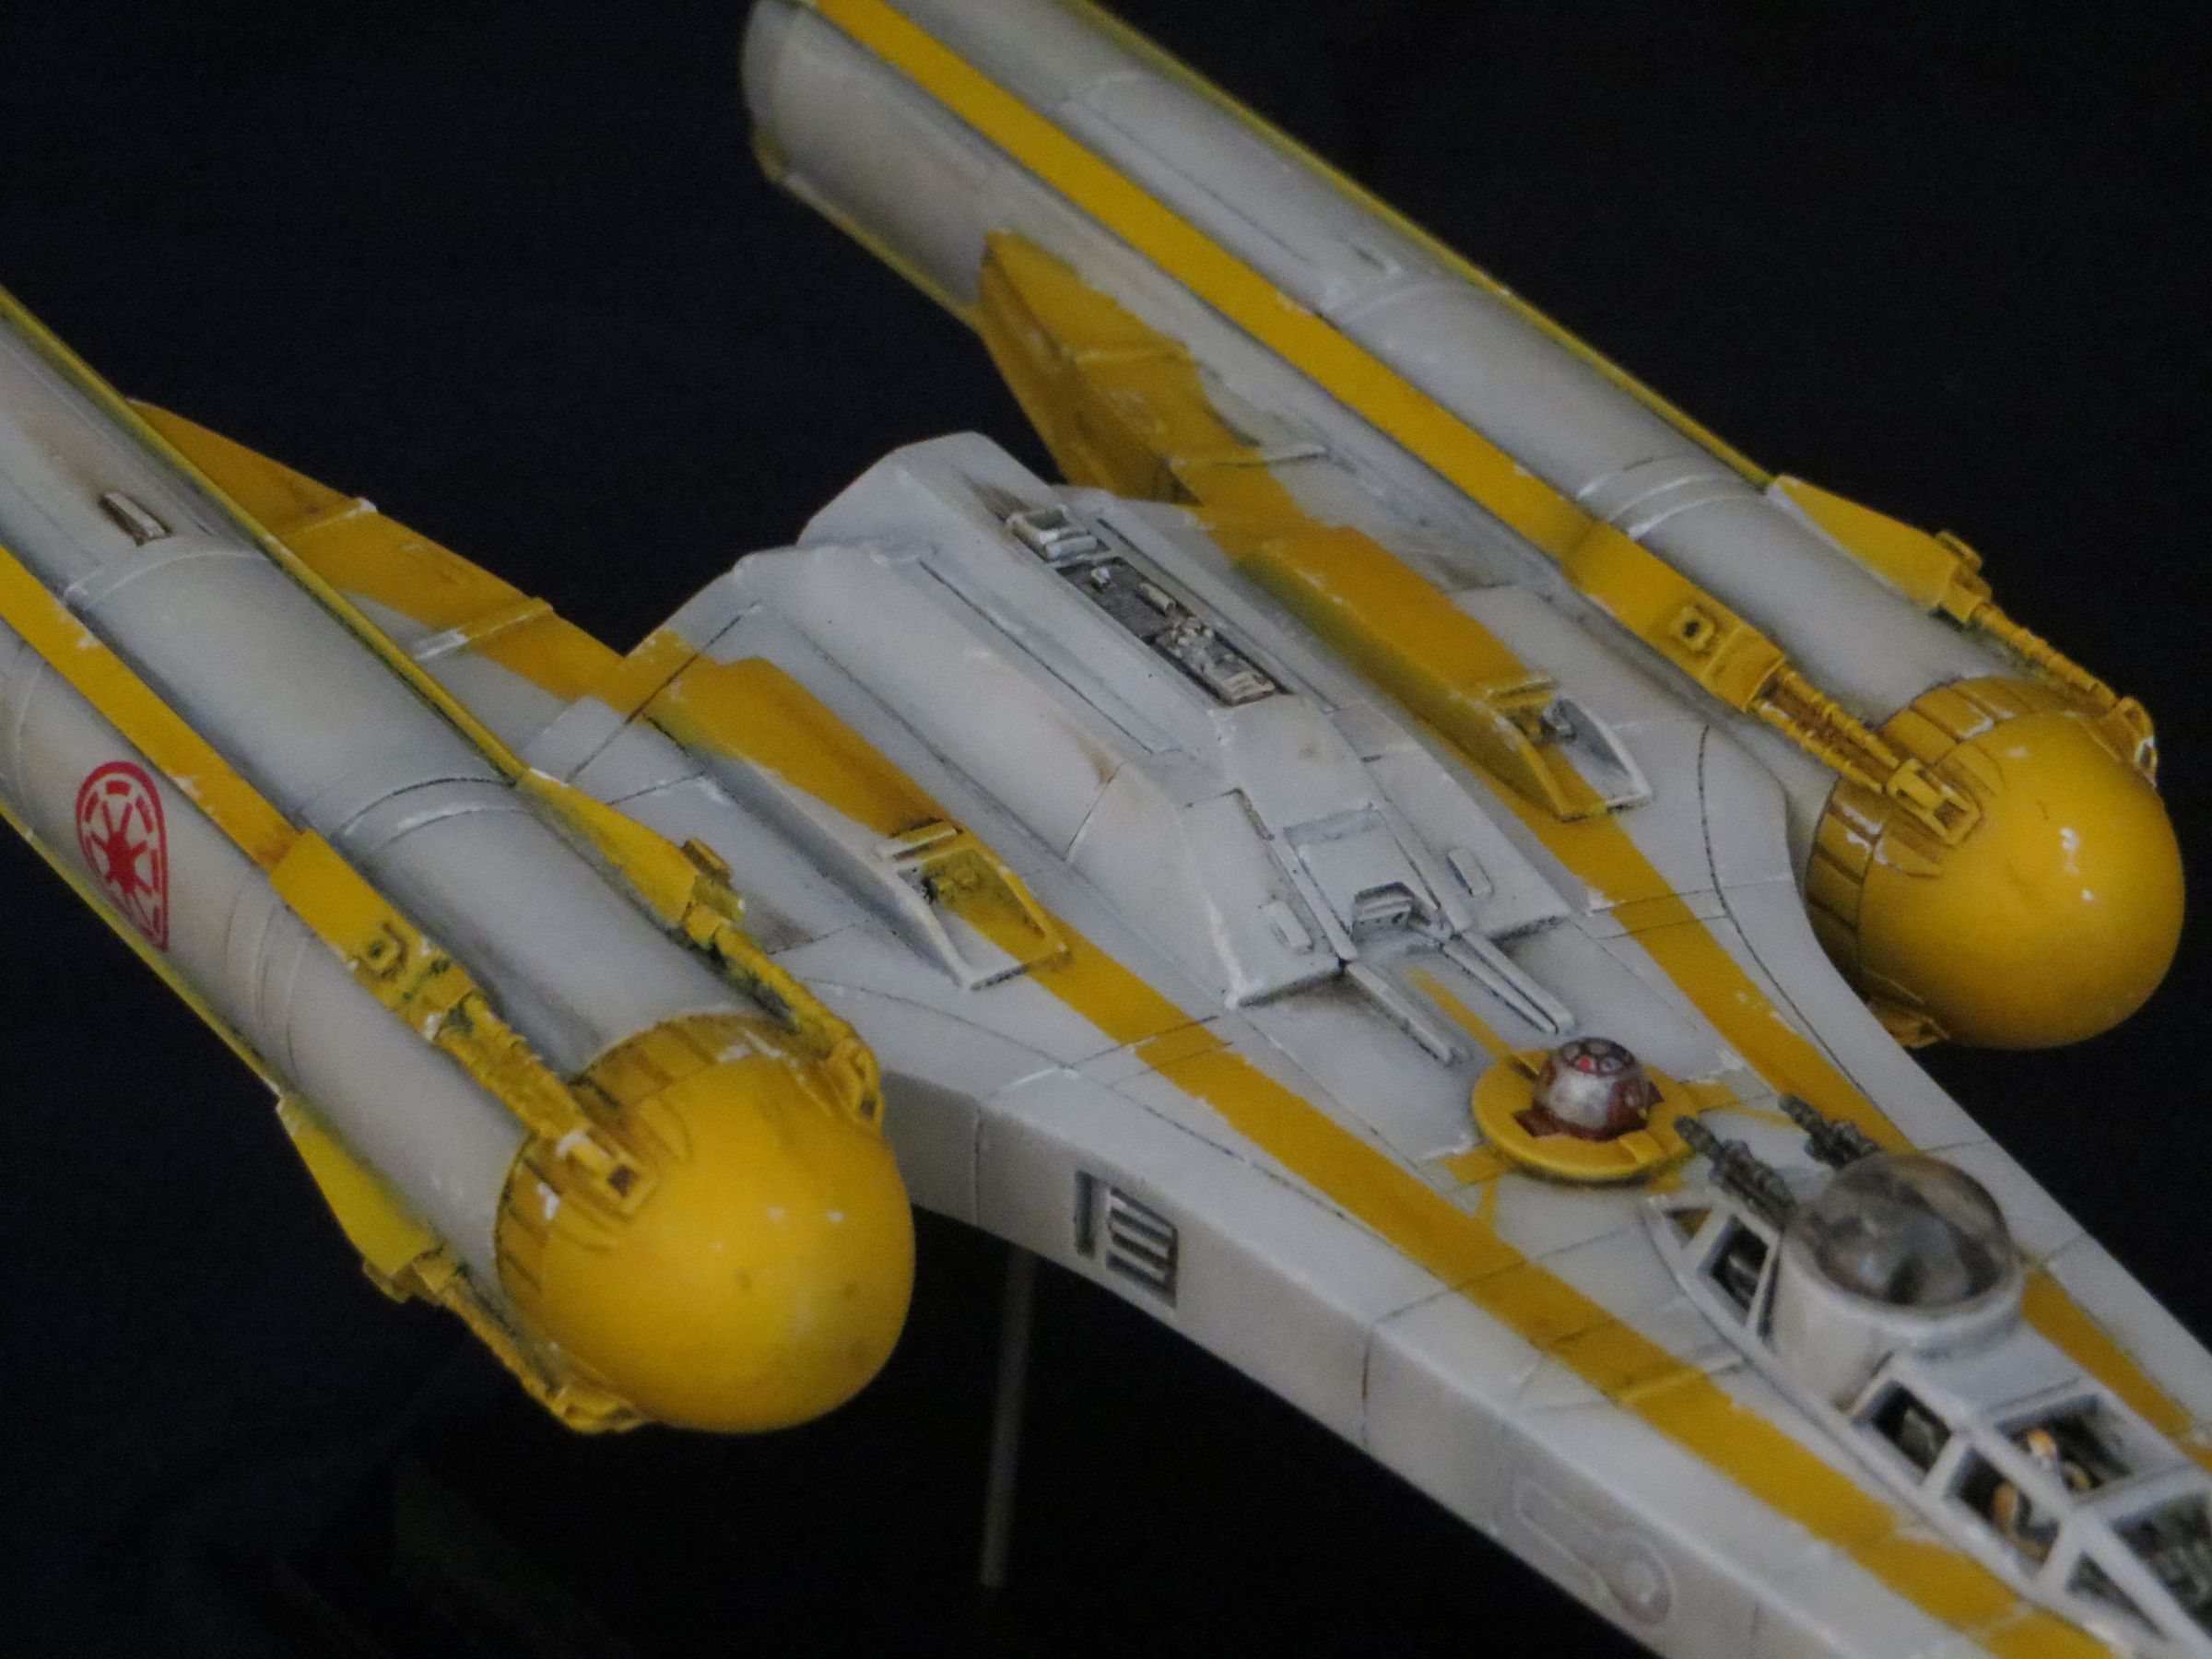
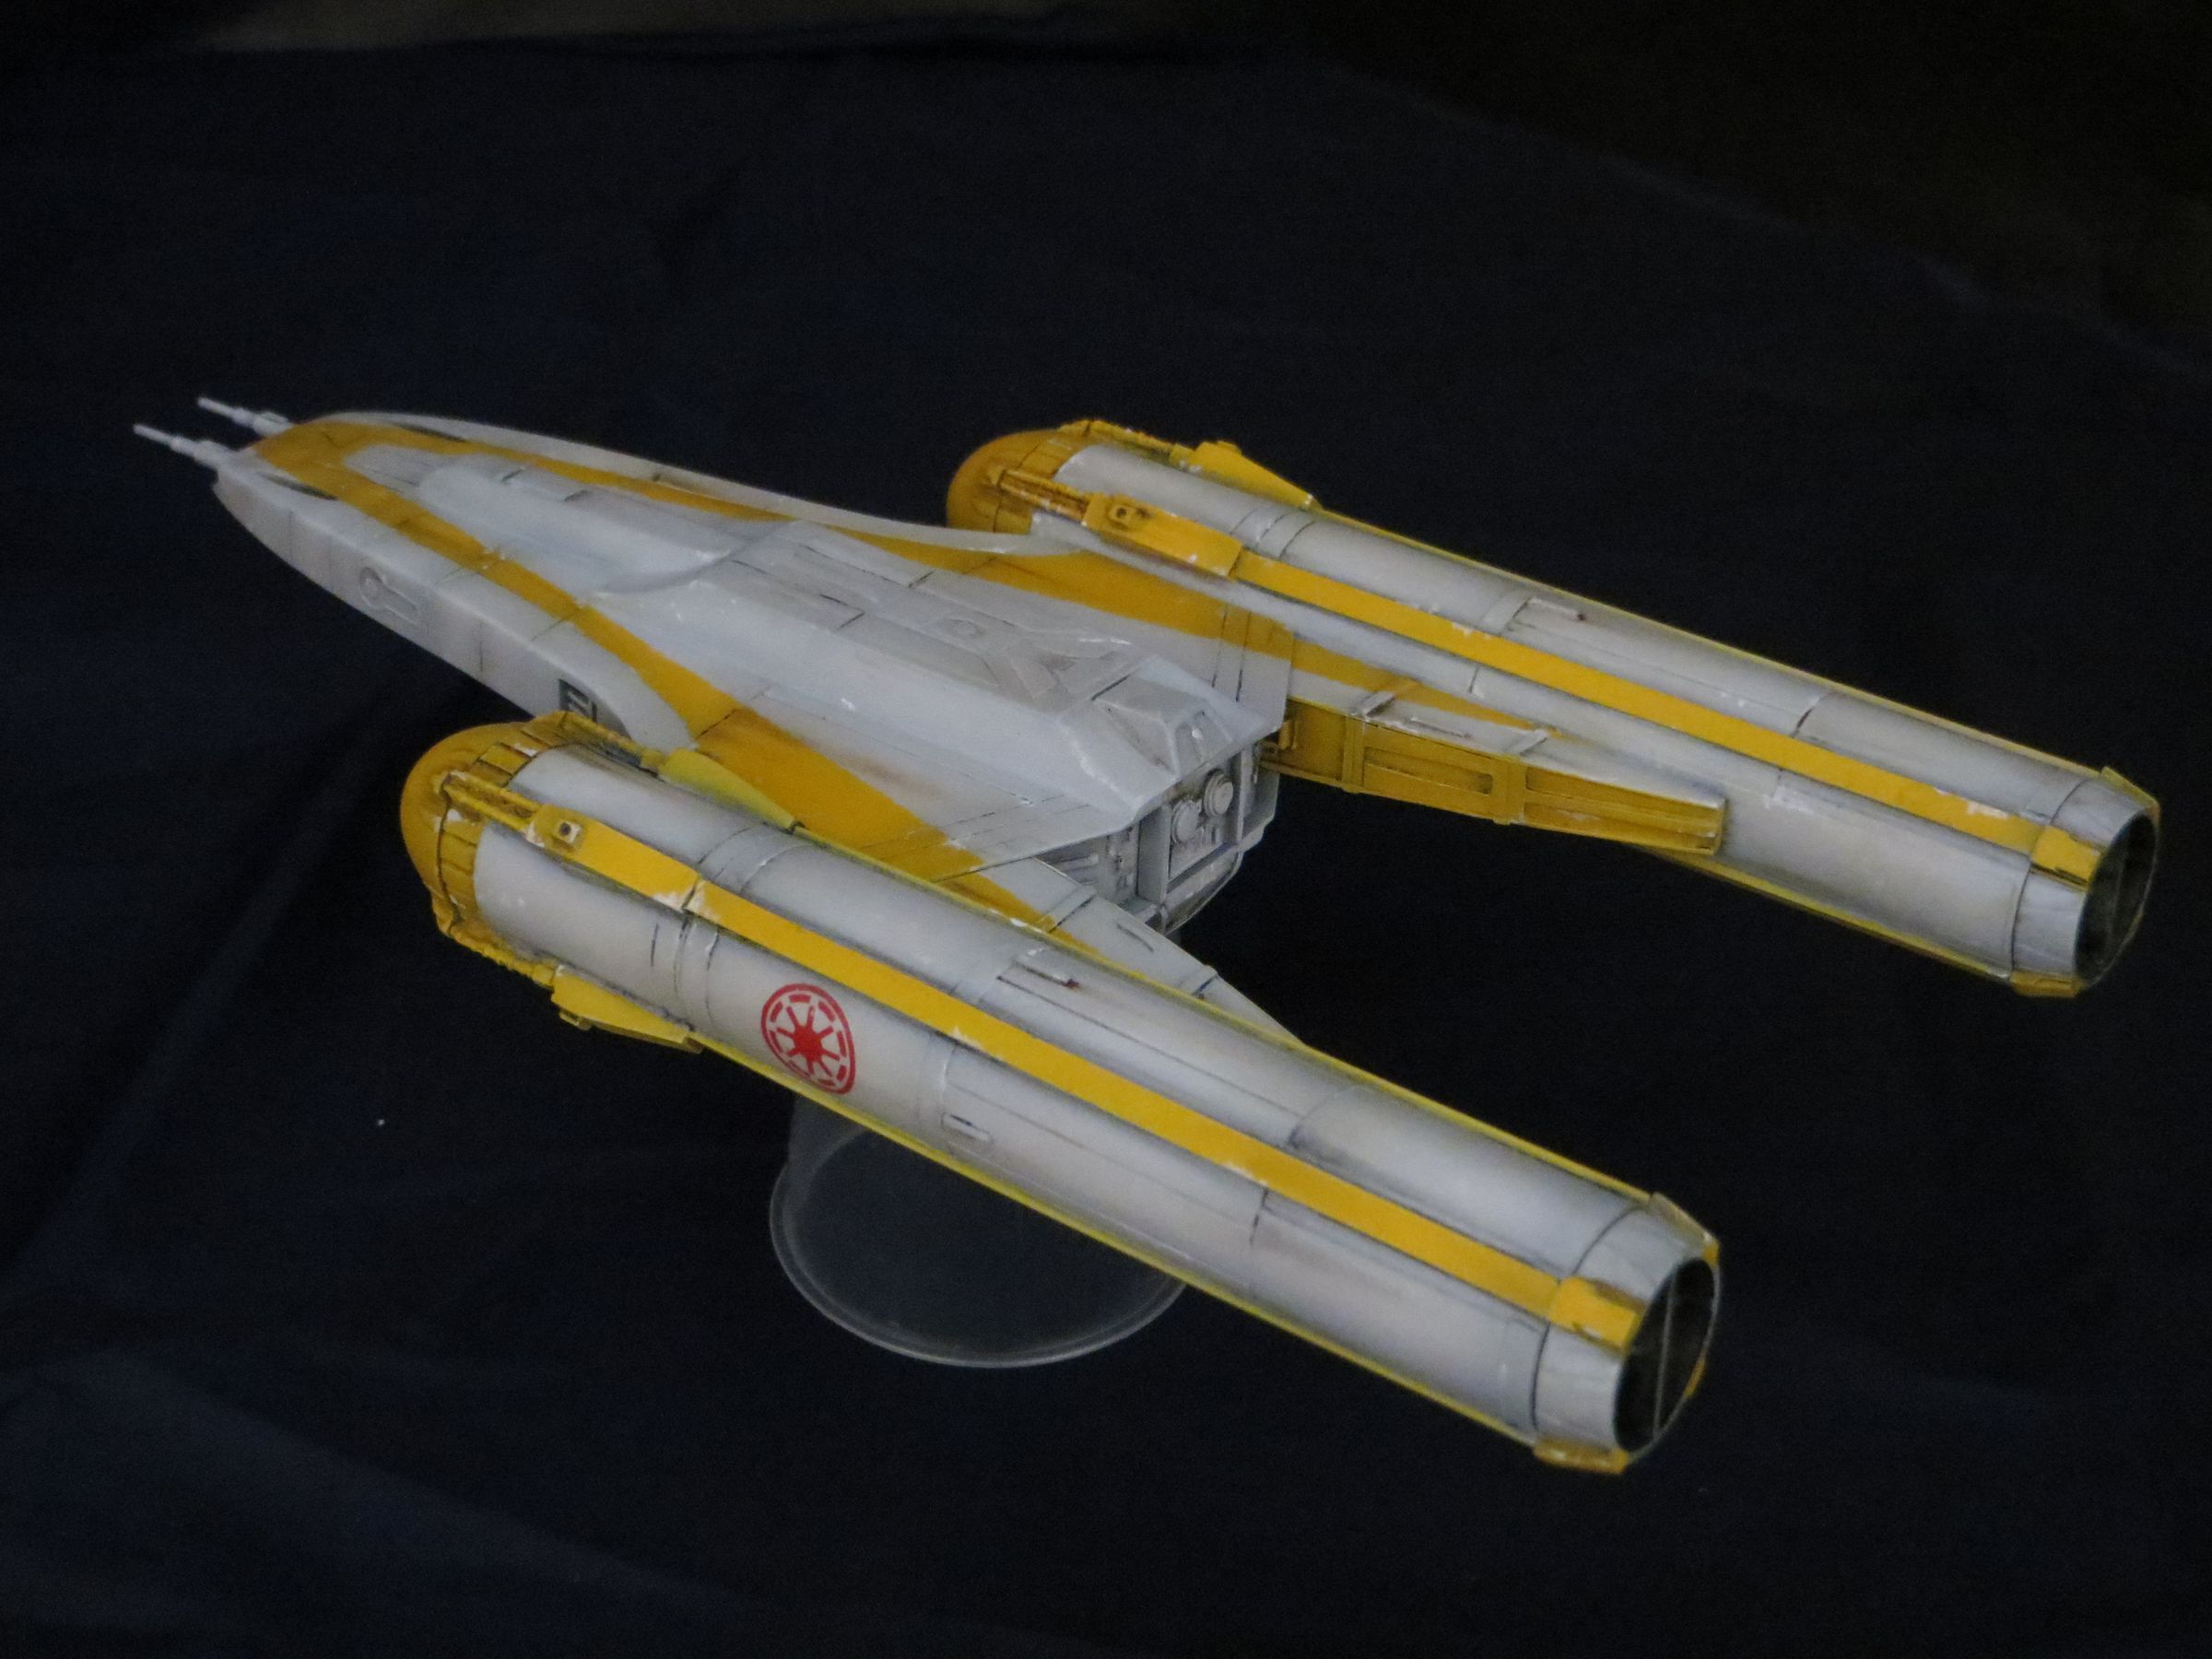
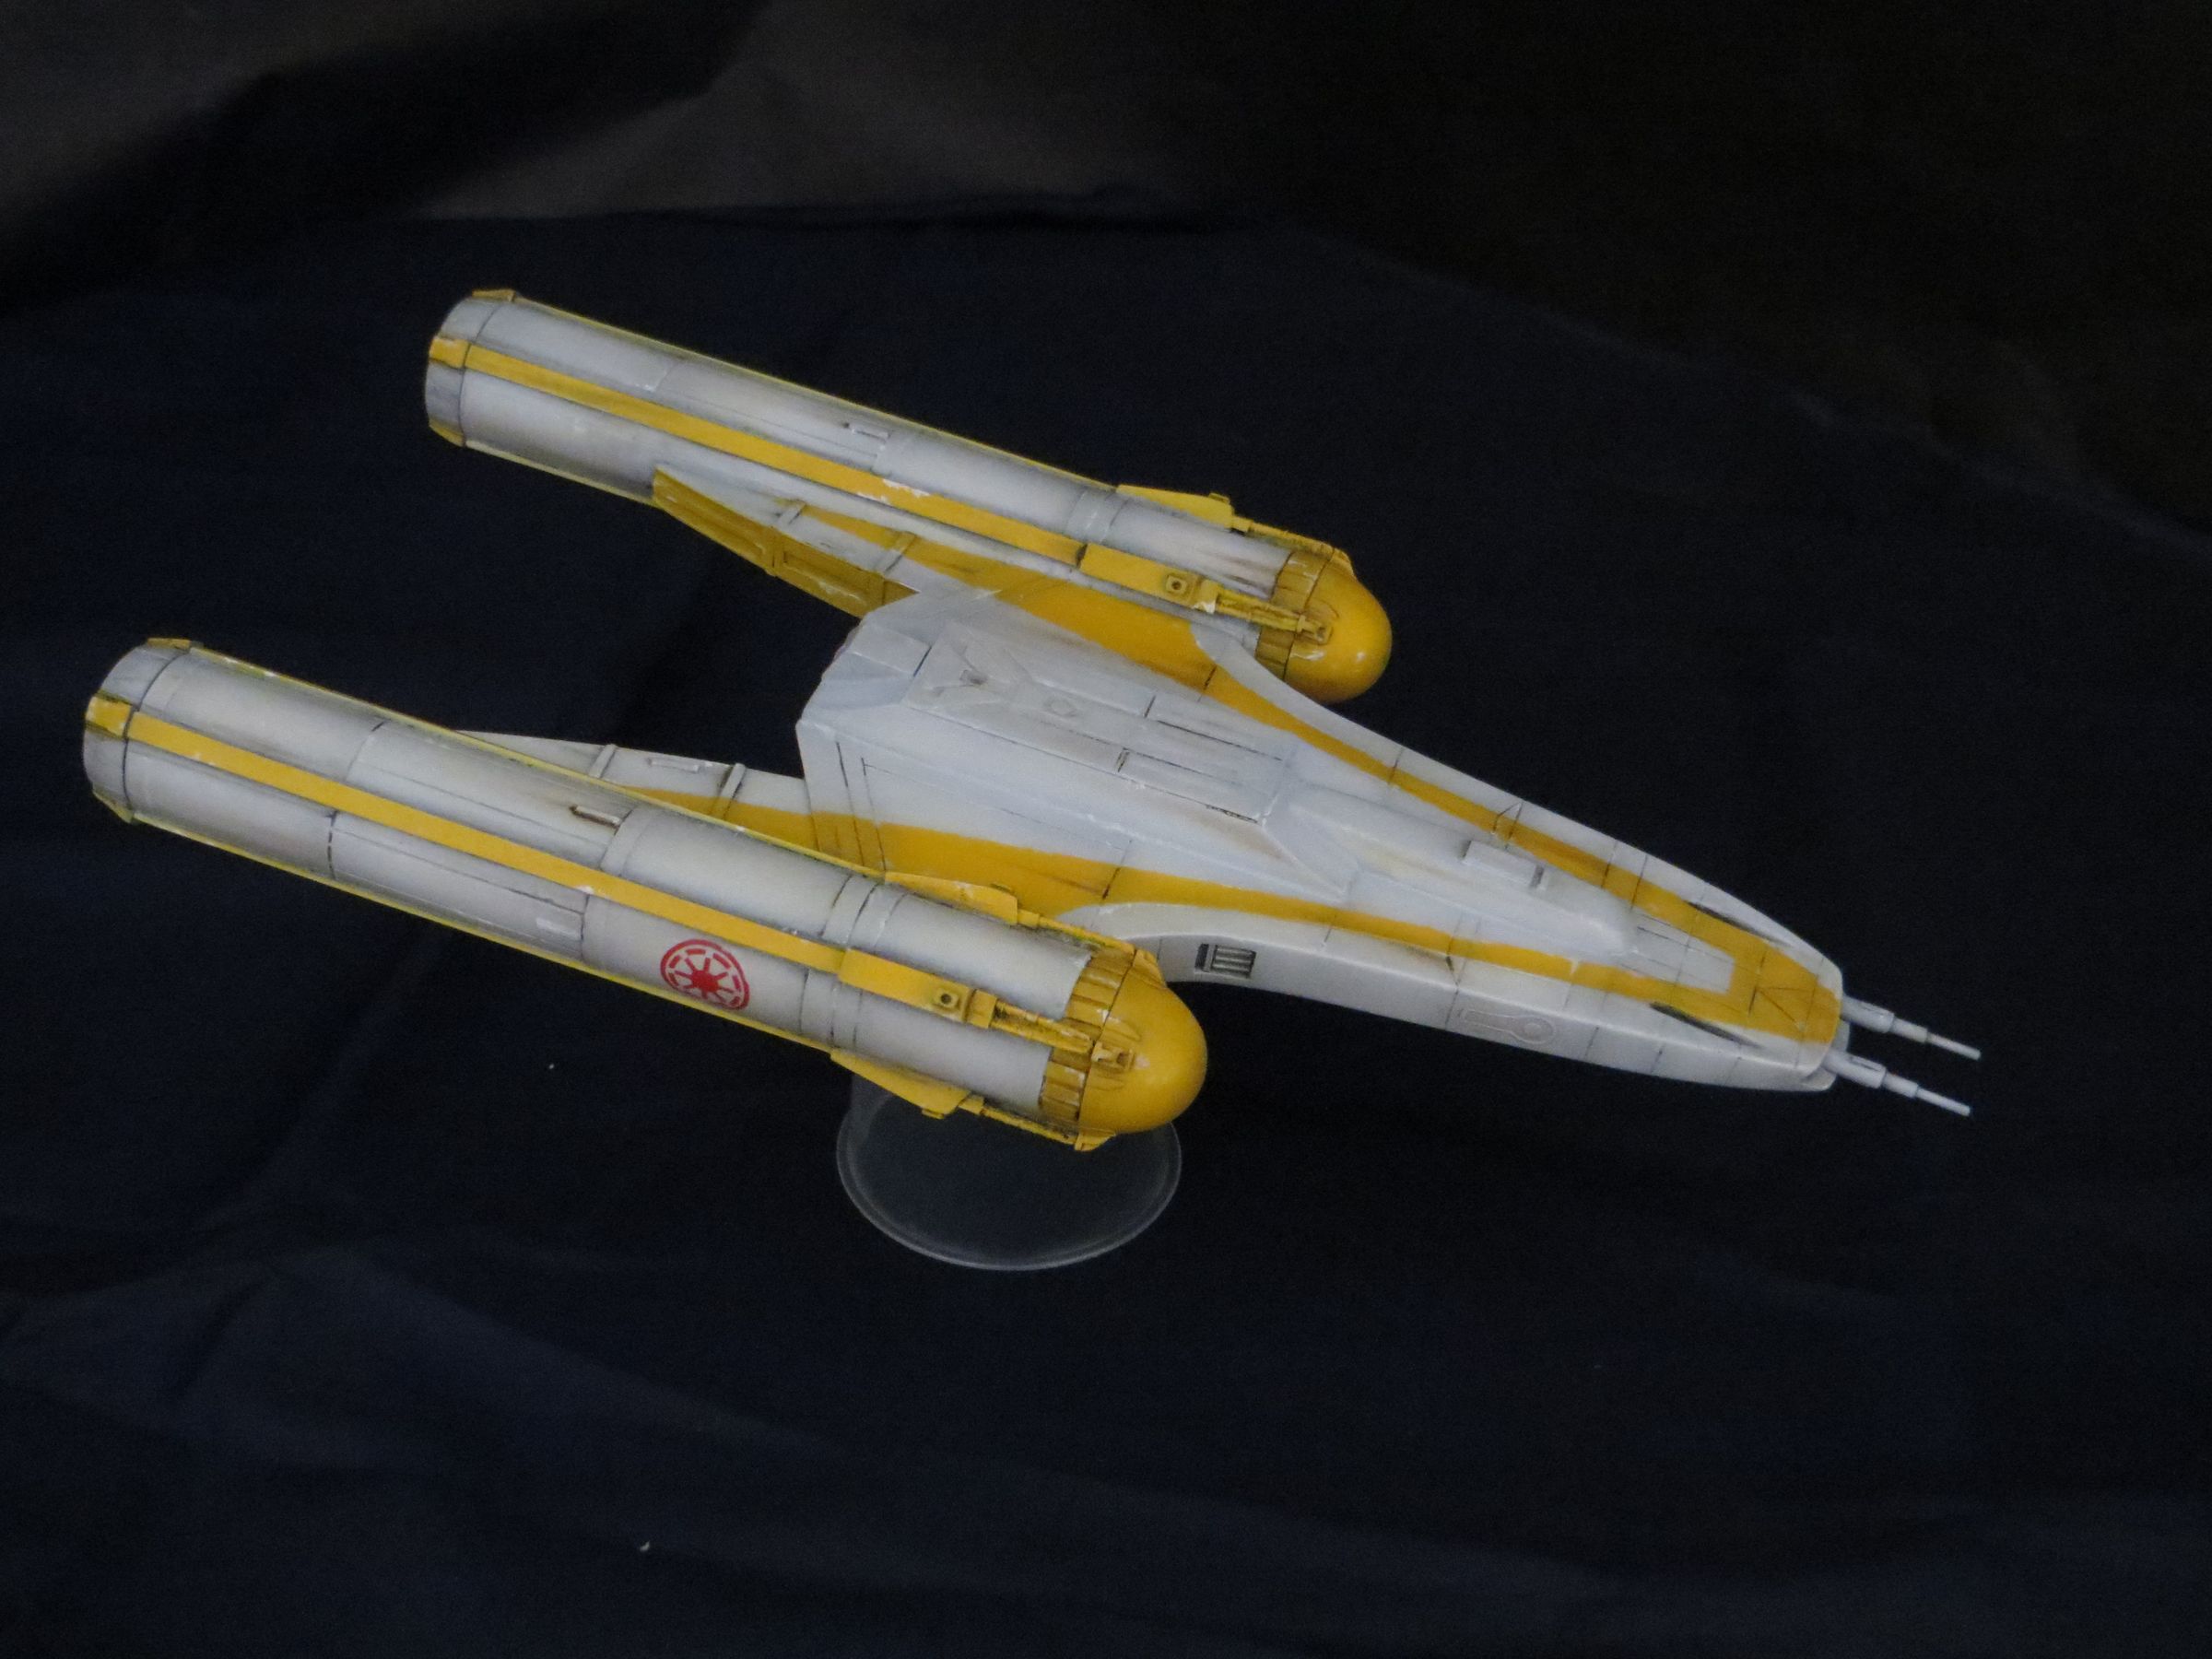
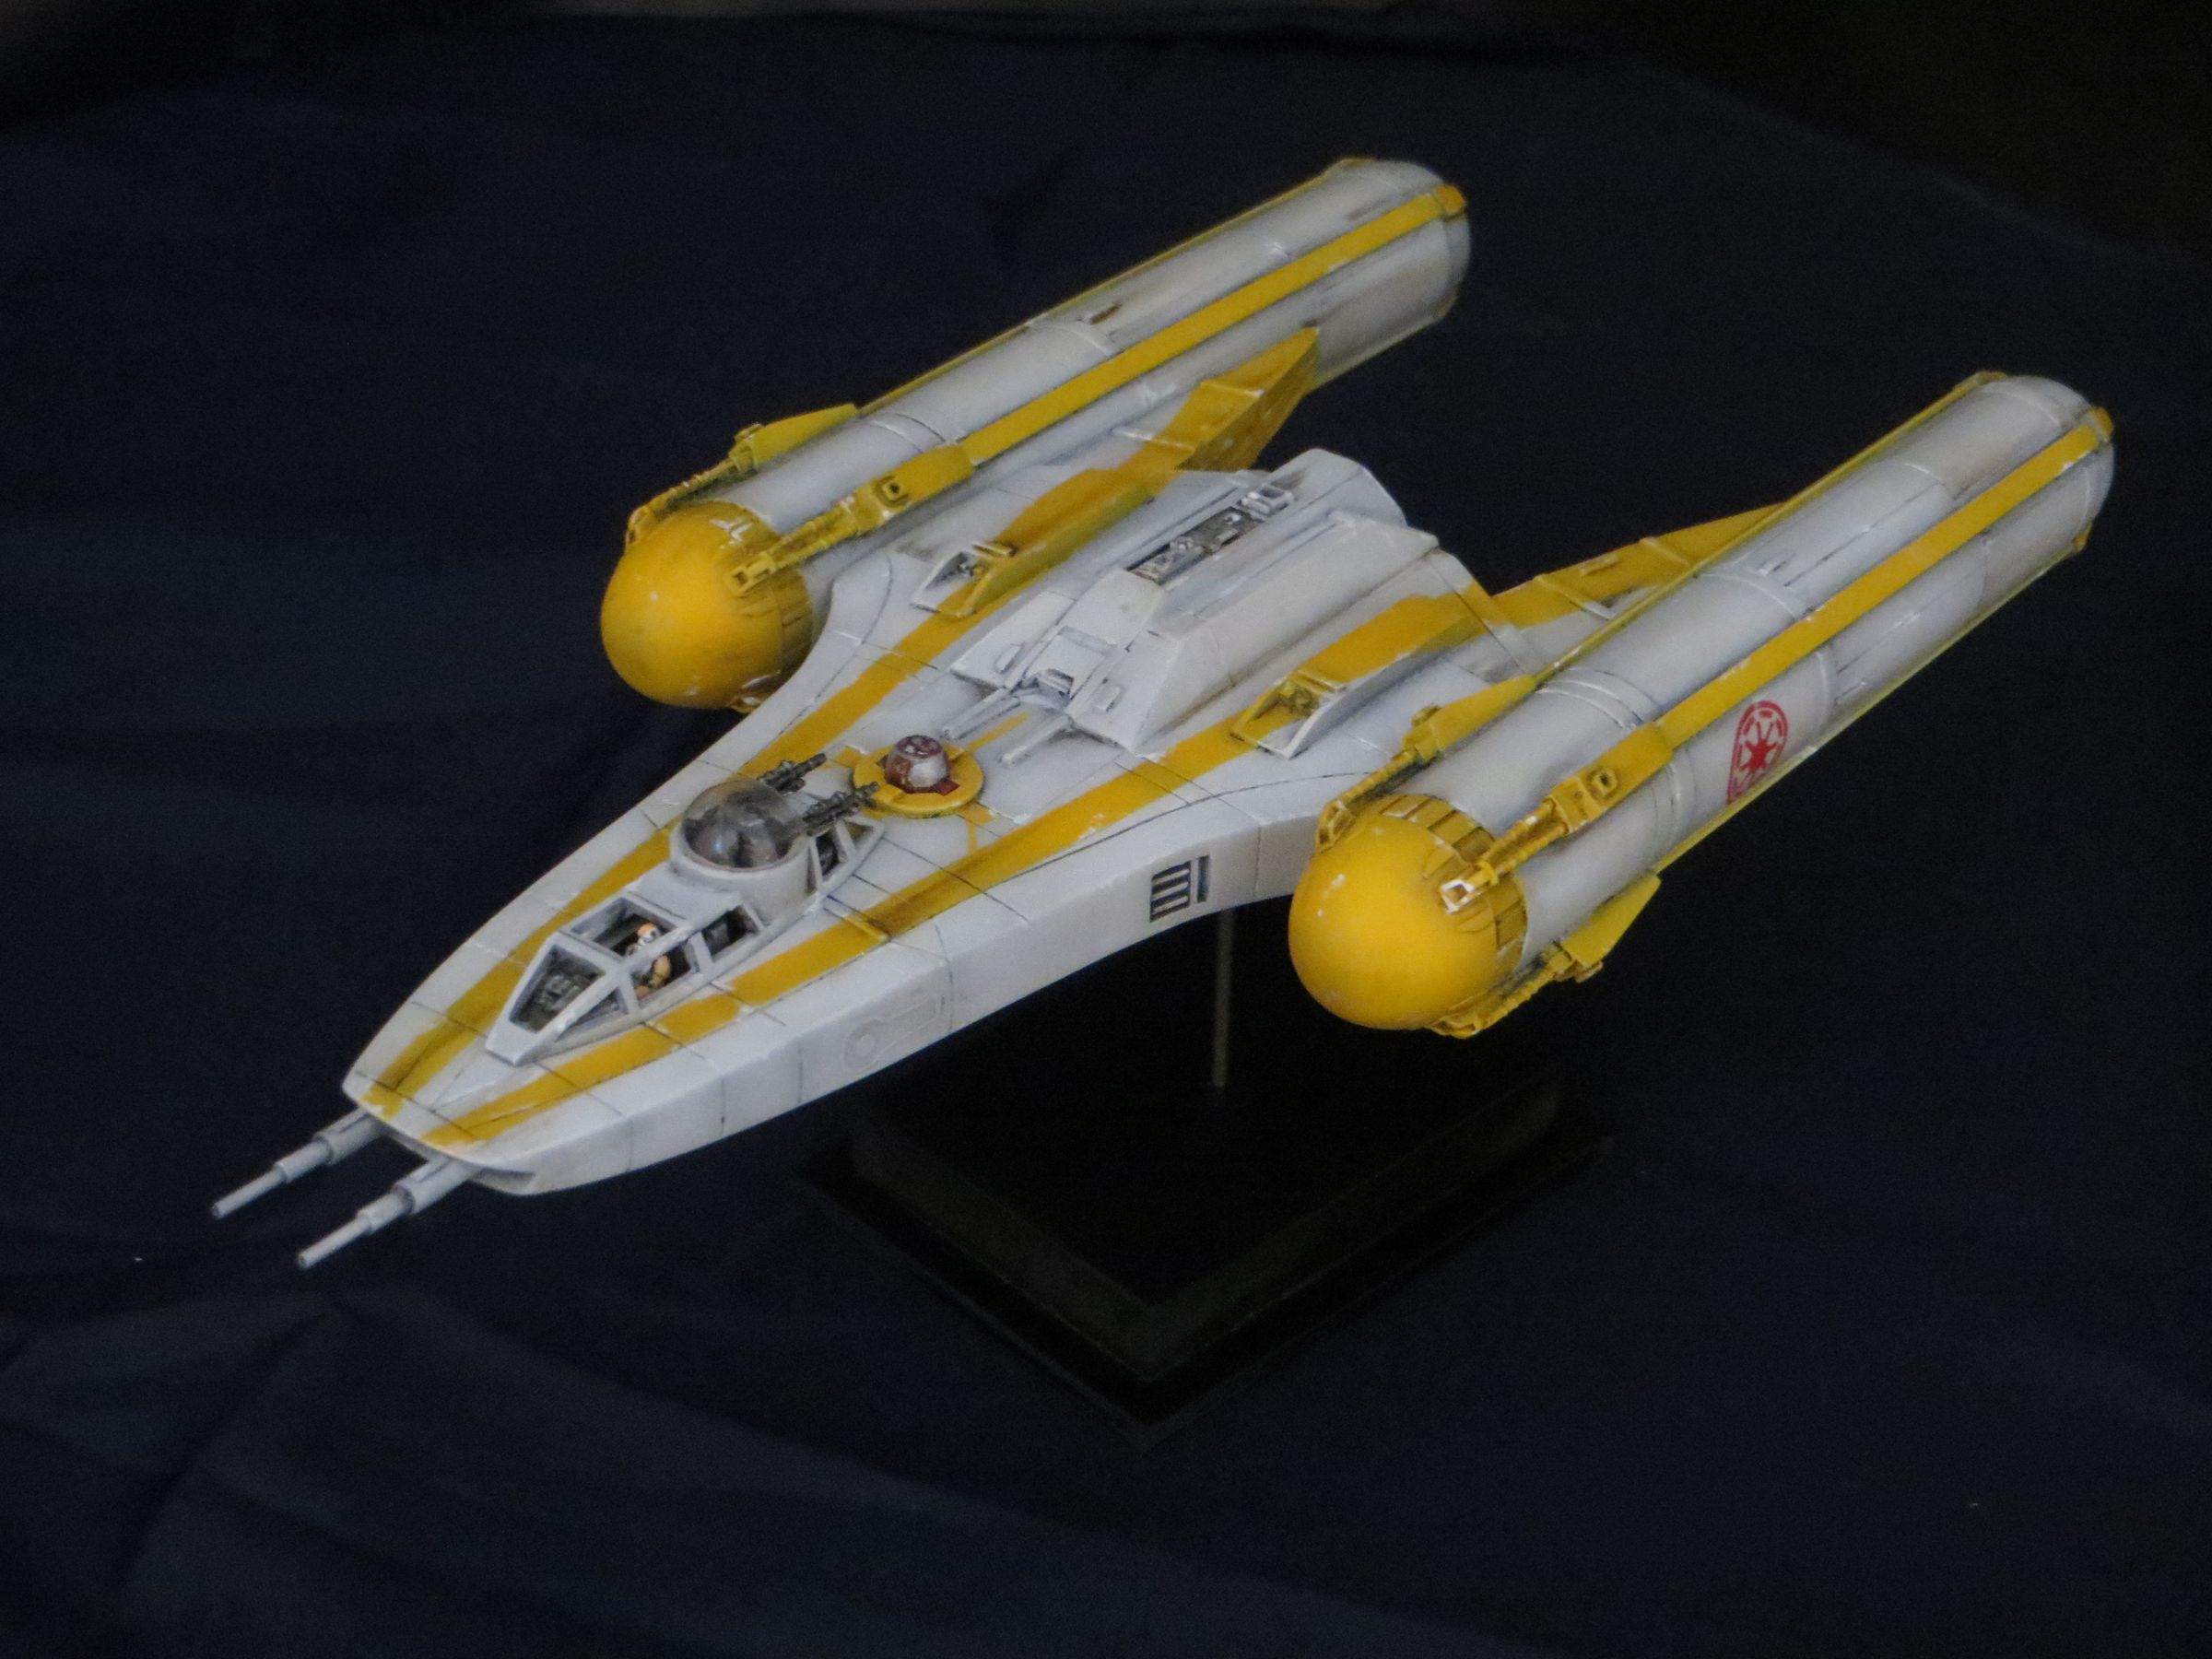
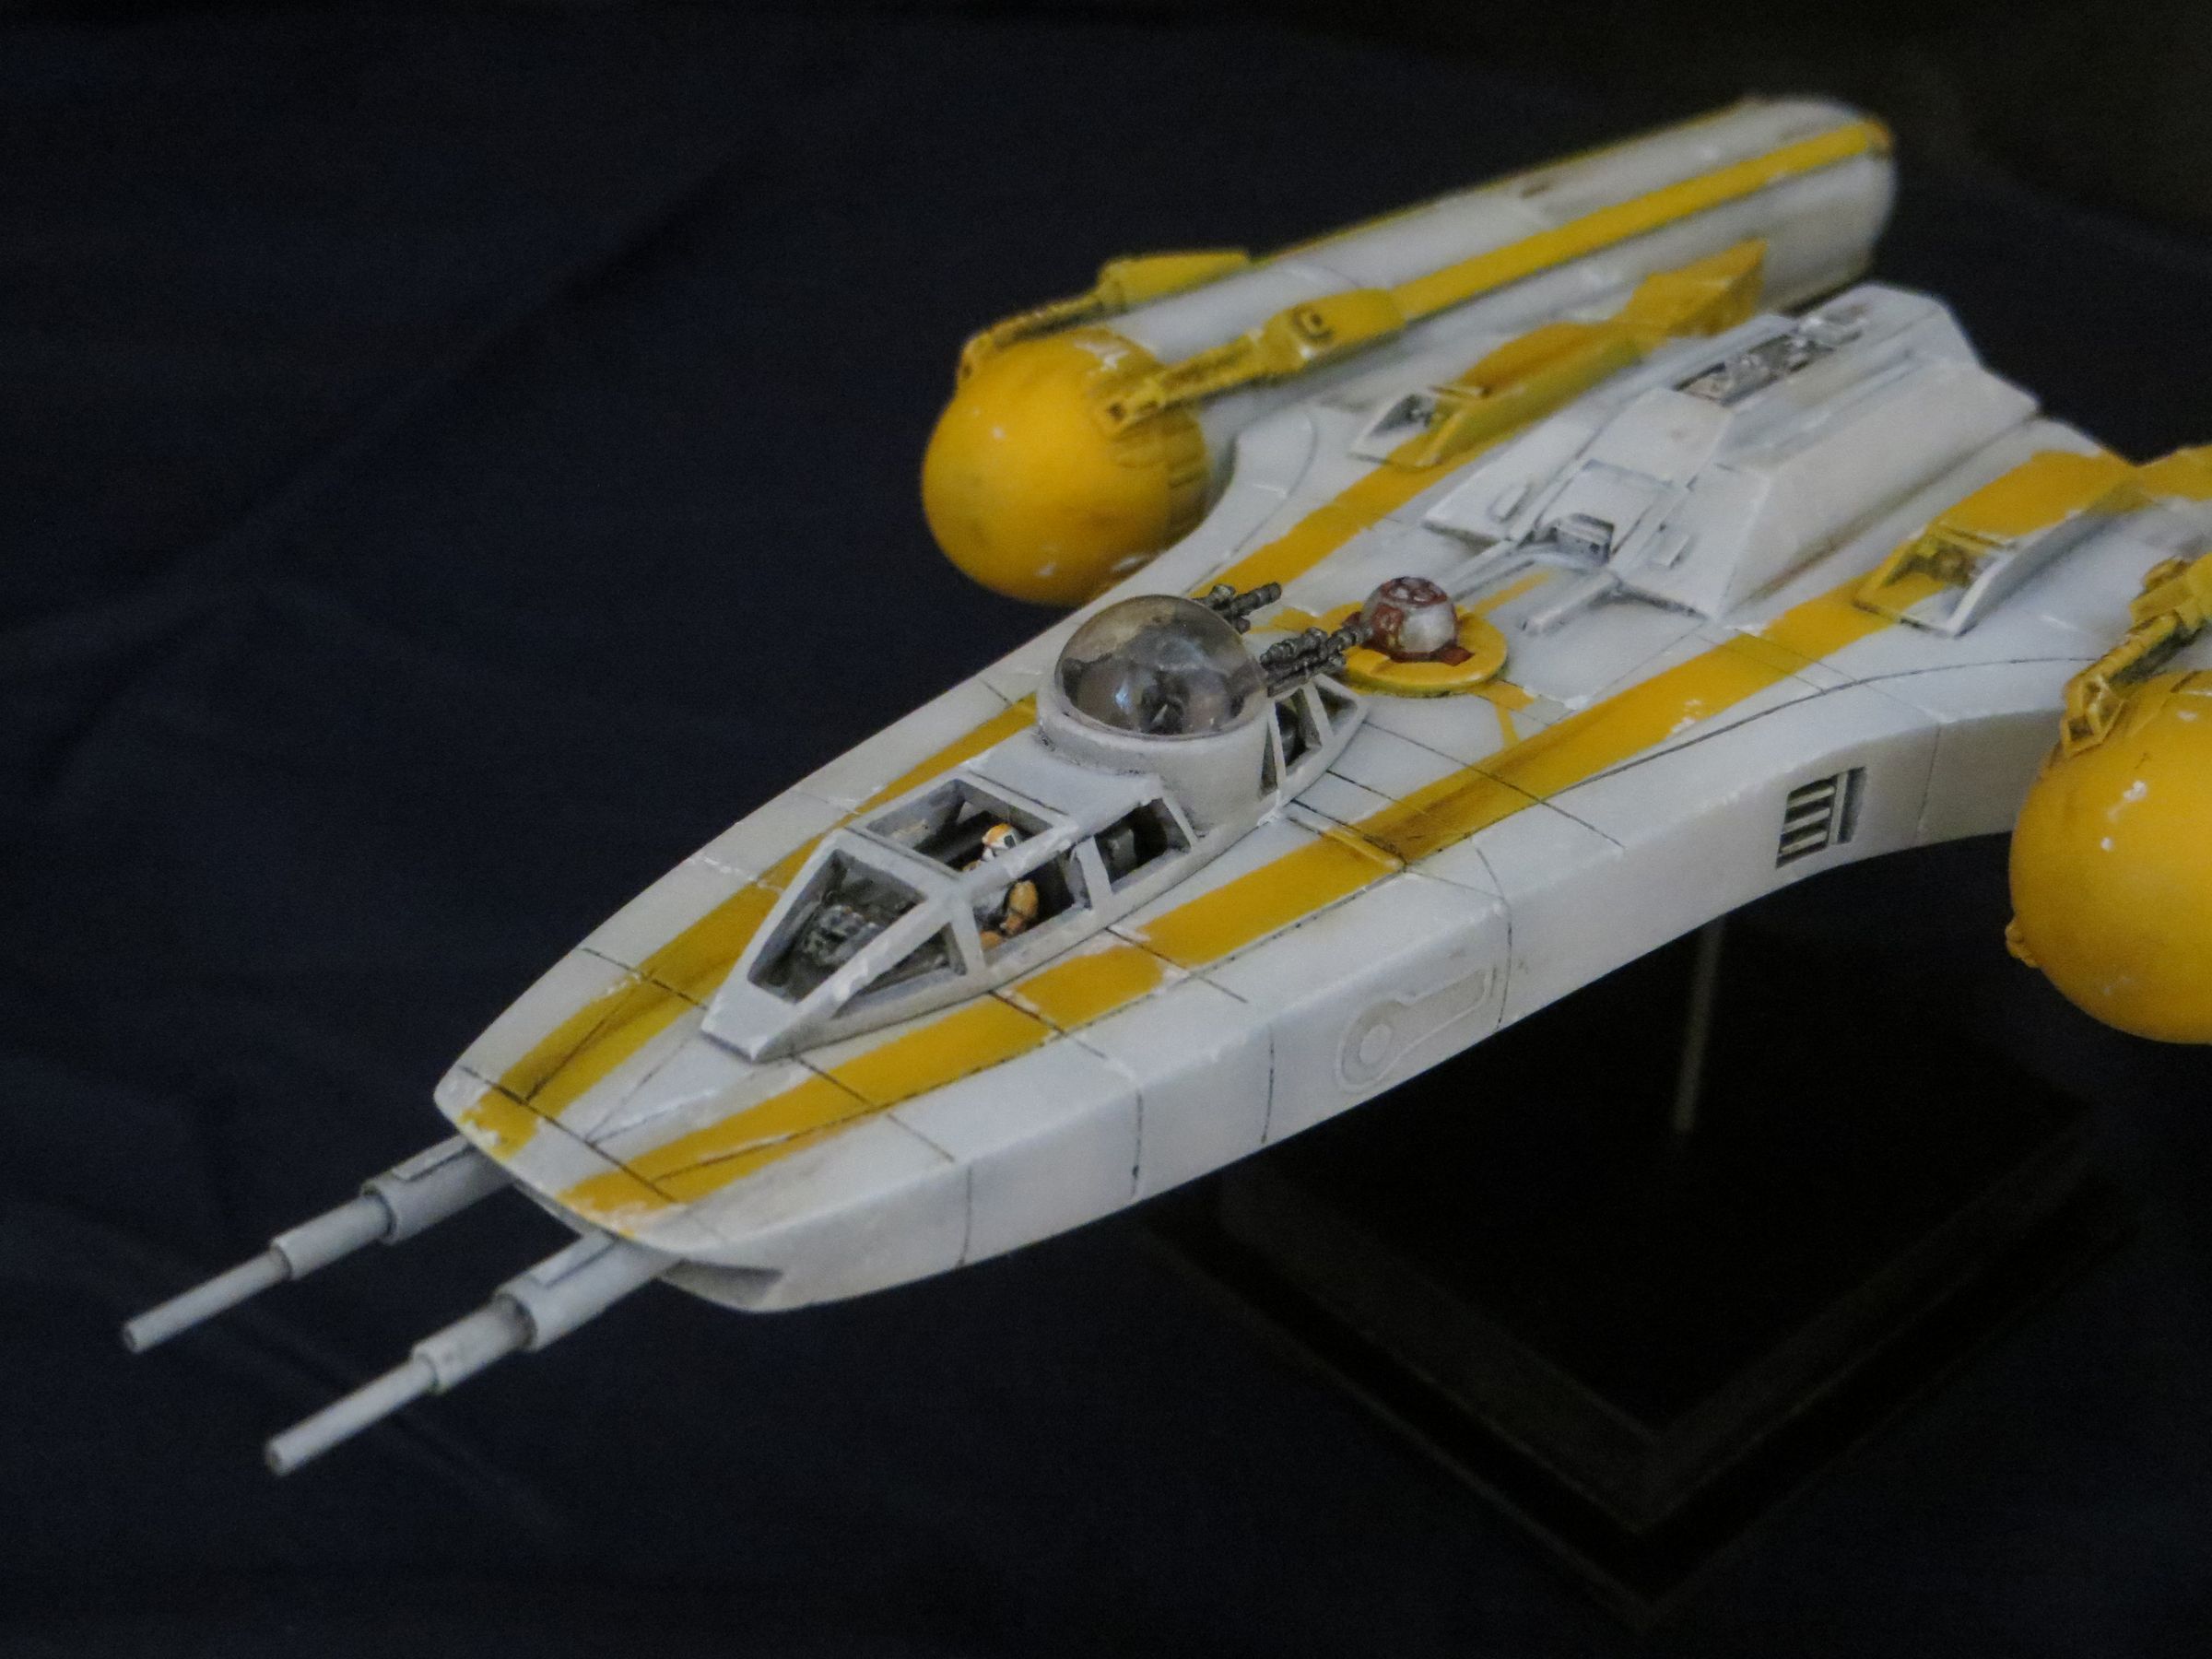
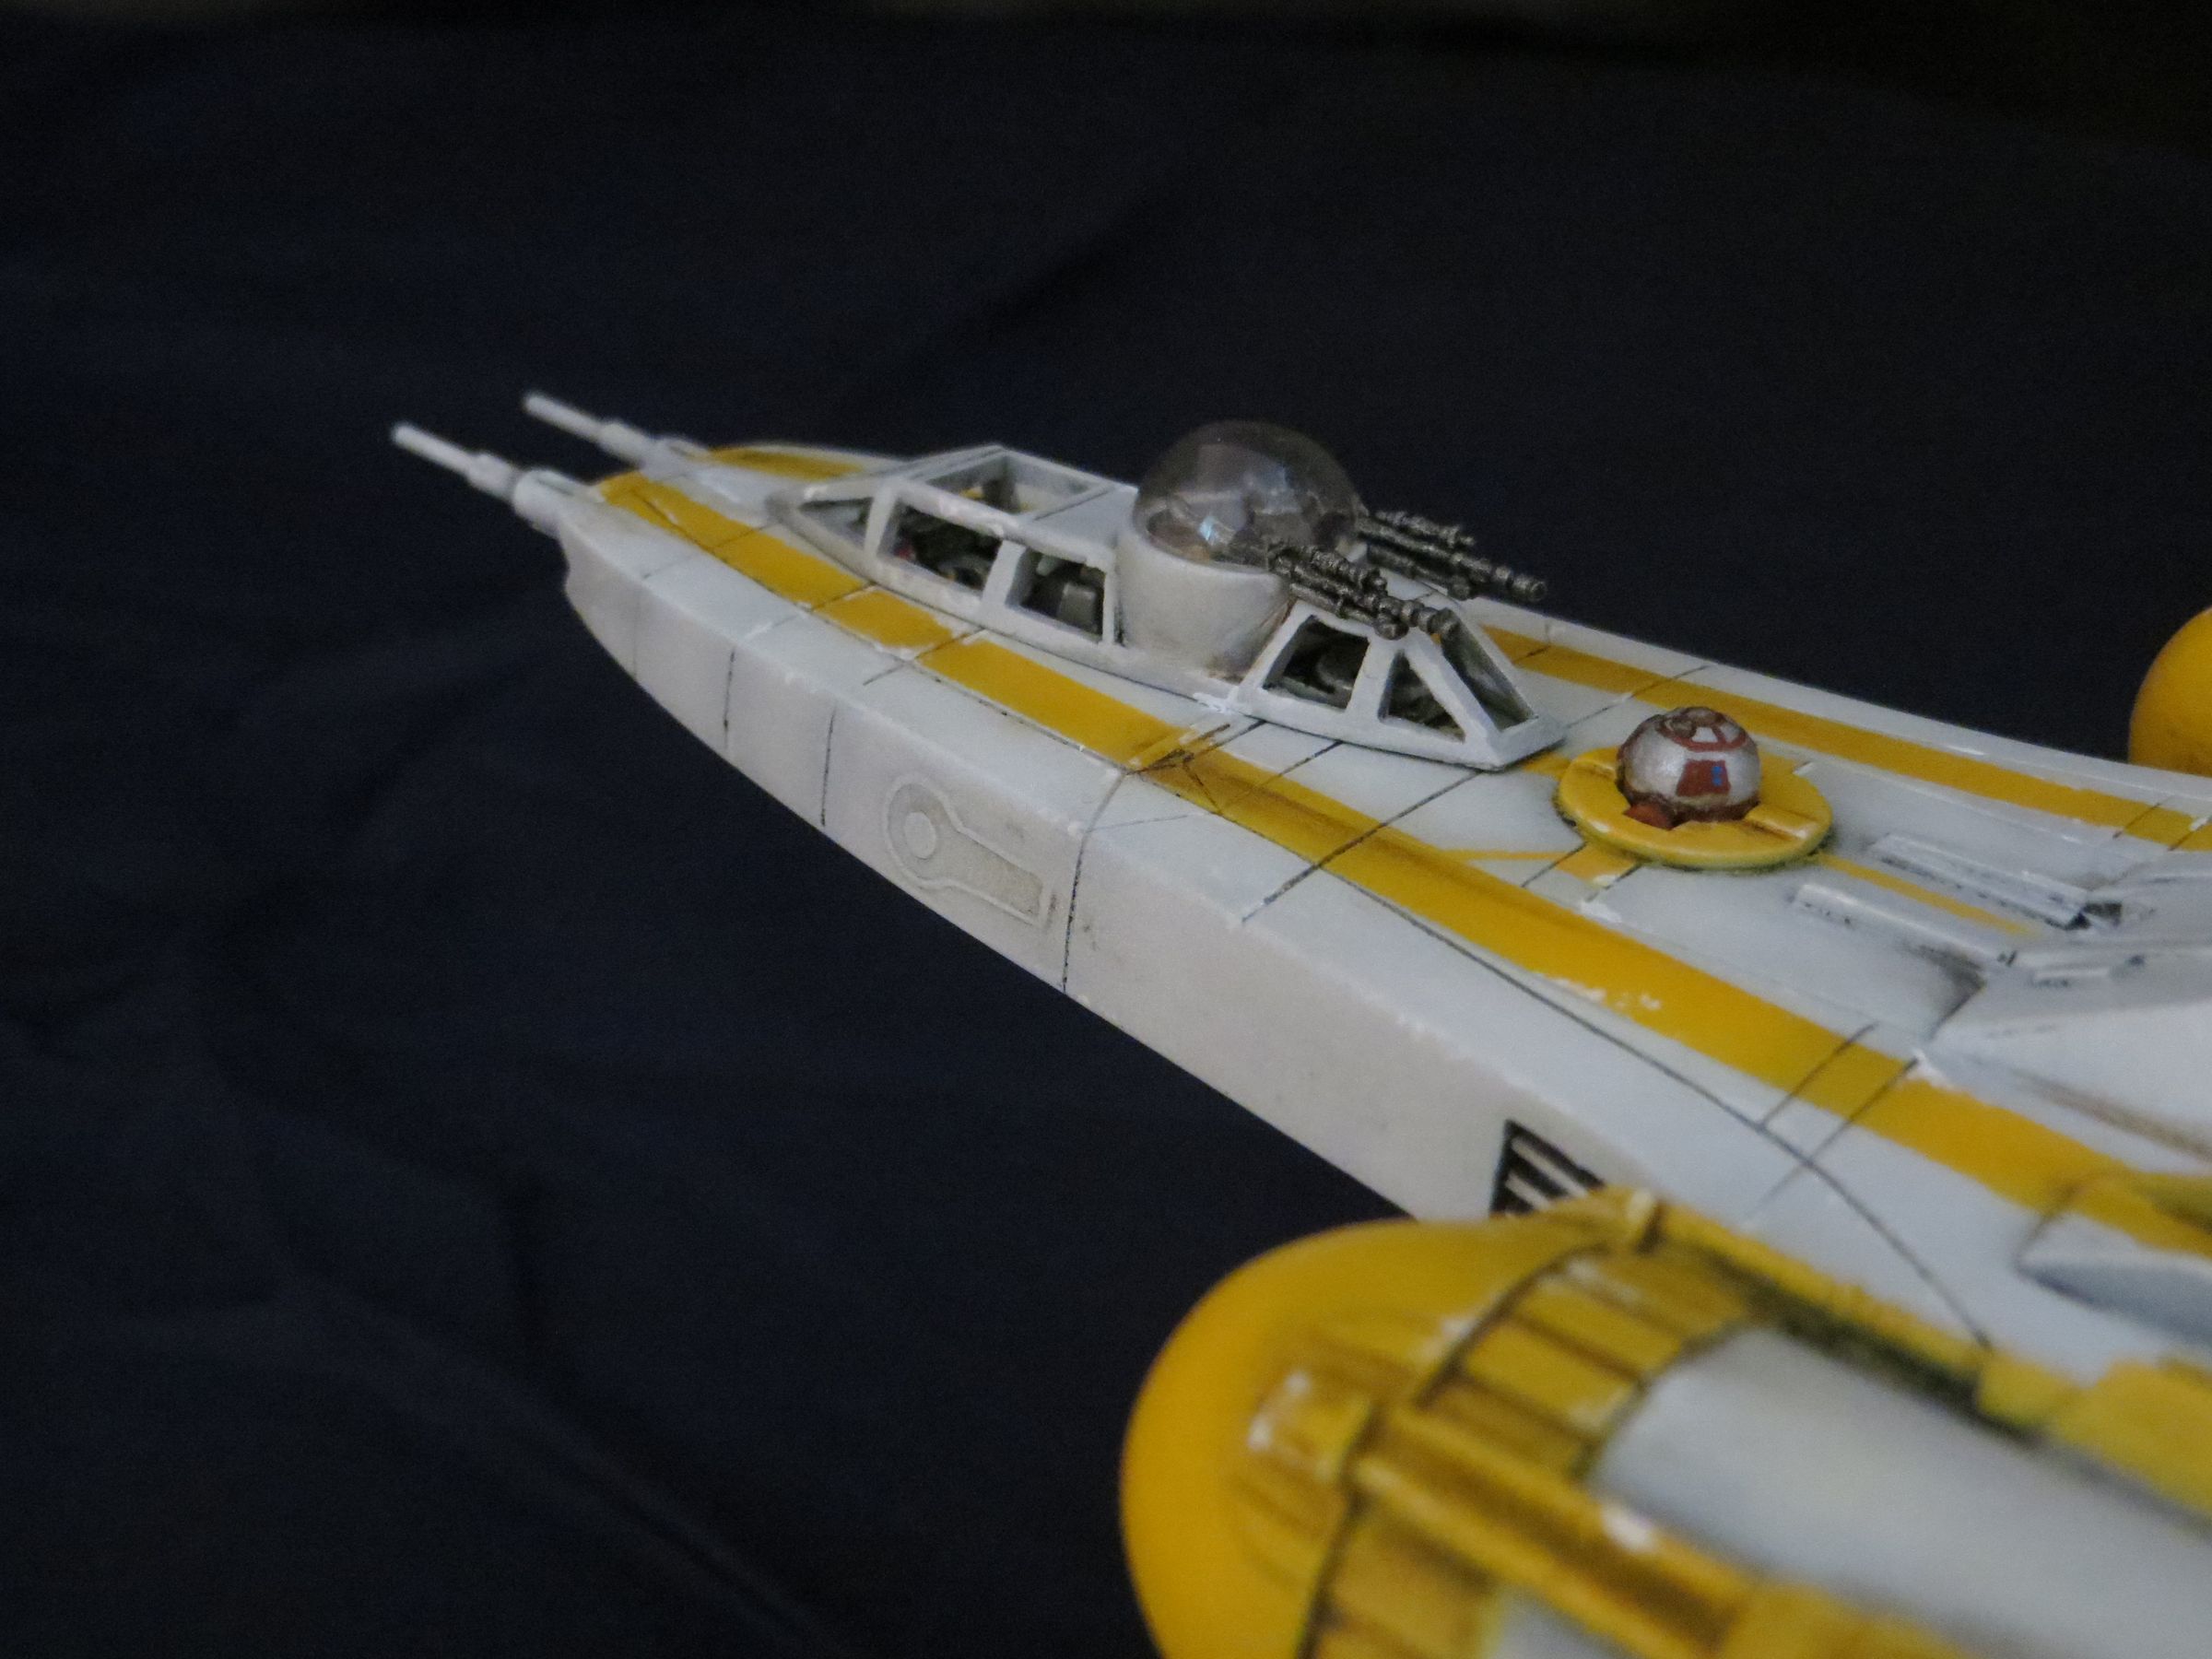
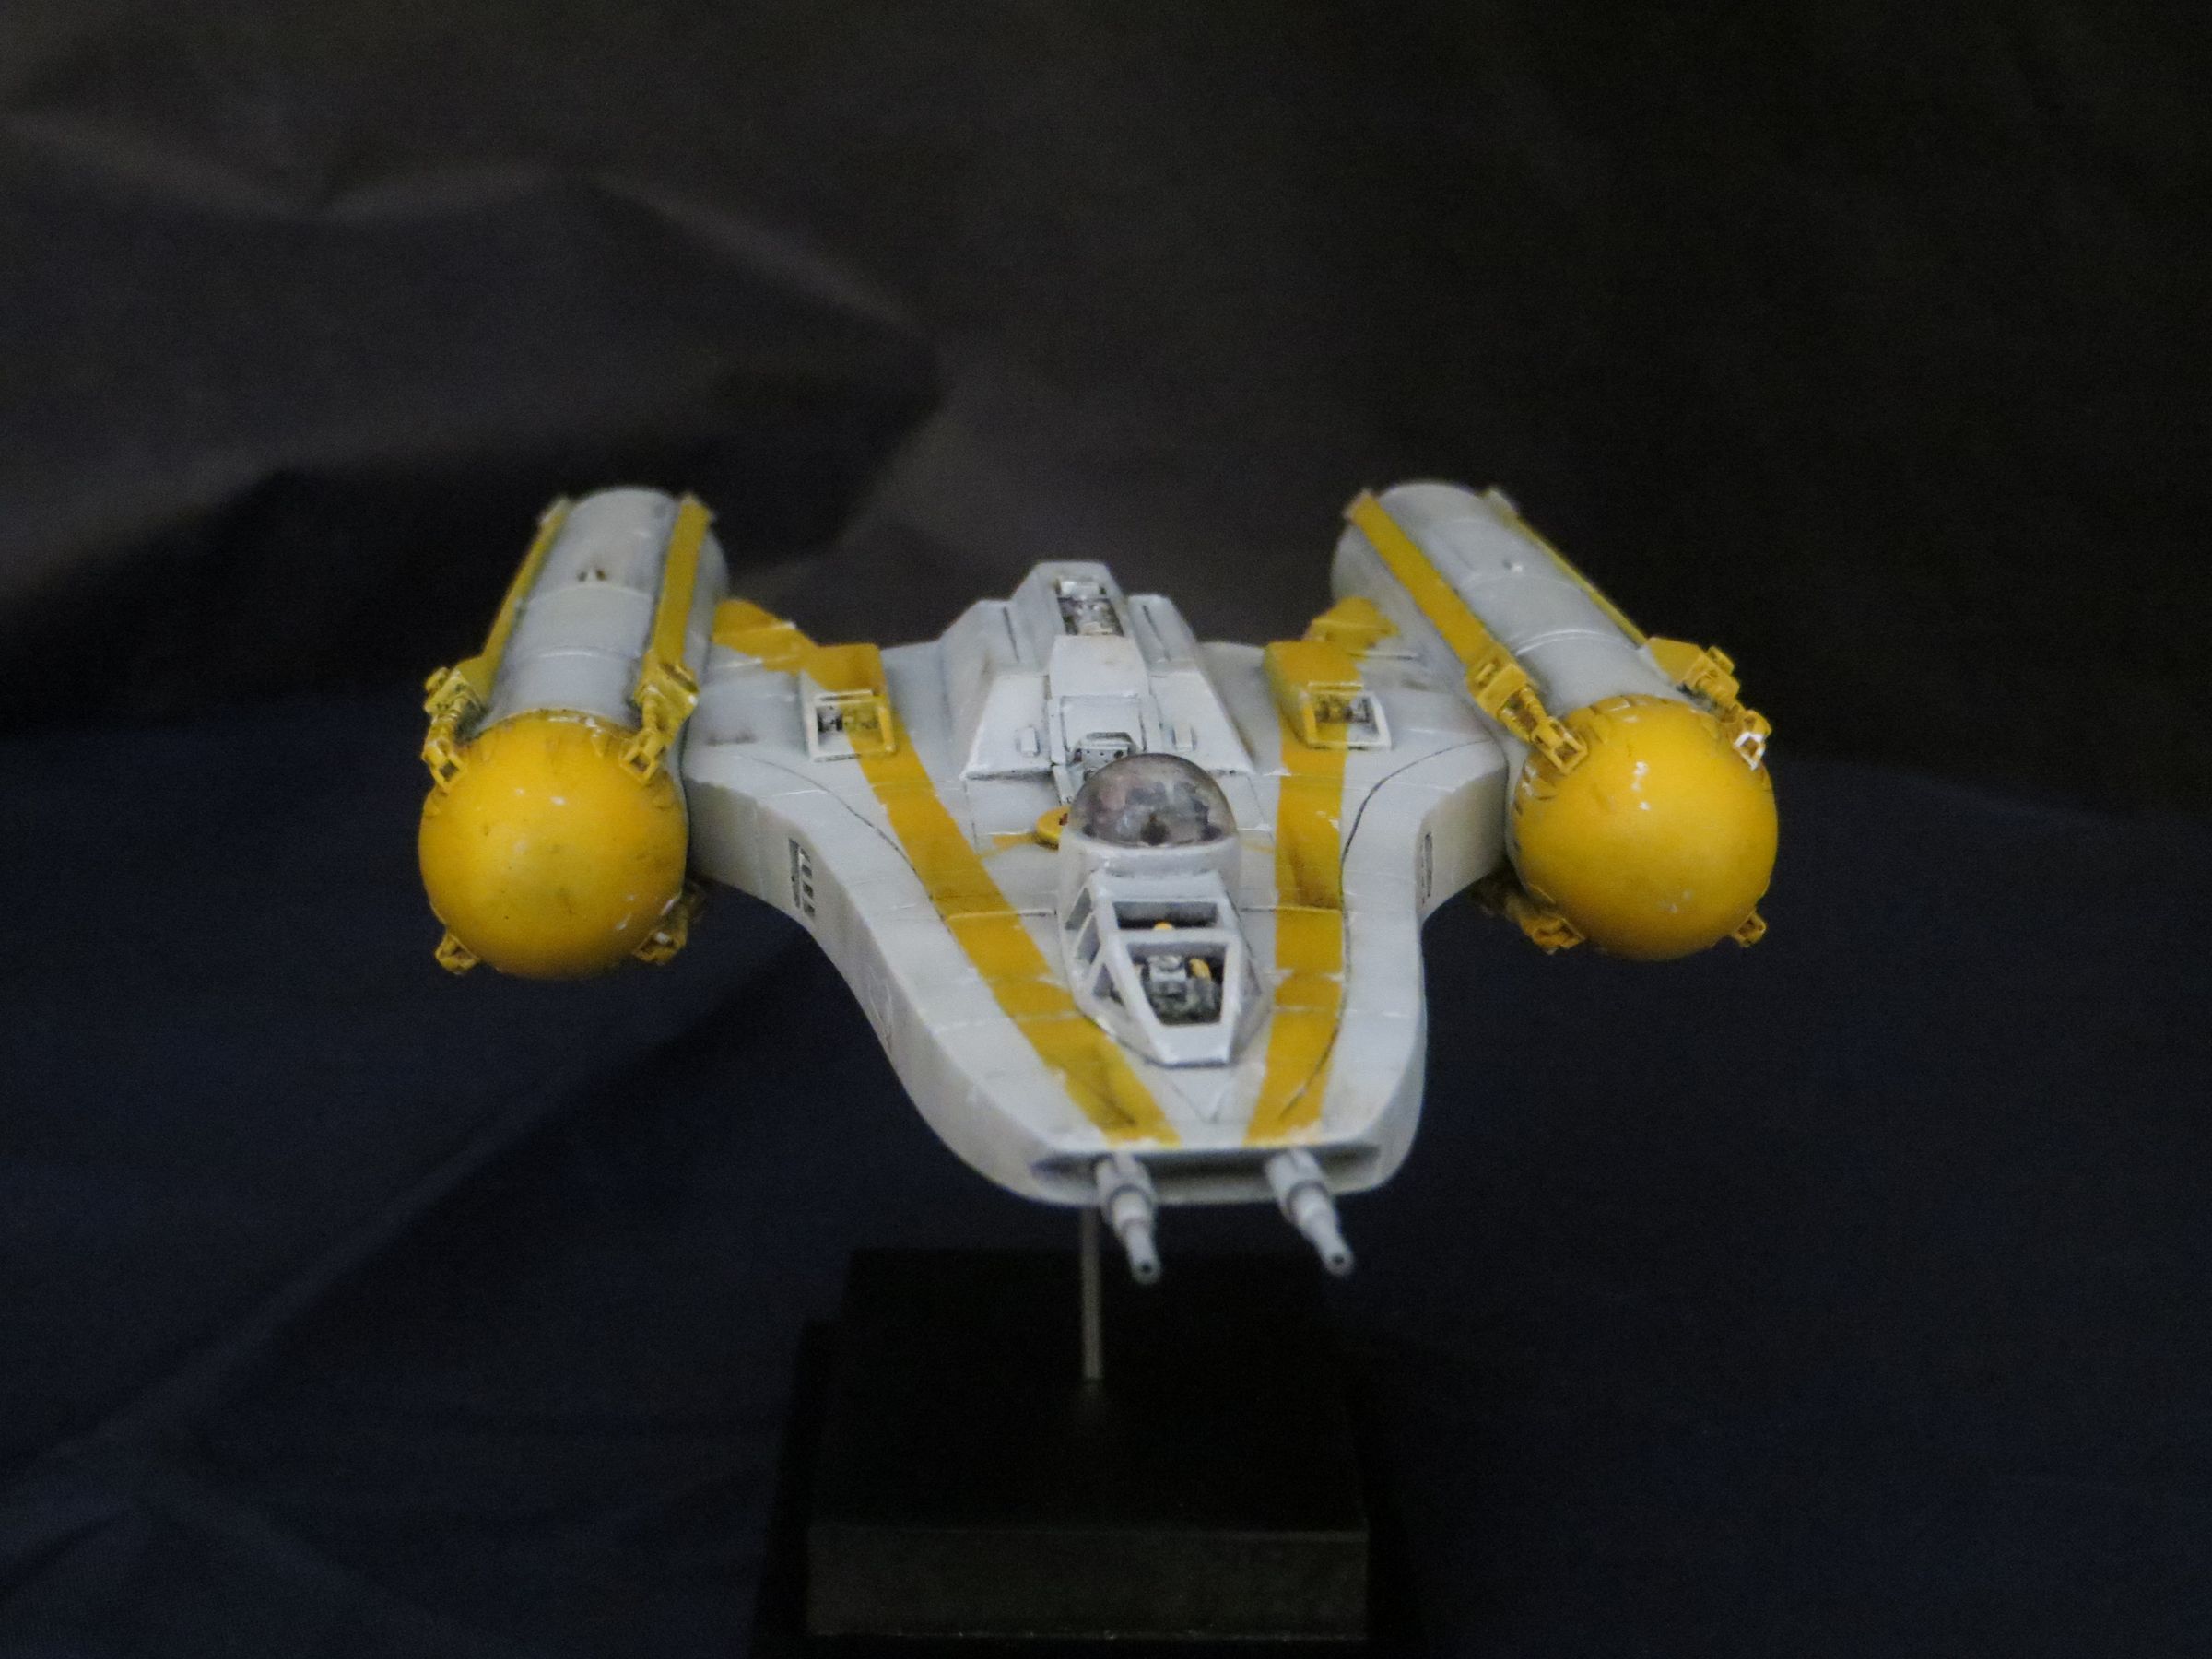
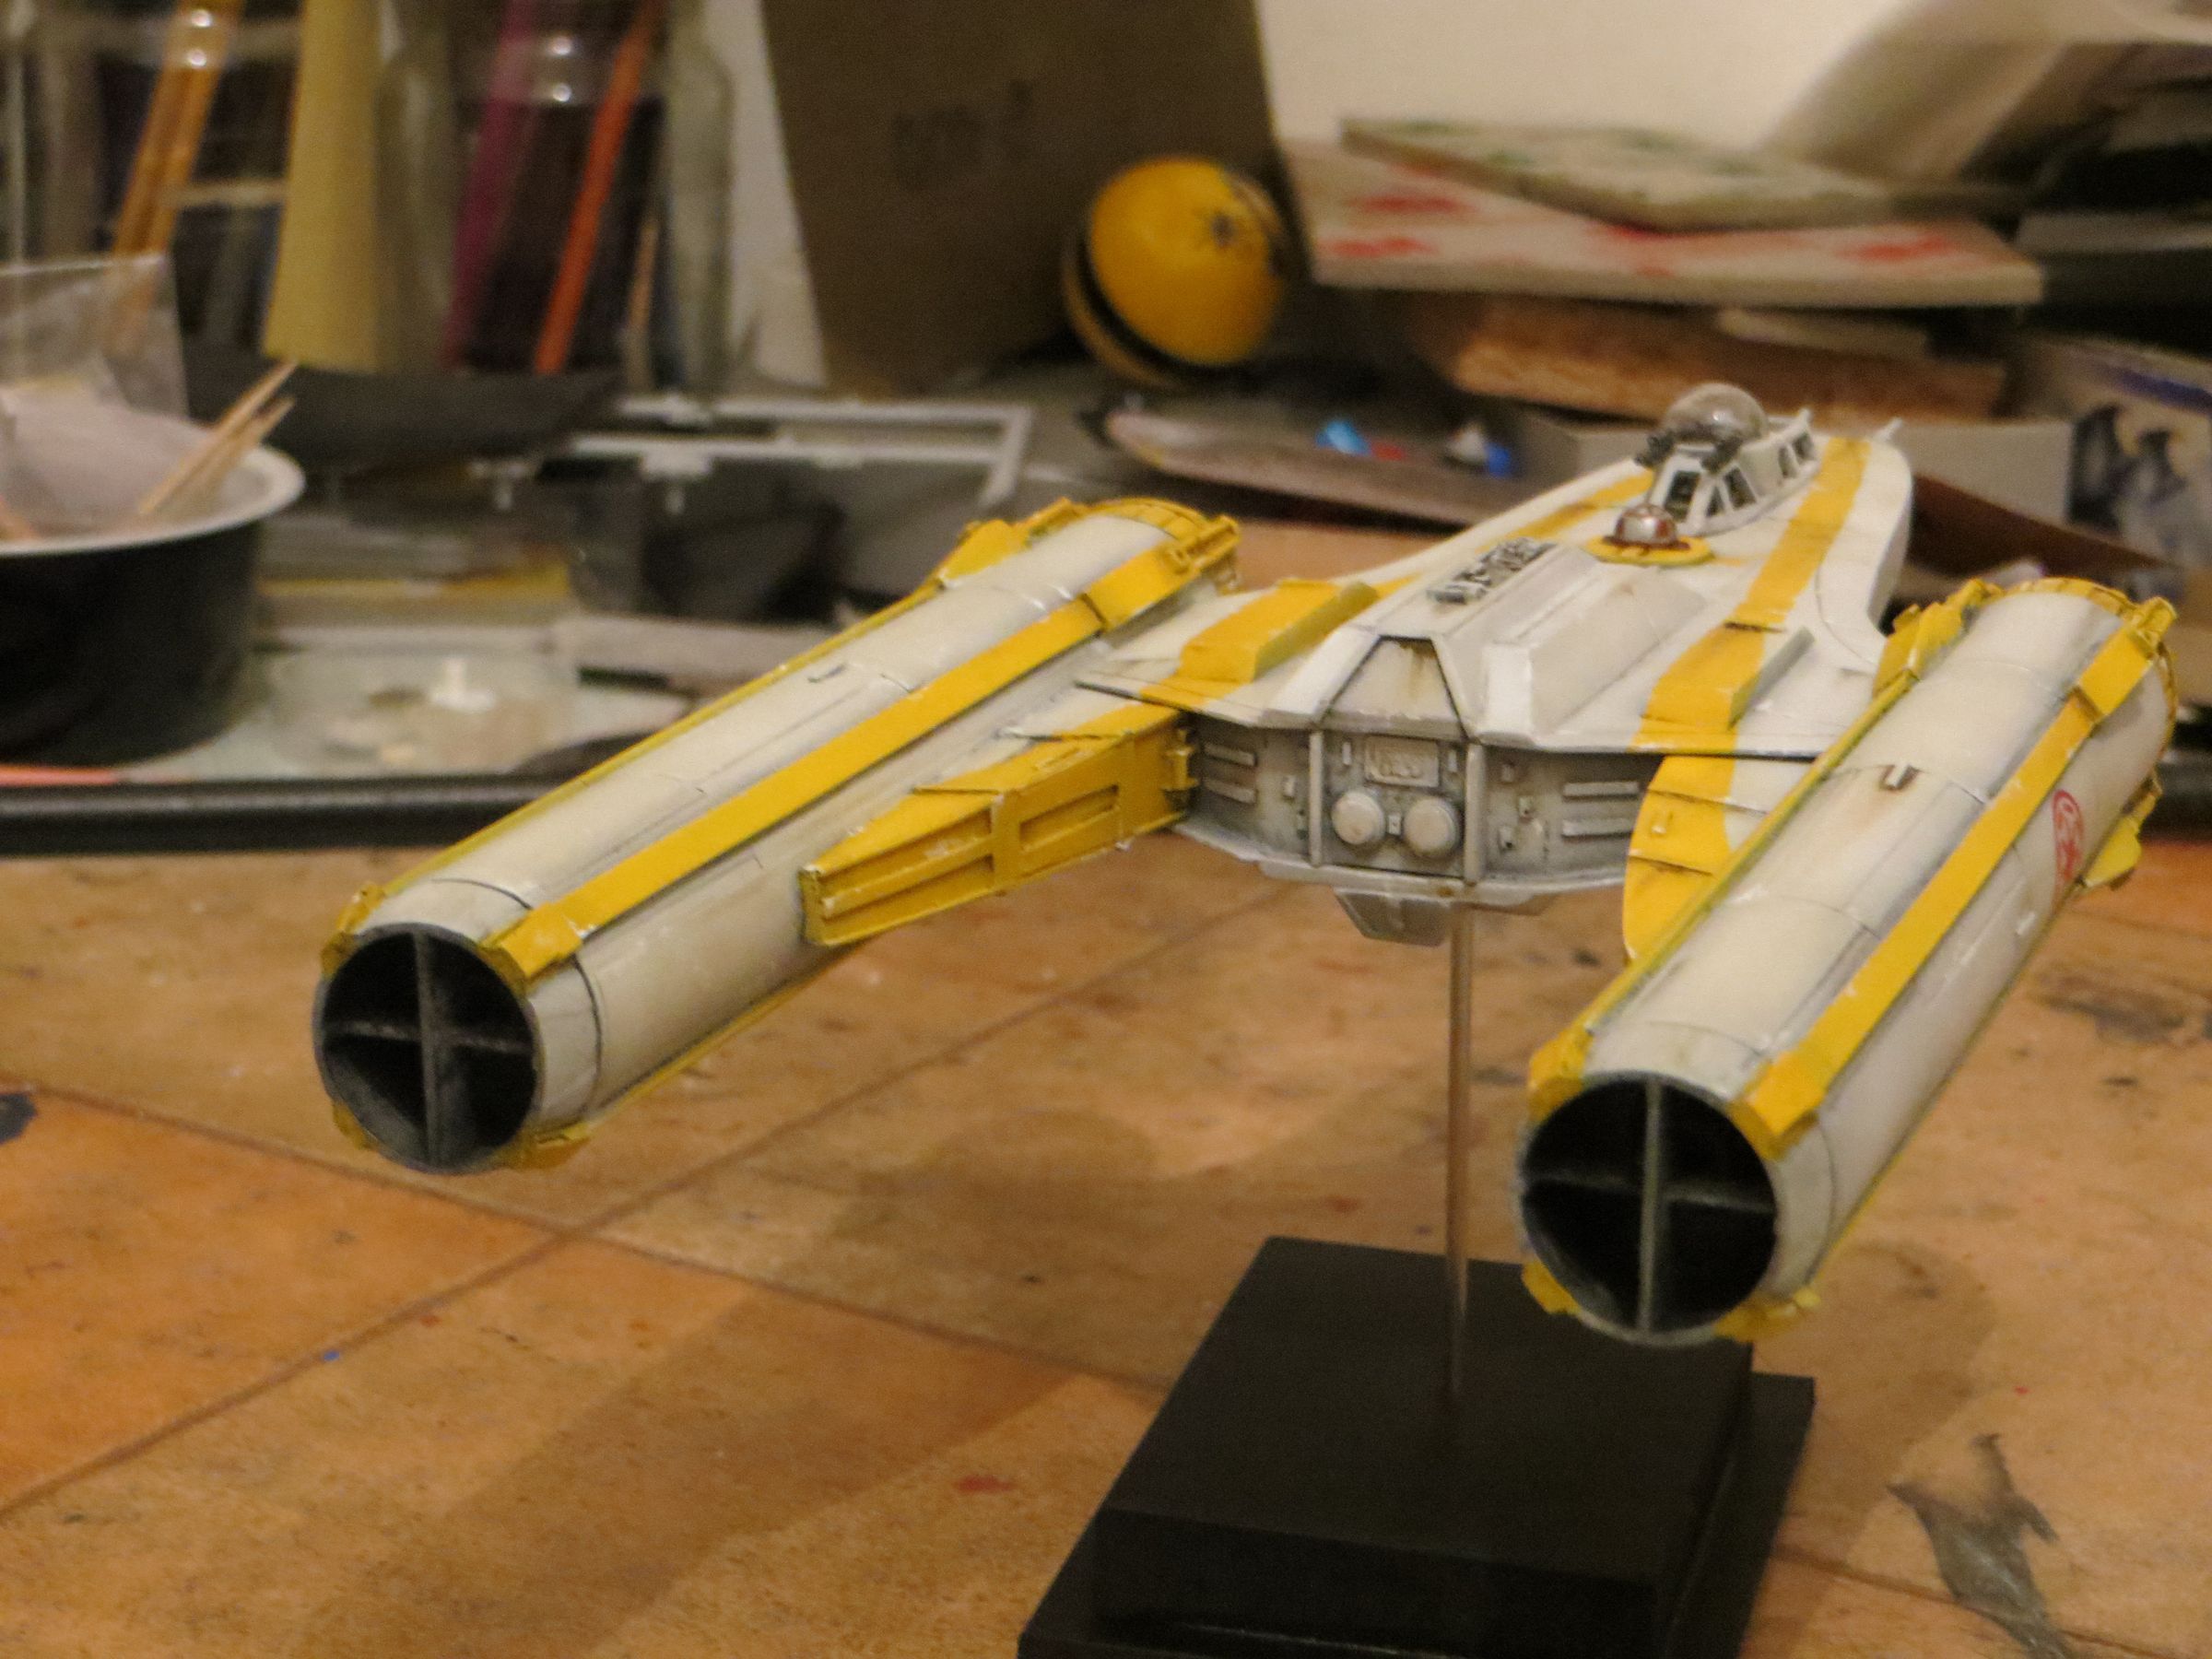
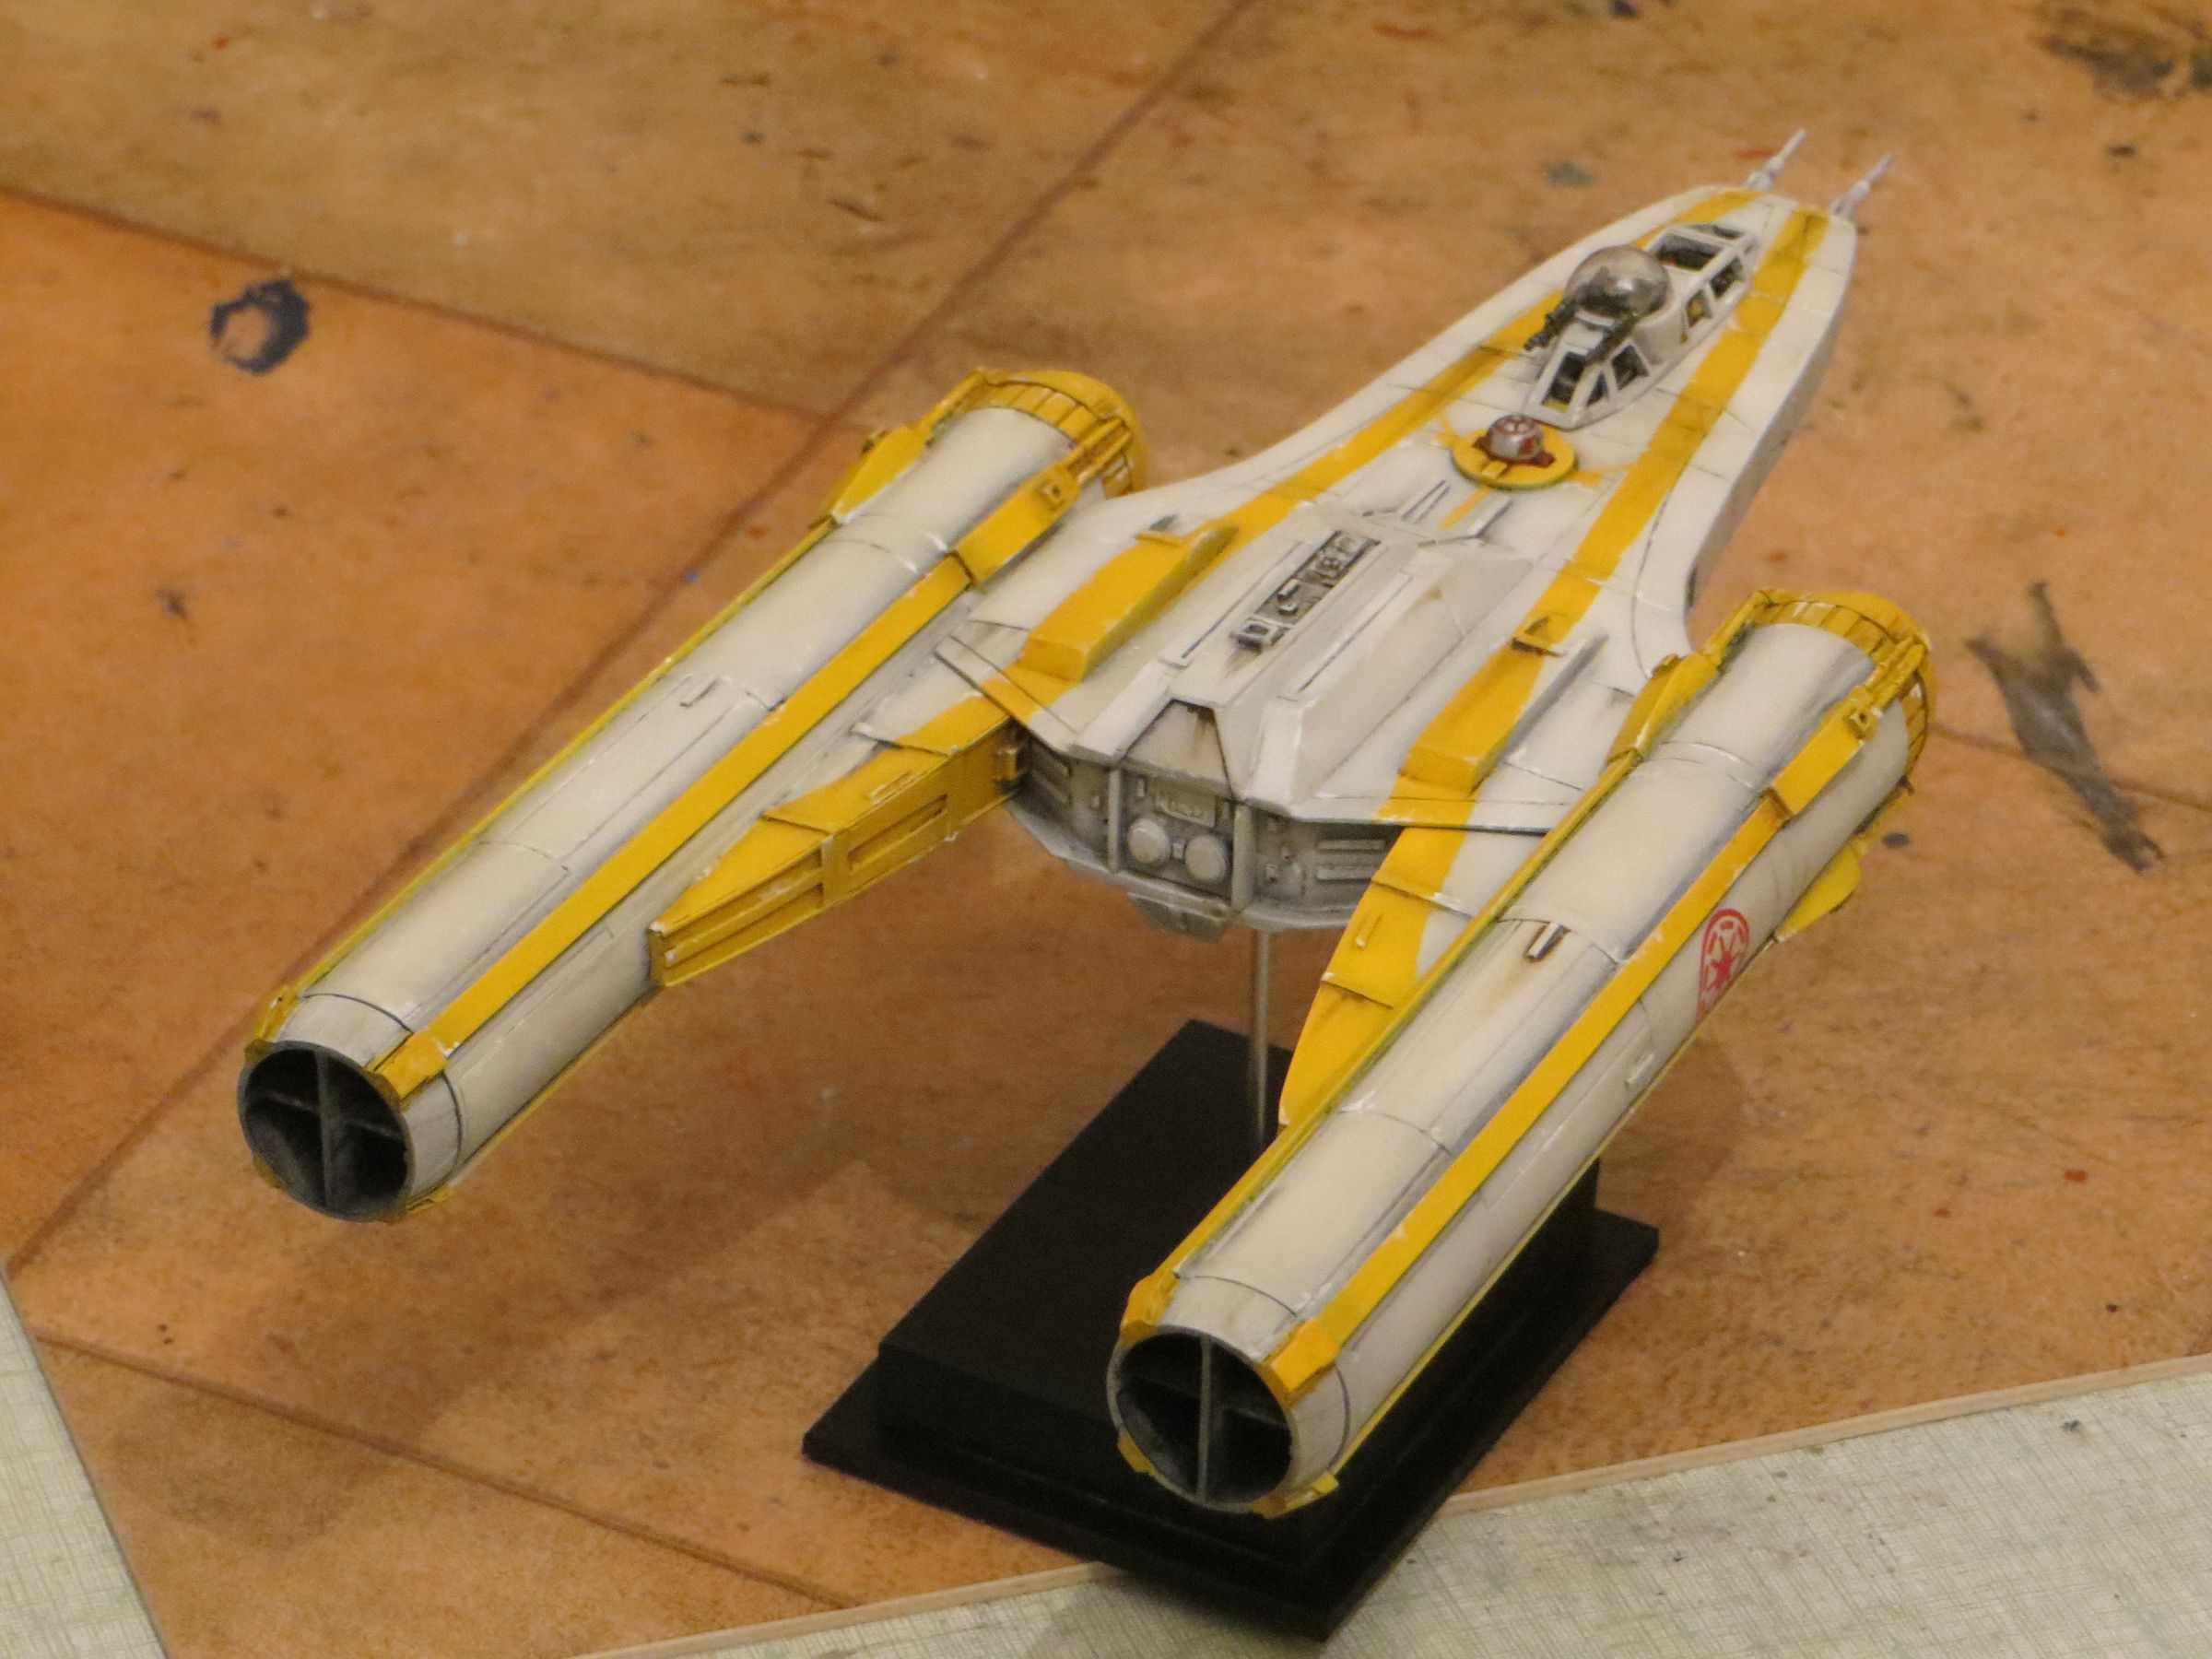
Some beauty shots


Aller au contenu | Aller au menu | Aller à la recherche
mercredi, 10 décembre 2014
Par olcabour le mercredi, 10 décembre 2014, 16:31
Some beauty shots
Par olcabour le mercredi, 10 décembre 2014, 16:20
Back to show the end of this assembly.
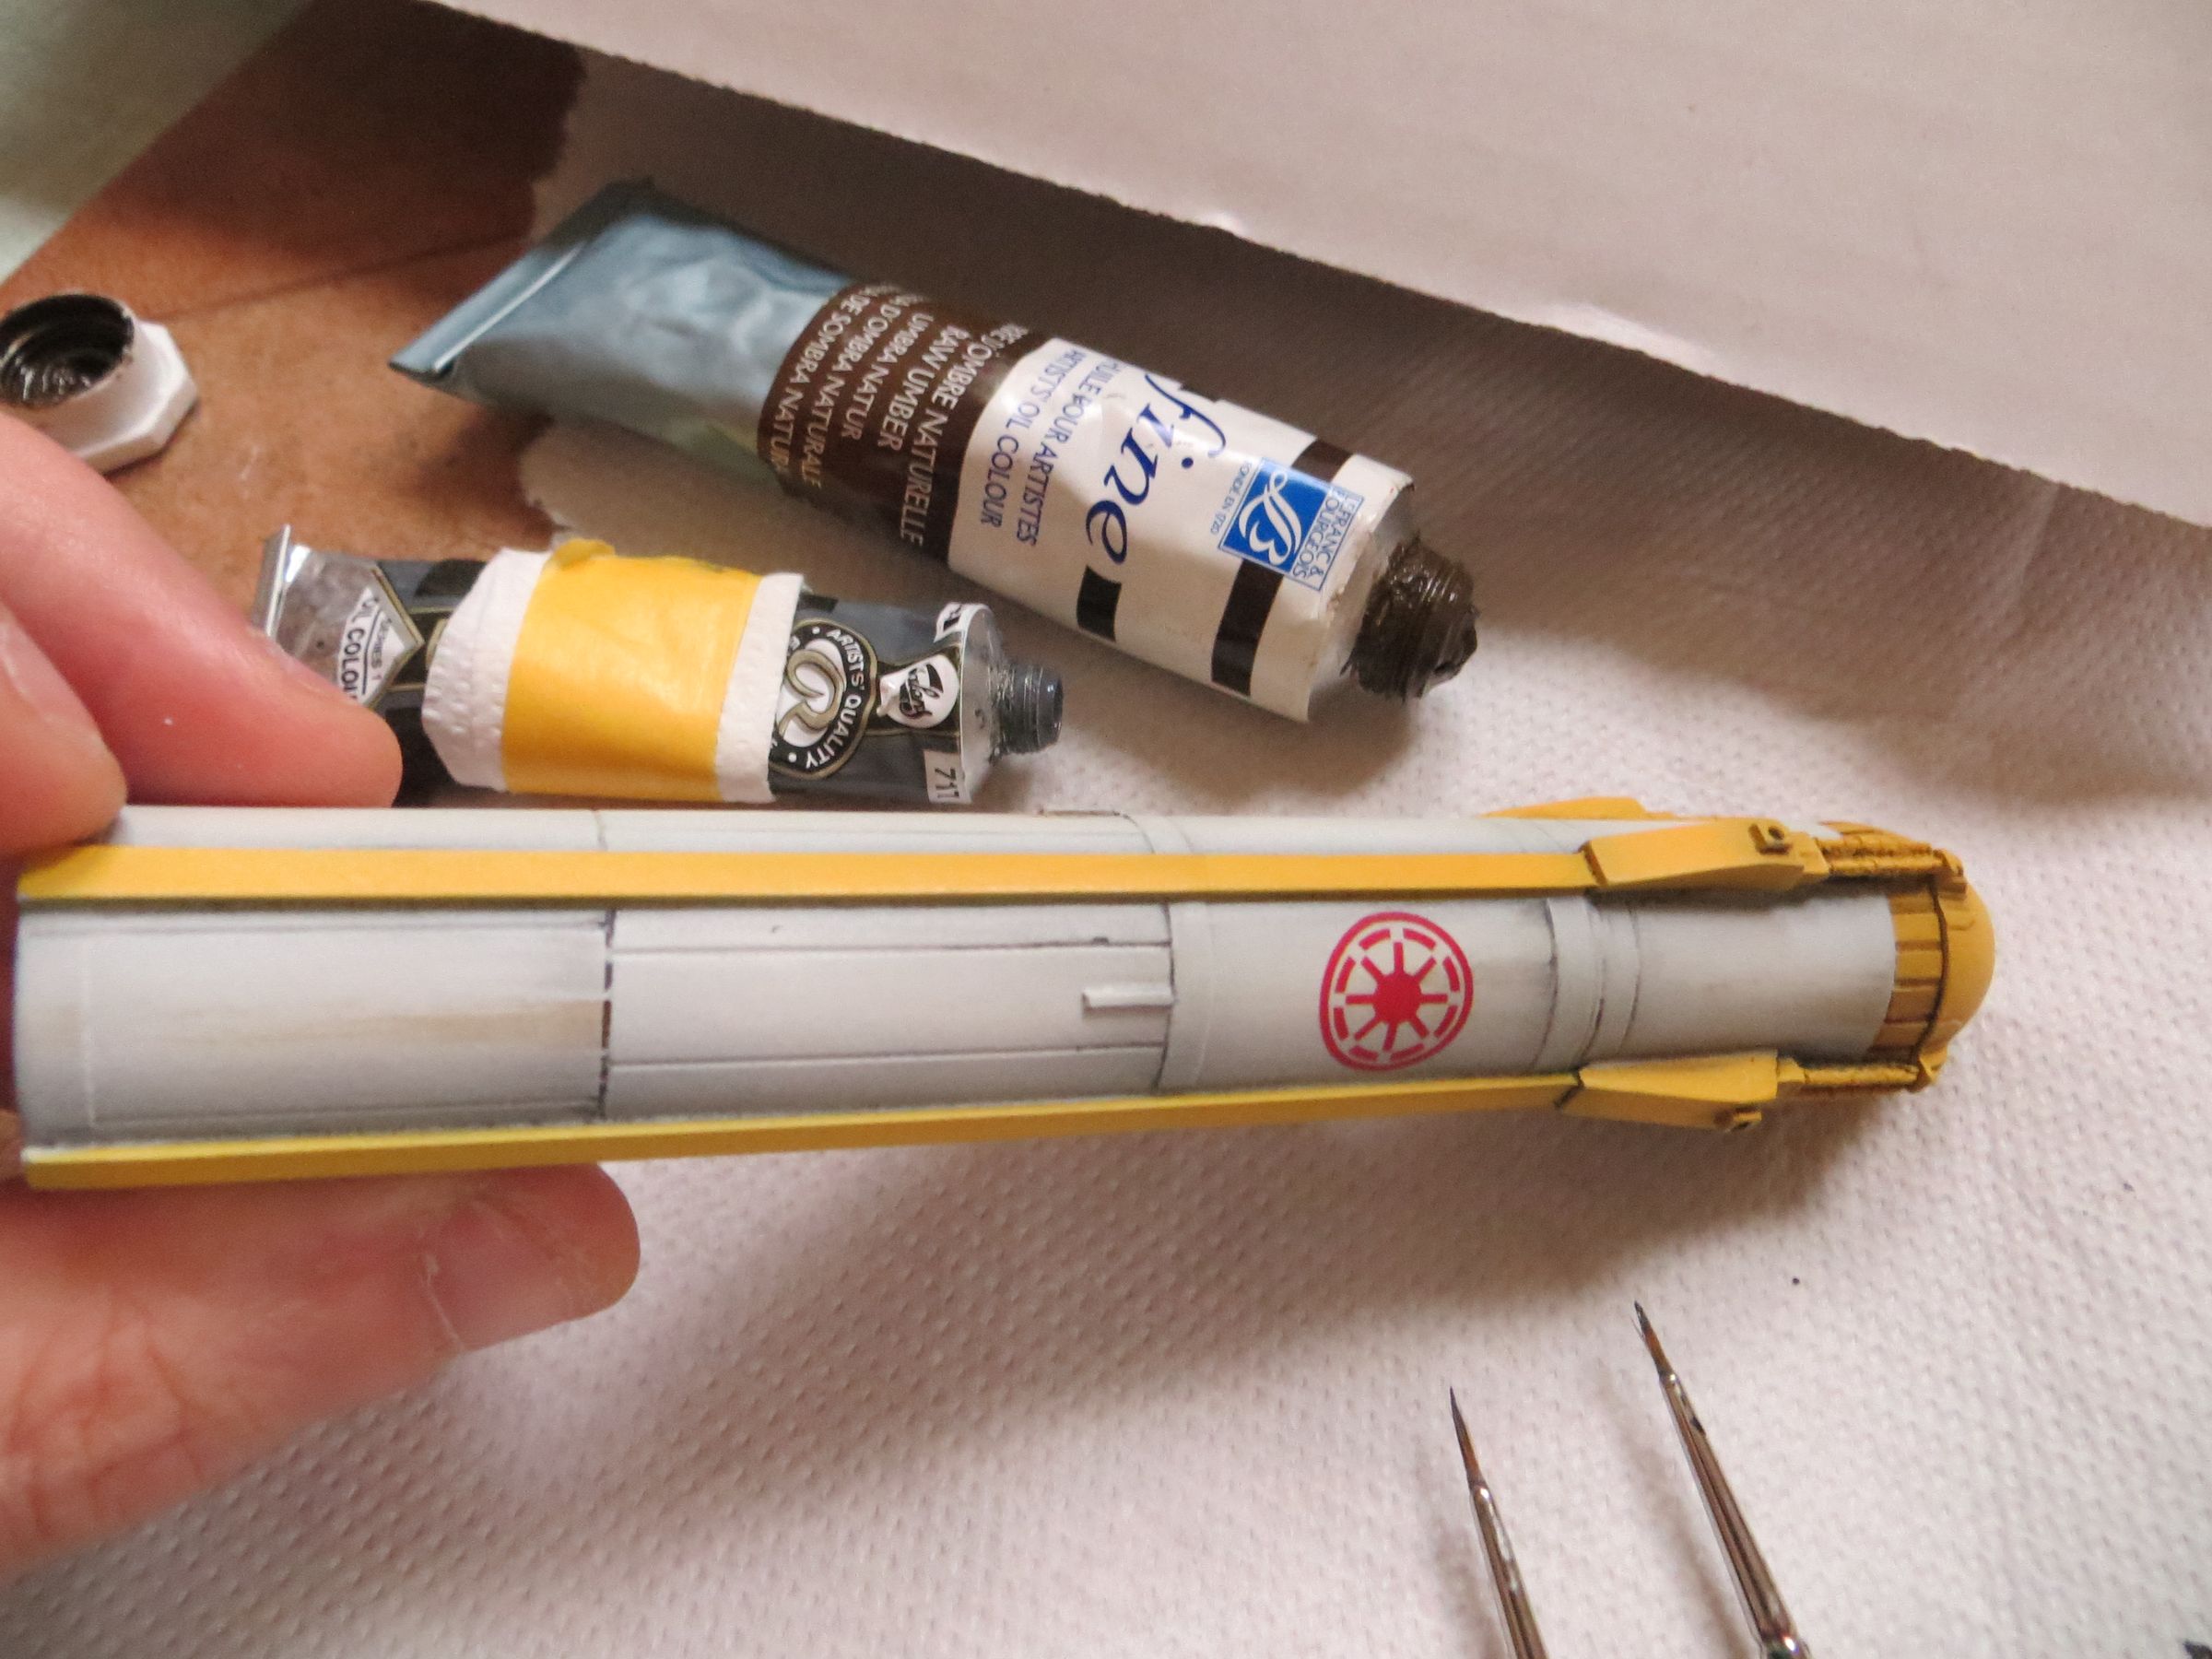
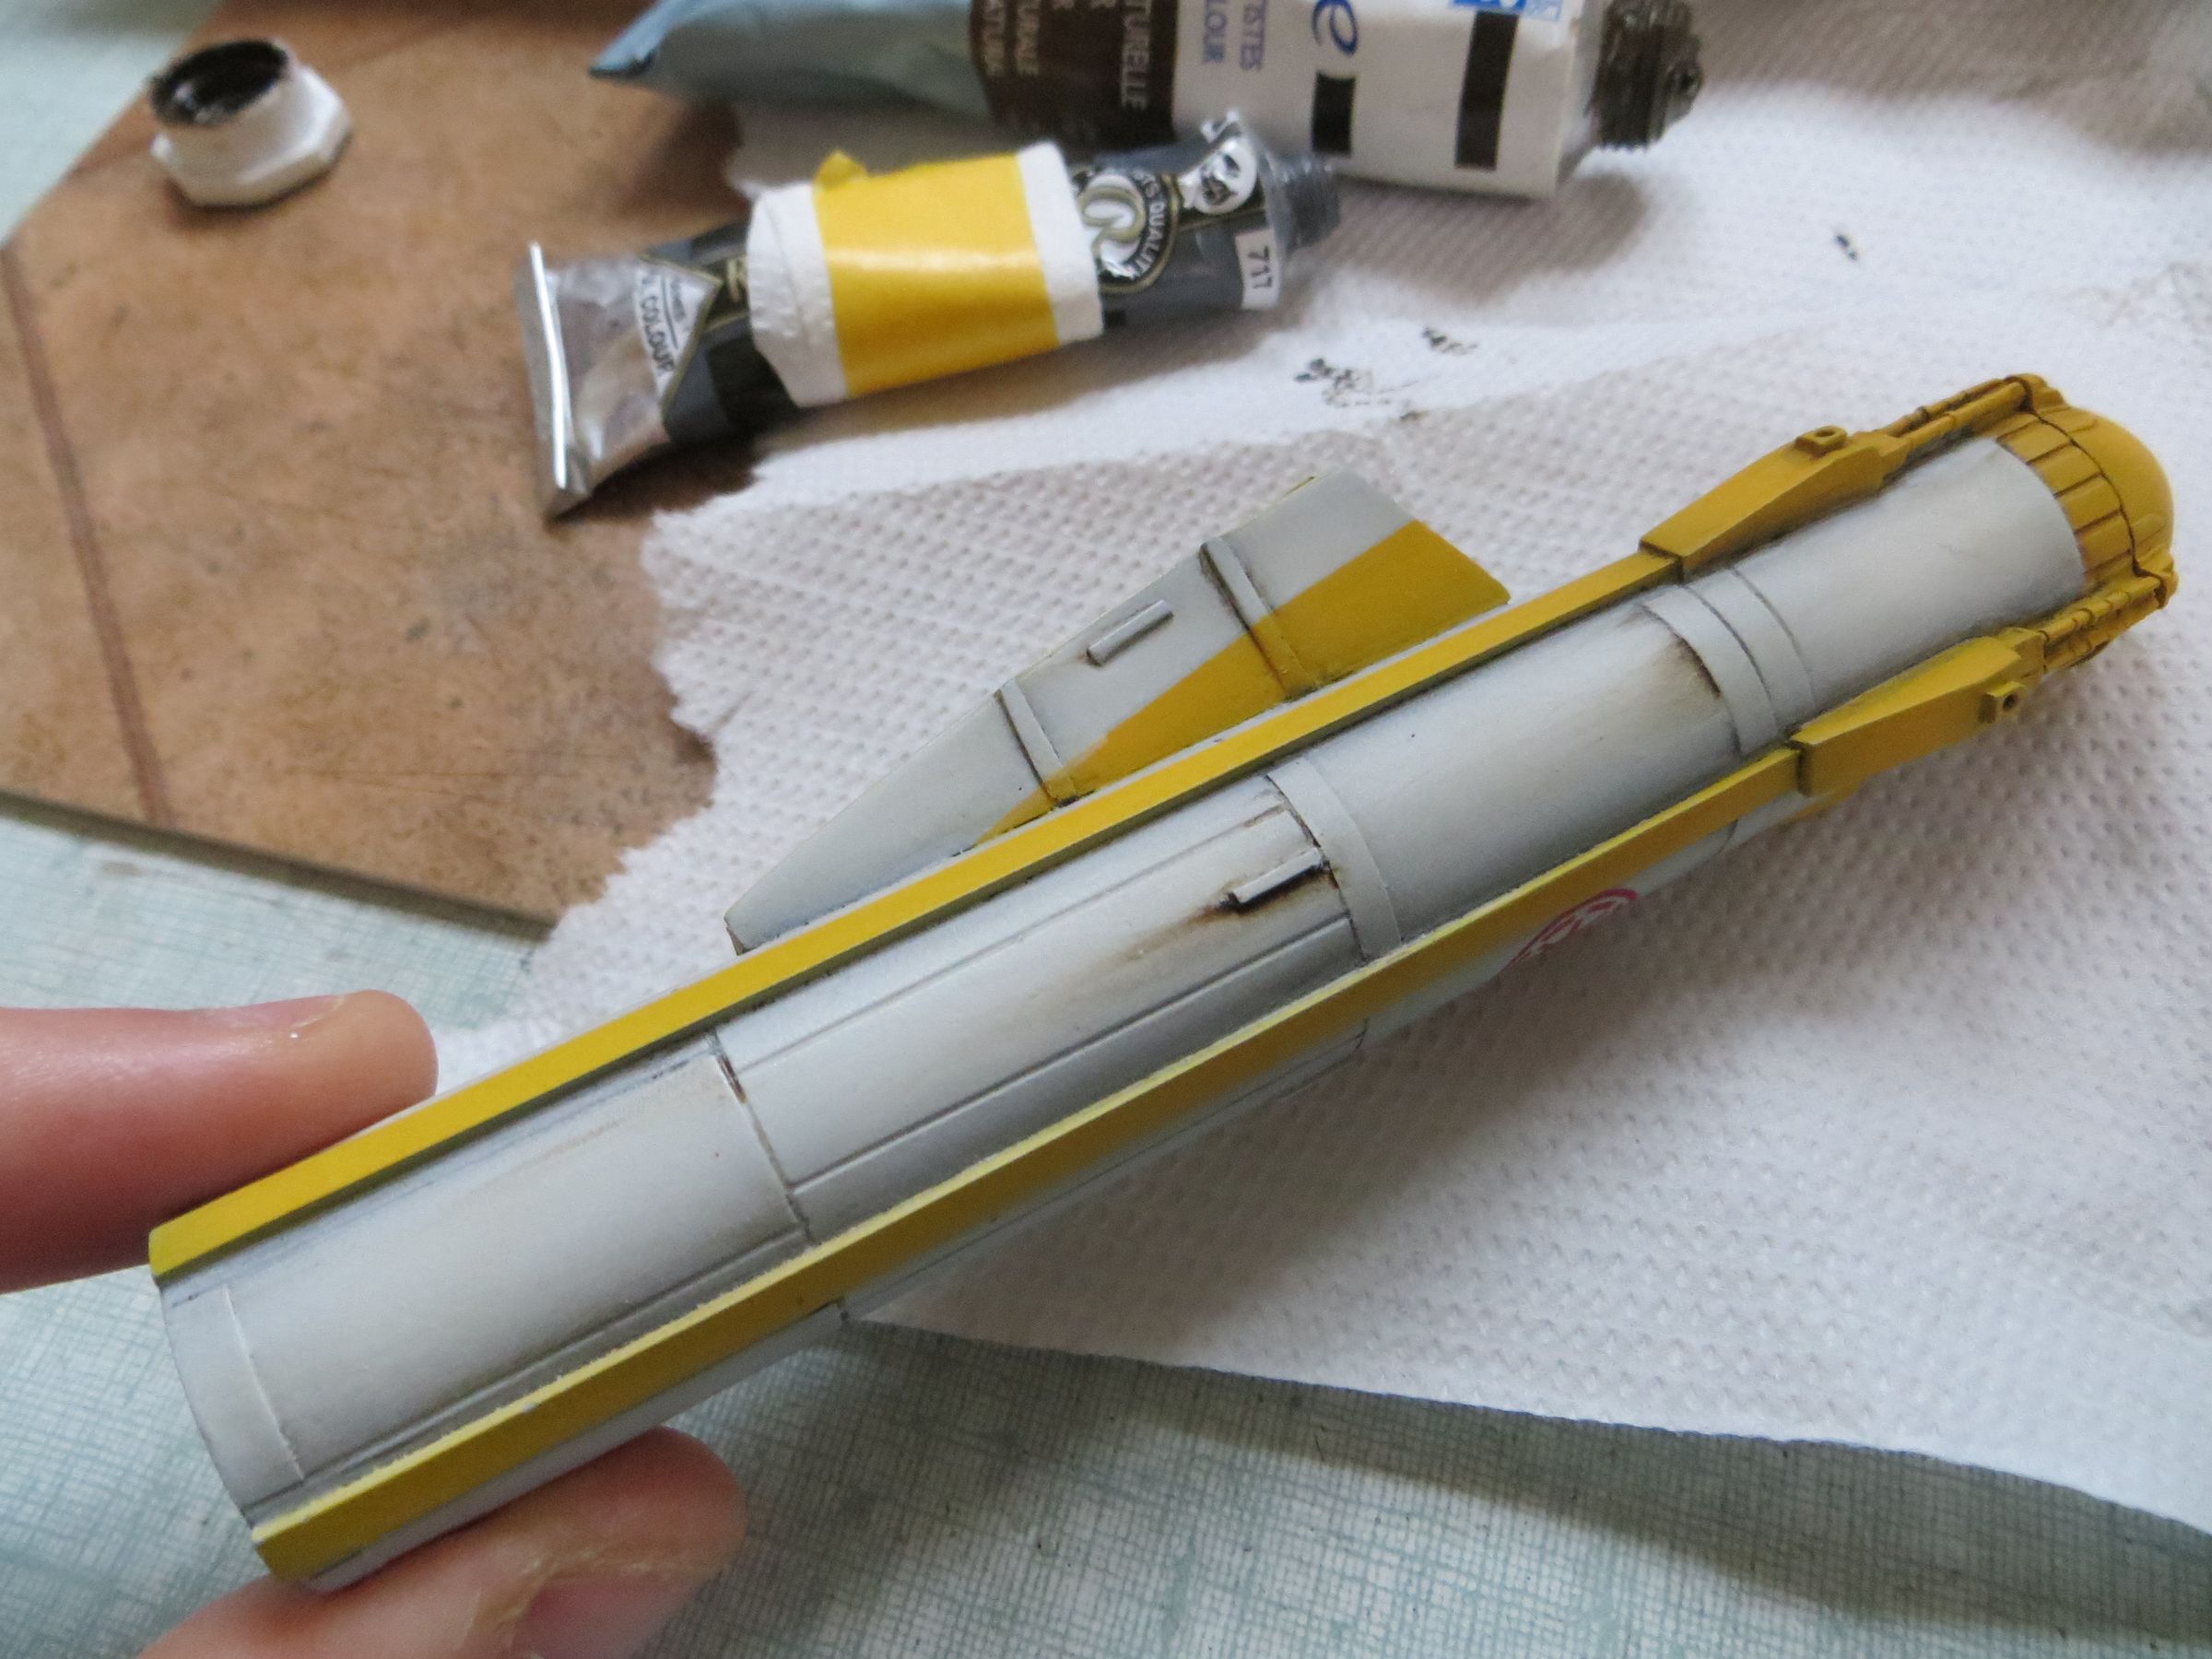
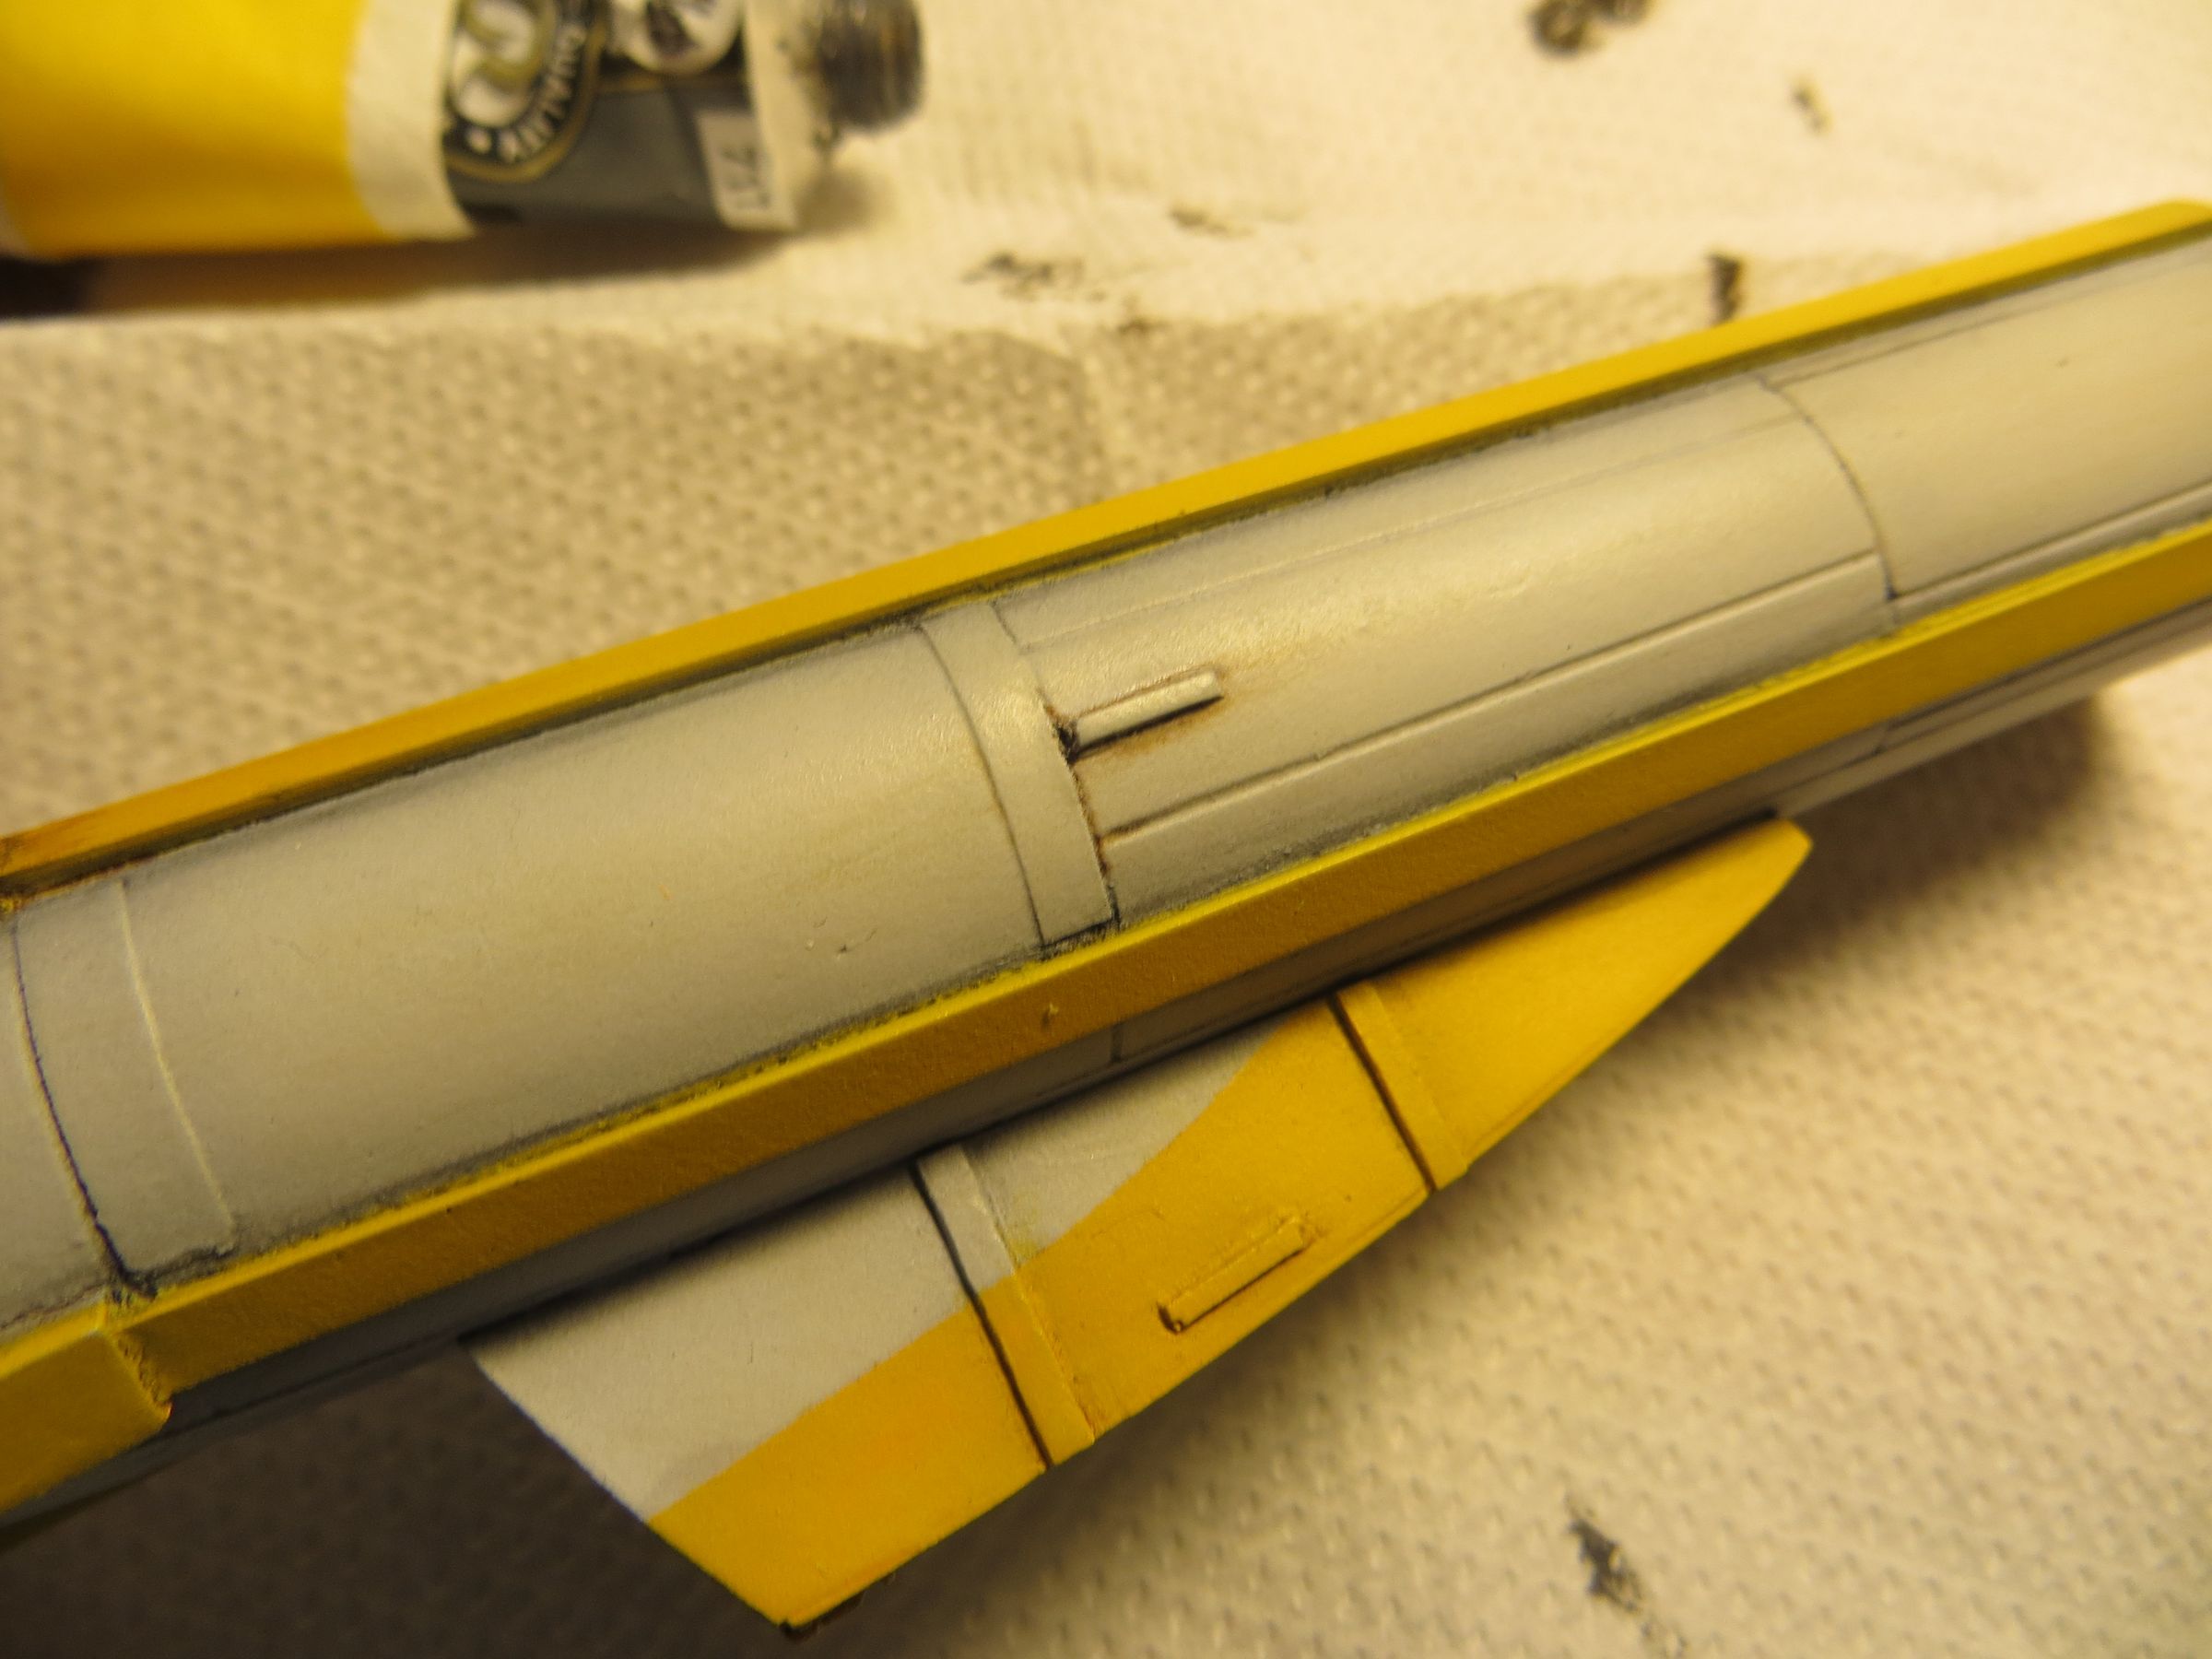
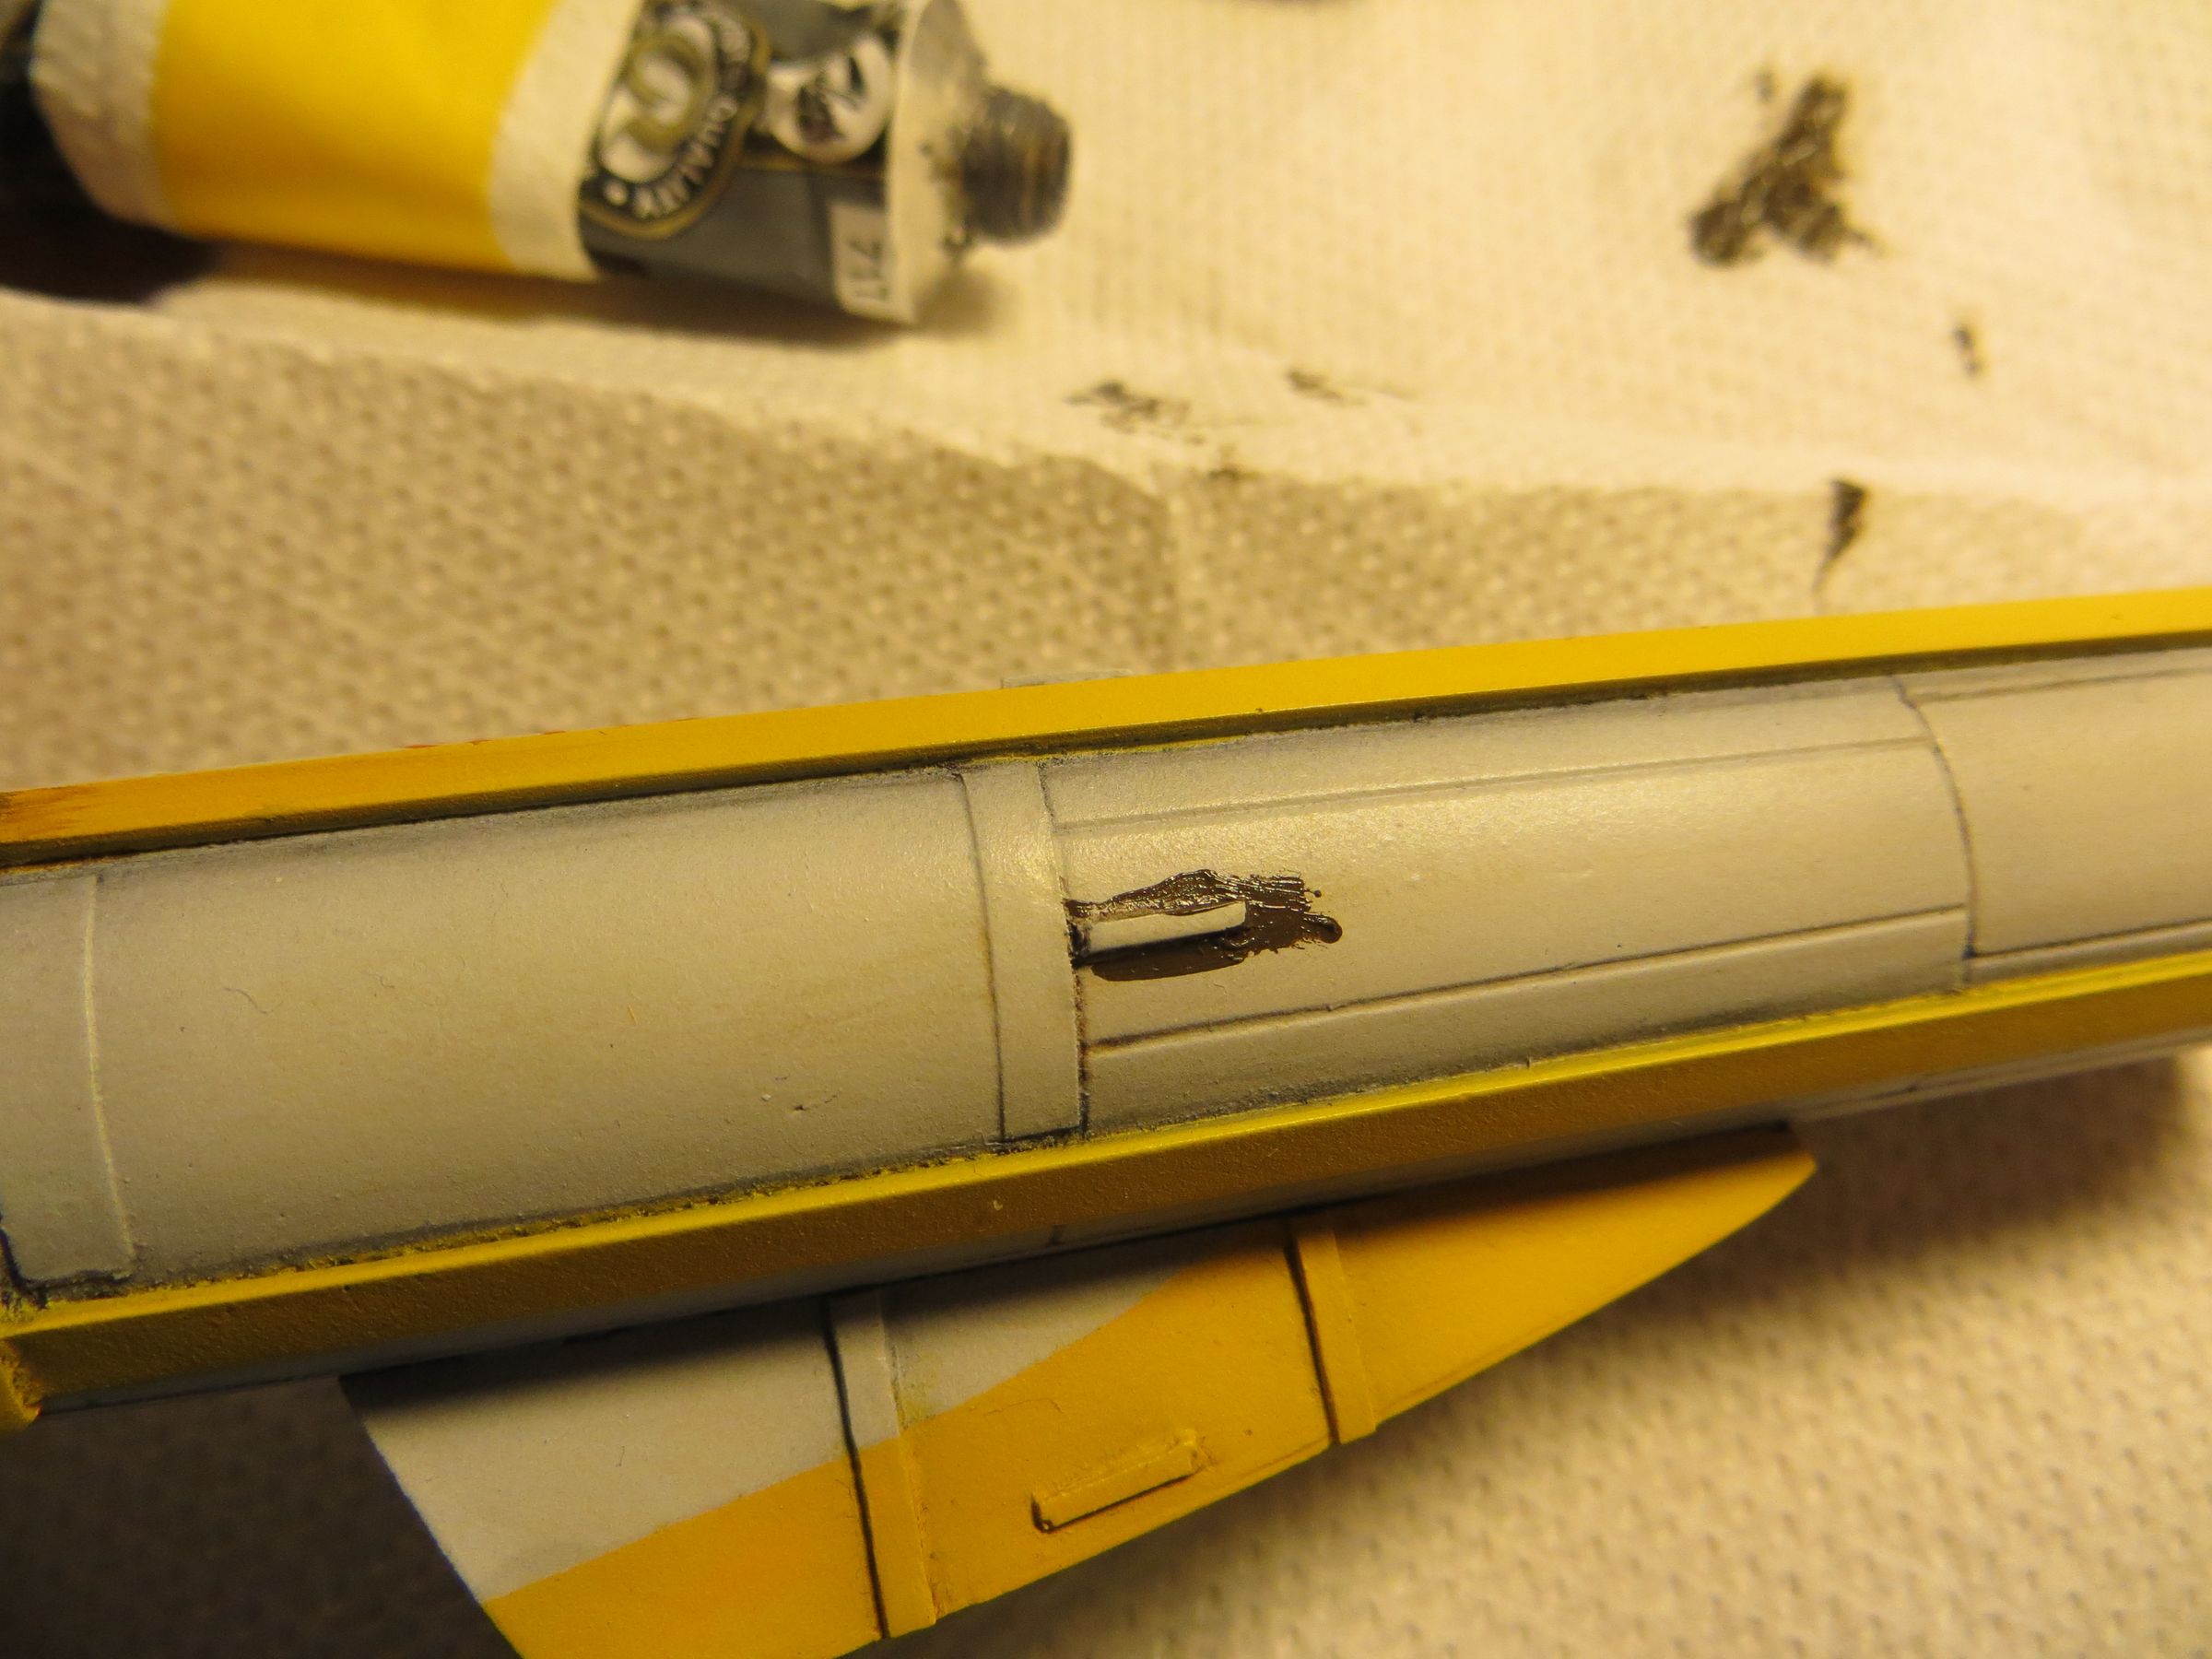
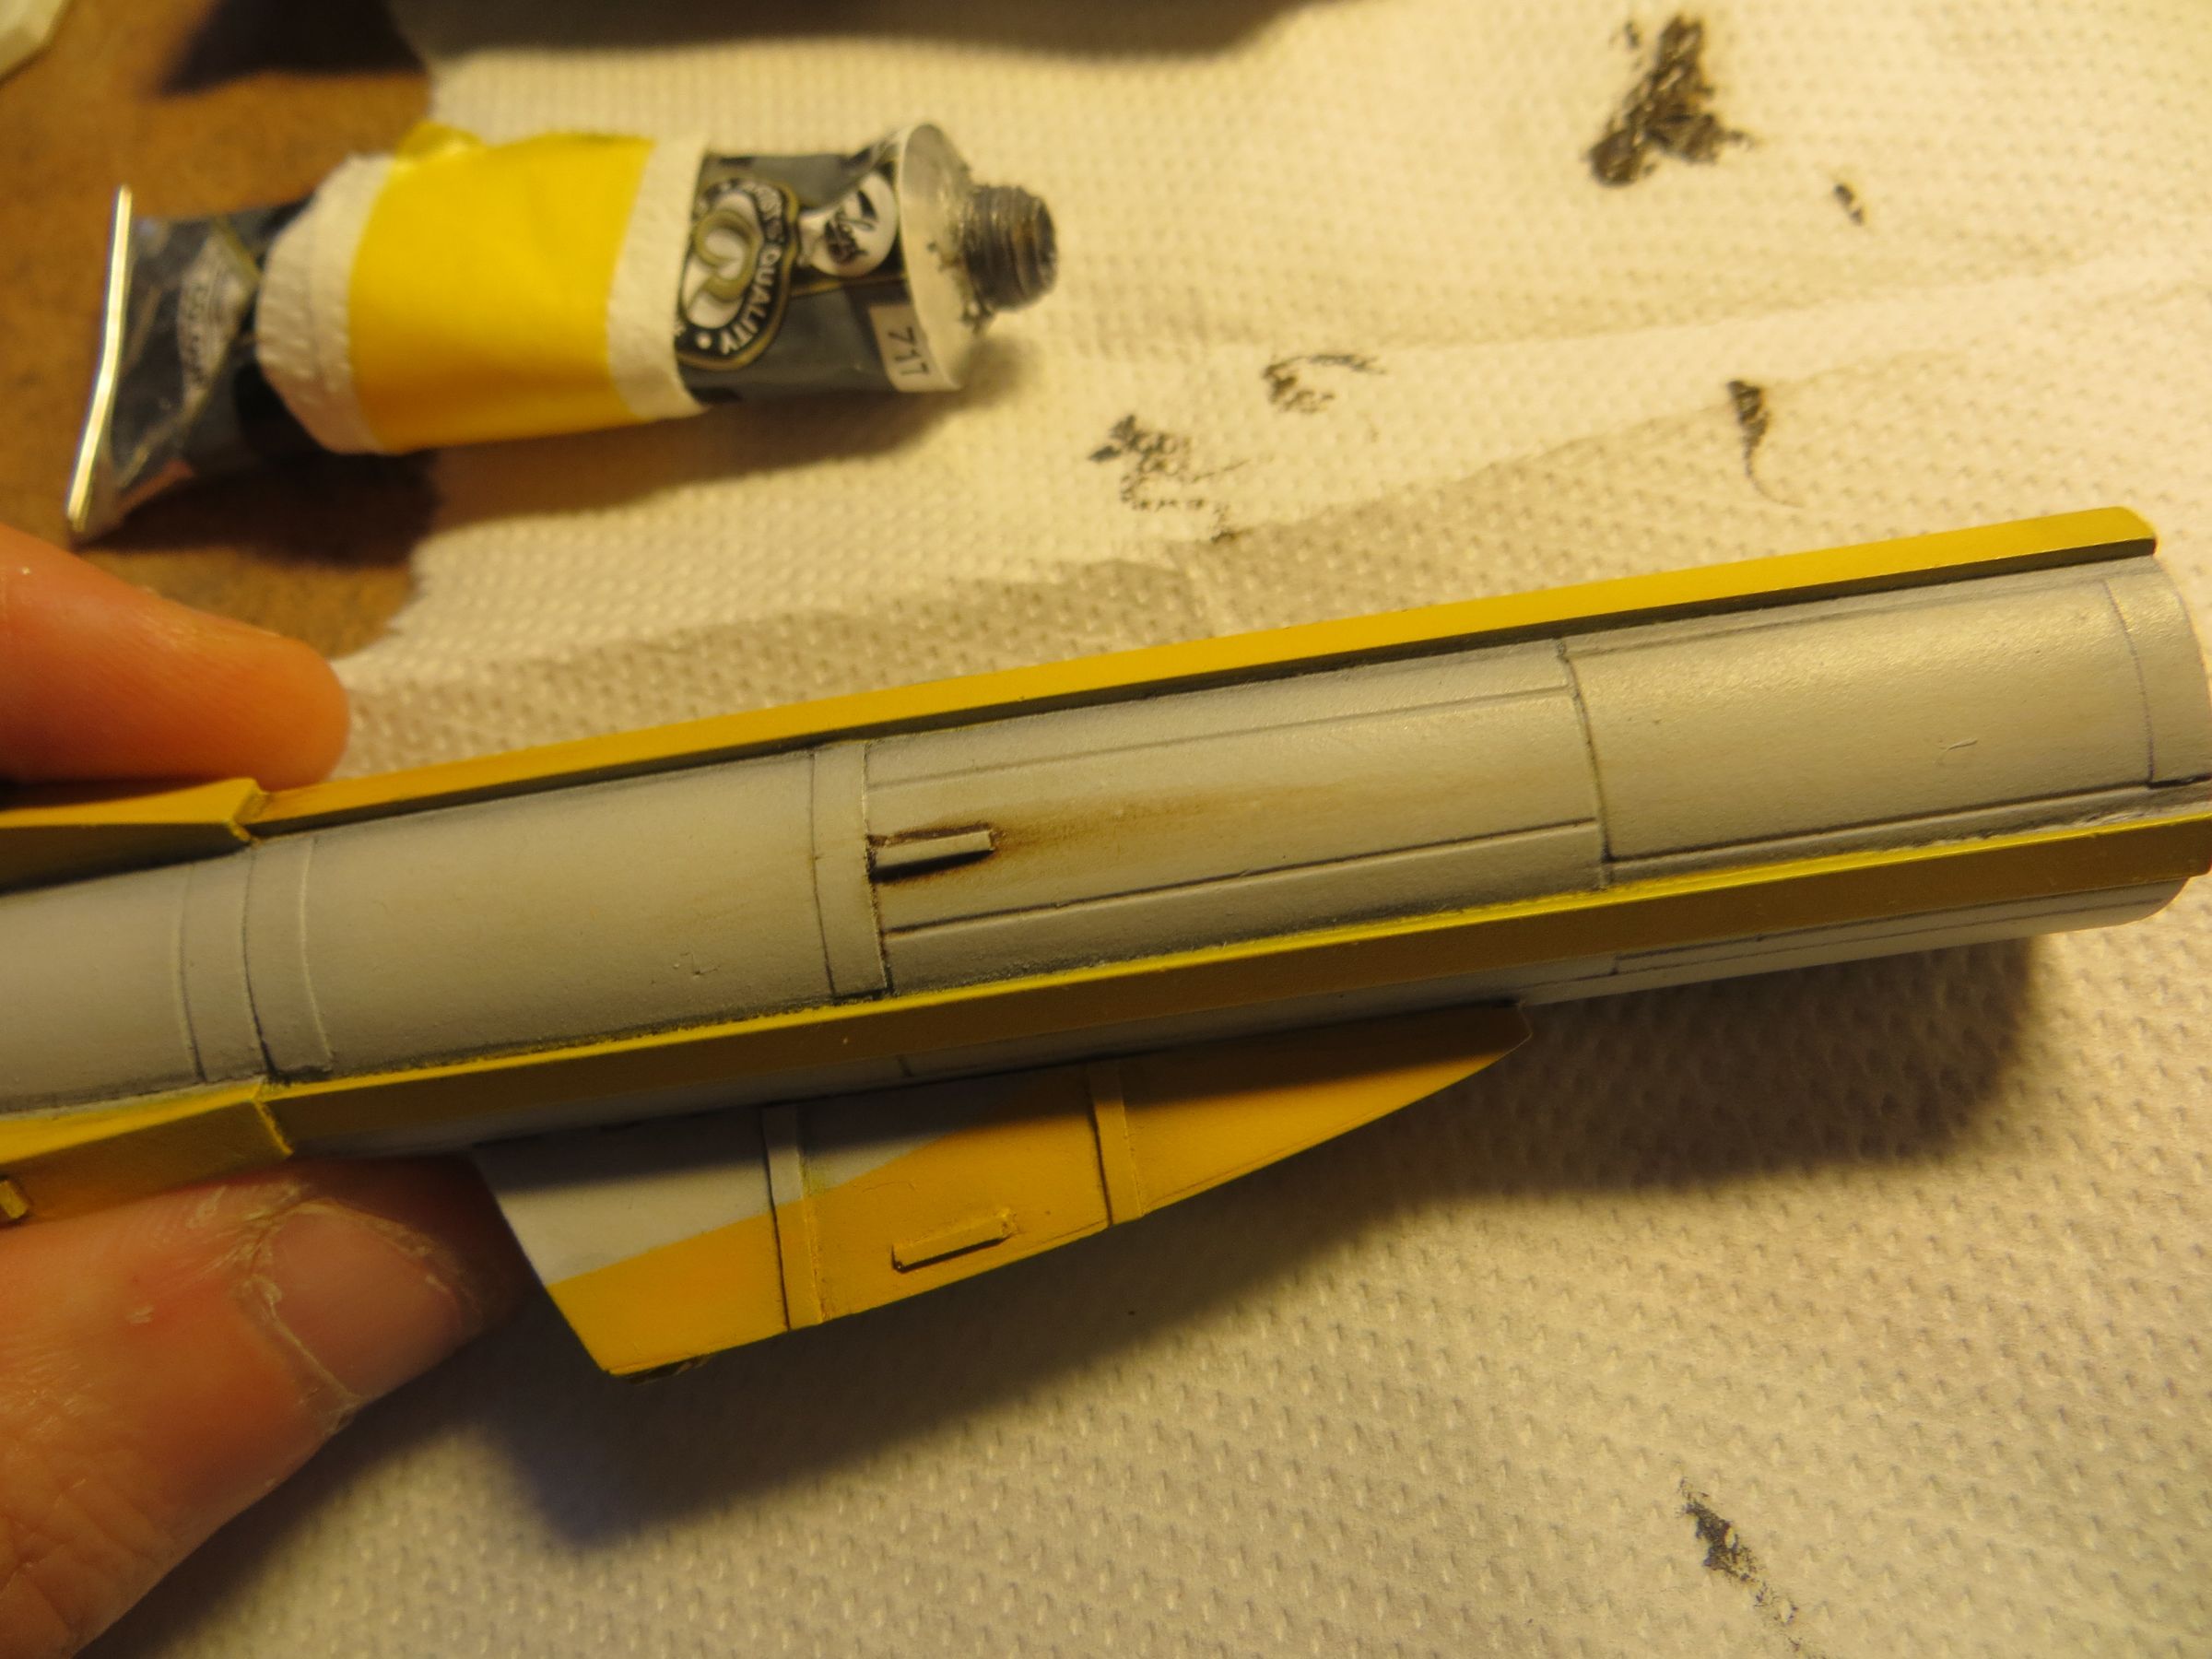
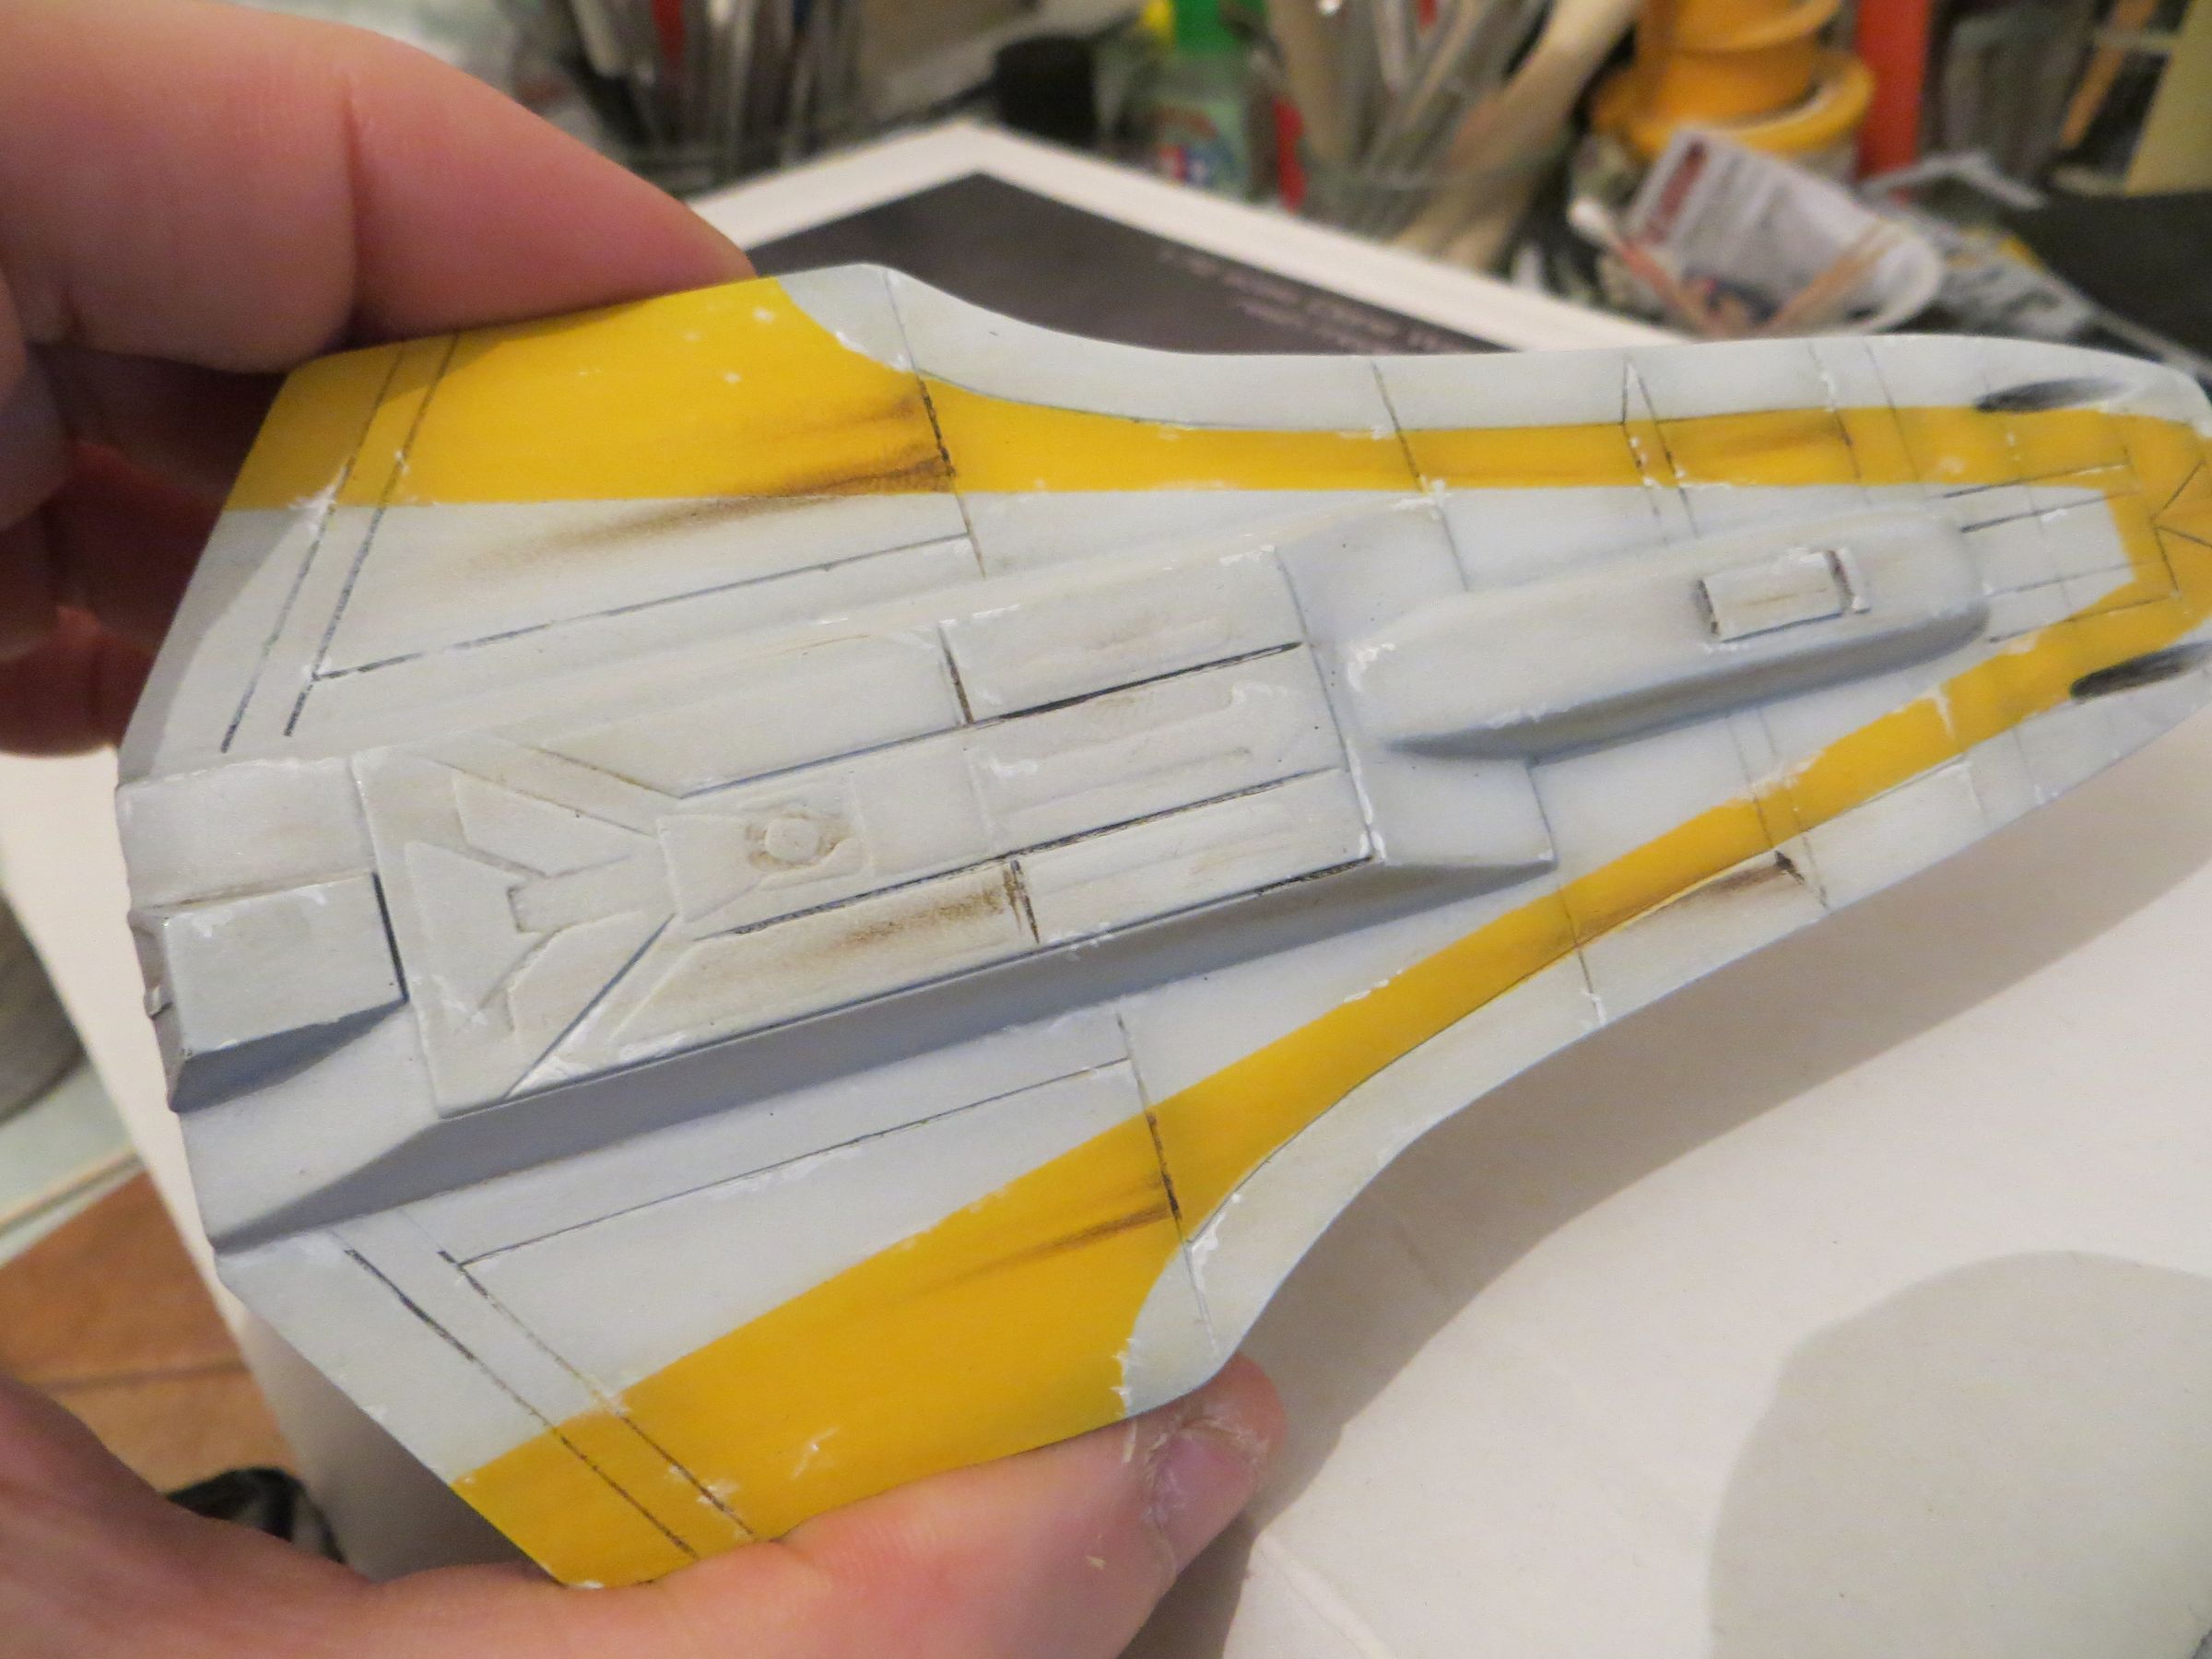
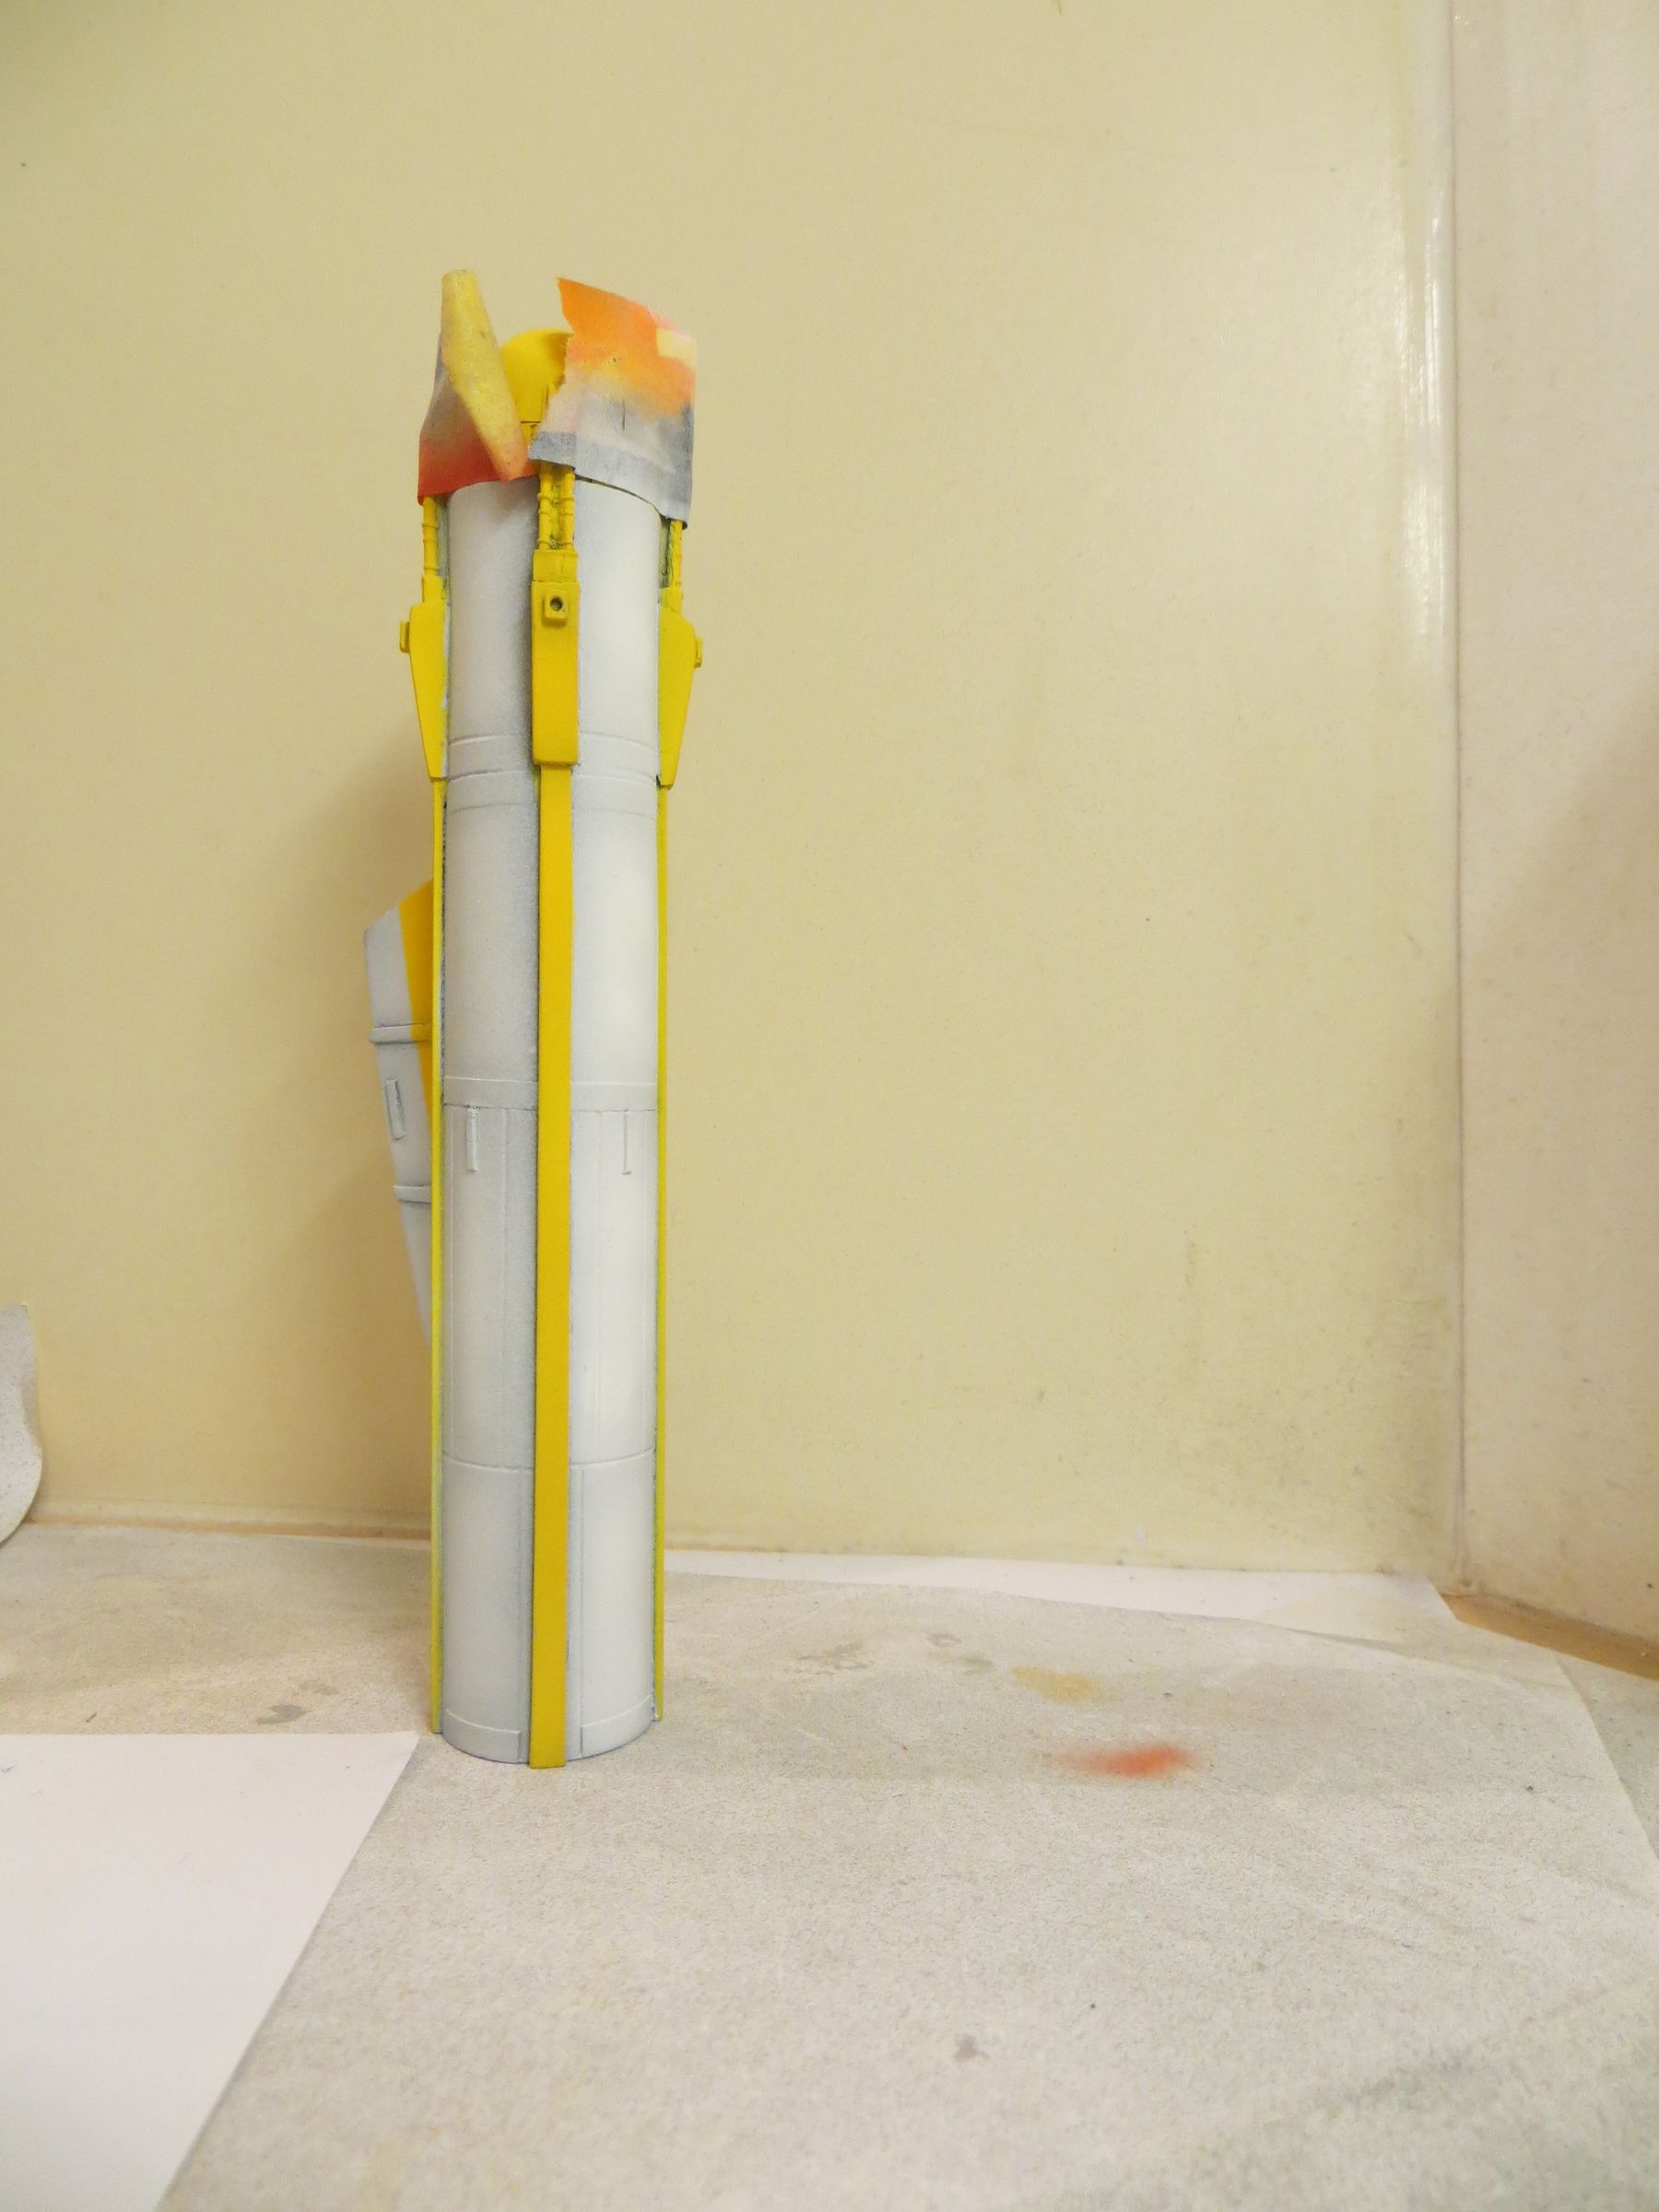
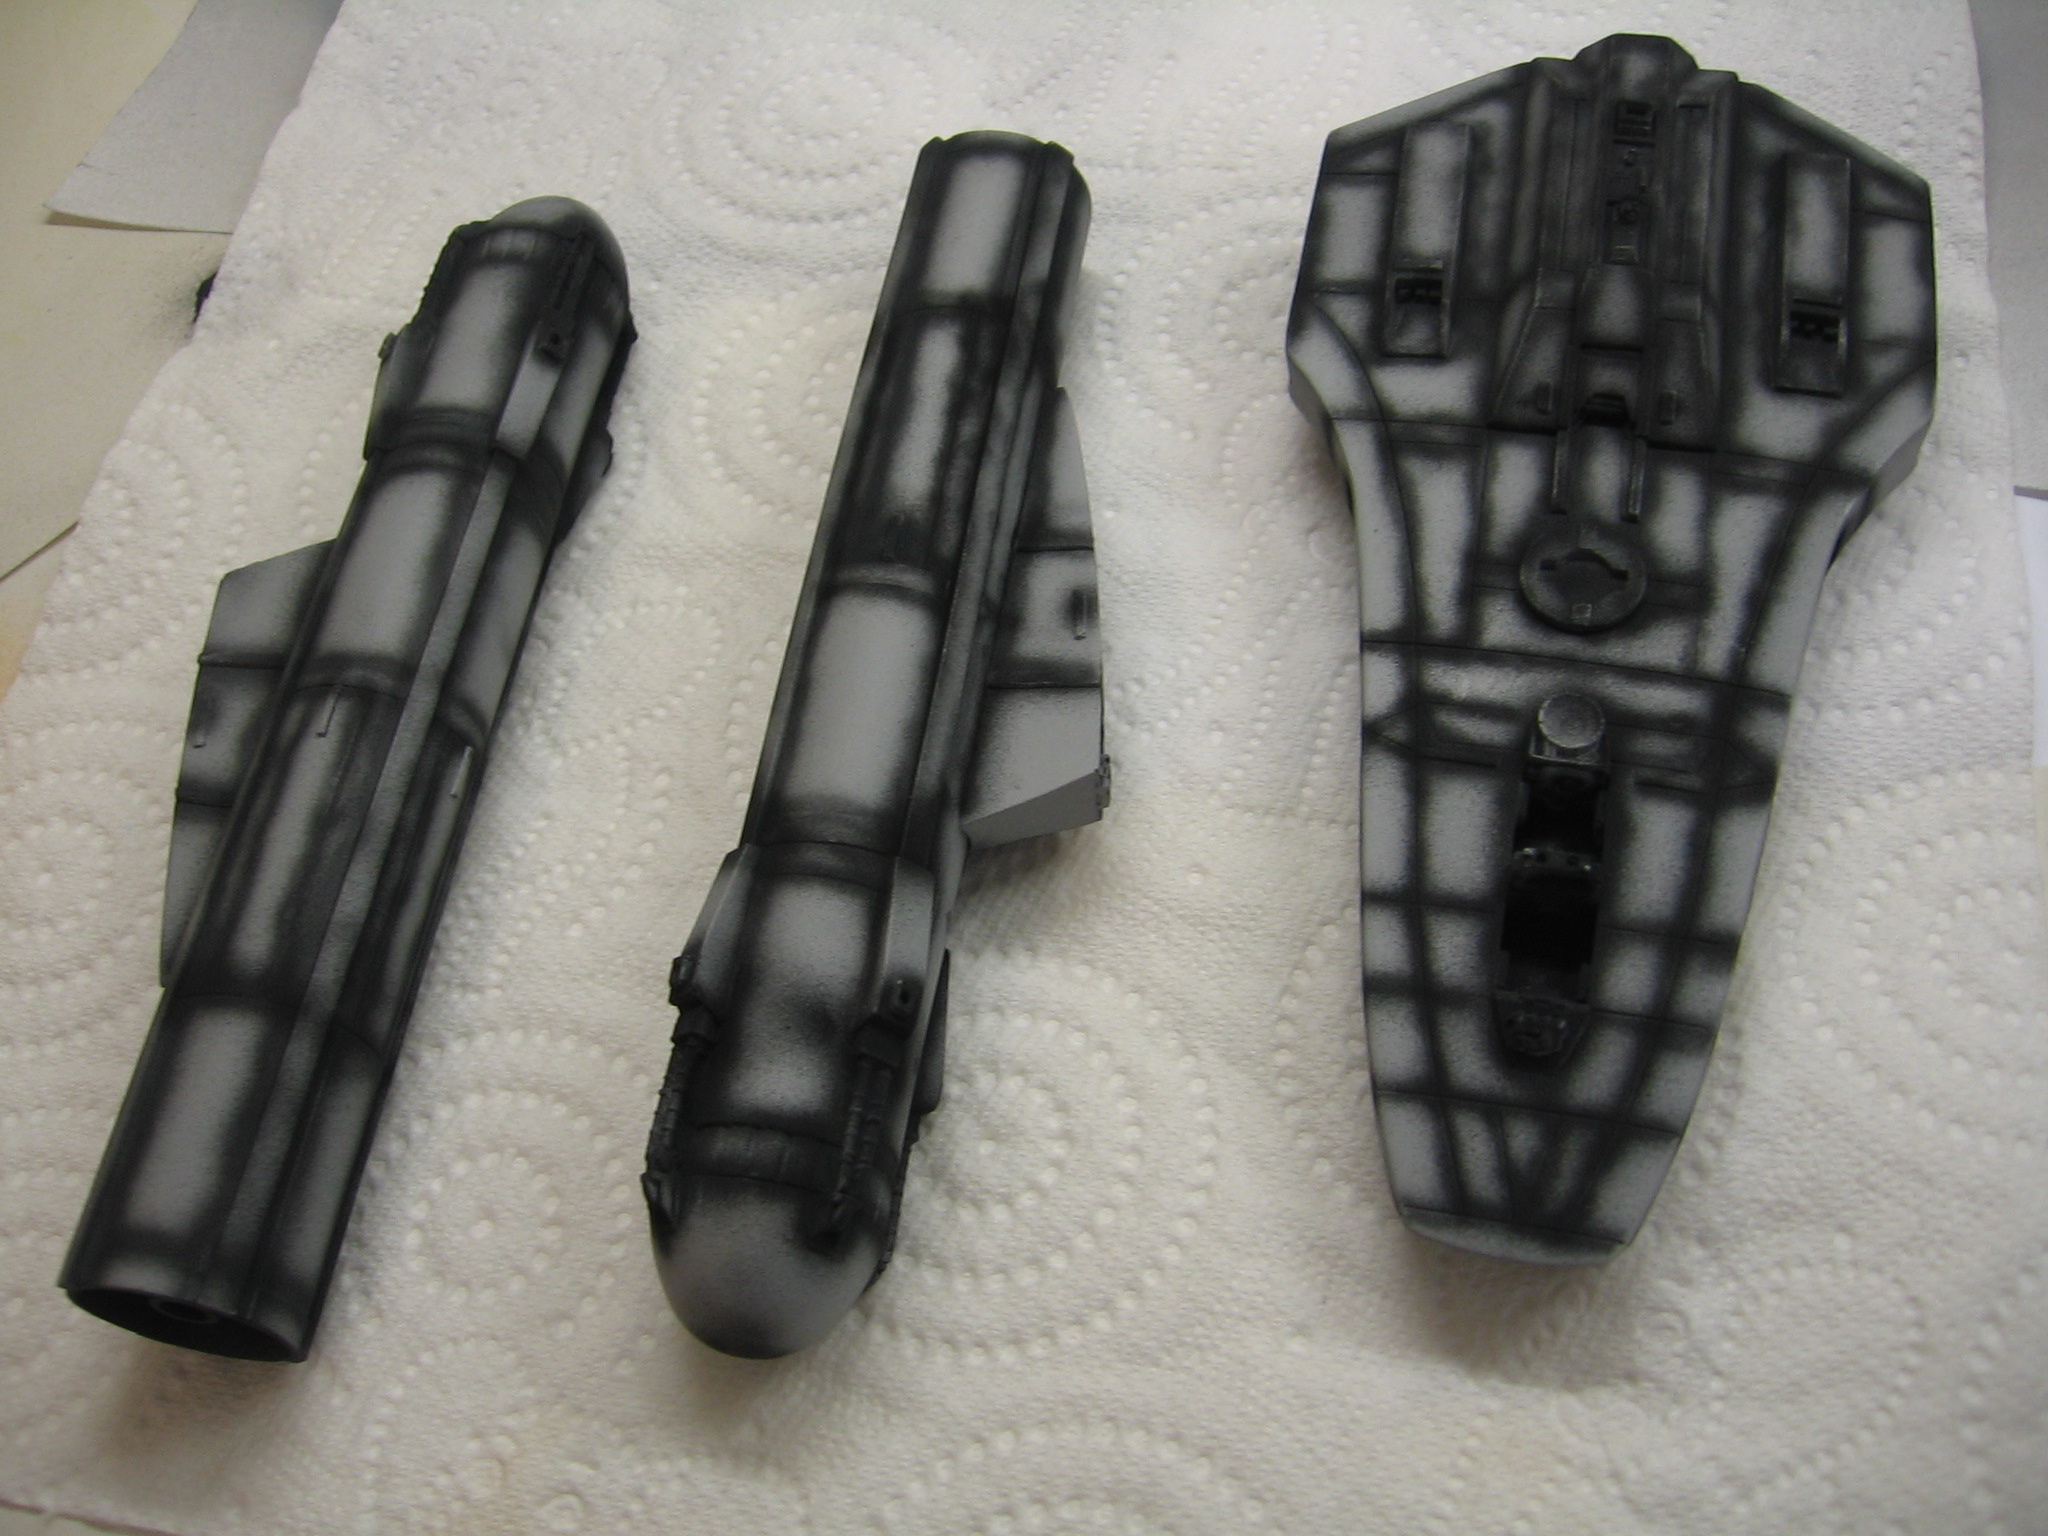
I had to improve the weathering, which was too soft.
For this, I took gray, black and umber oil paints.
I apply a line of paint on the model, and pull the colors backwards (in the direction of the relative wind) with the finger or a paper towel.

Gradually, I weathered all the parts.

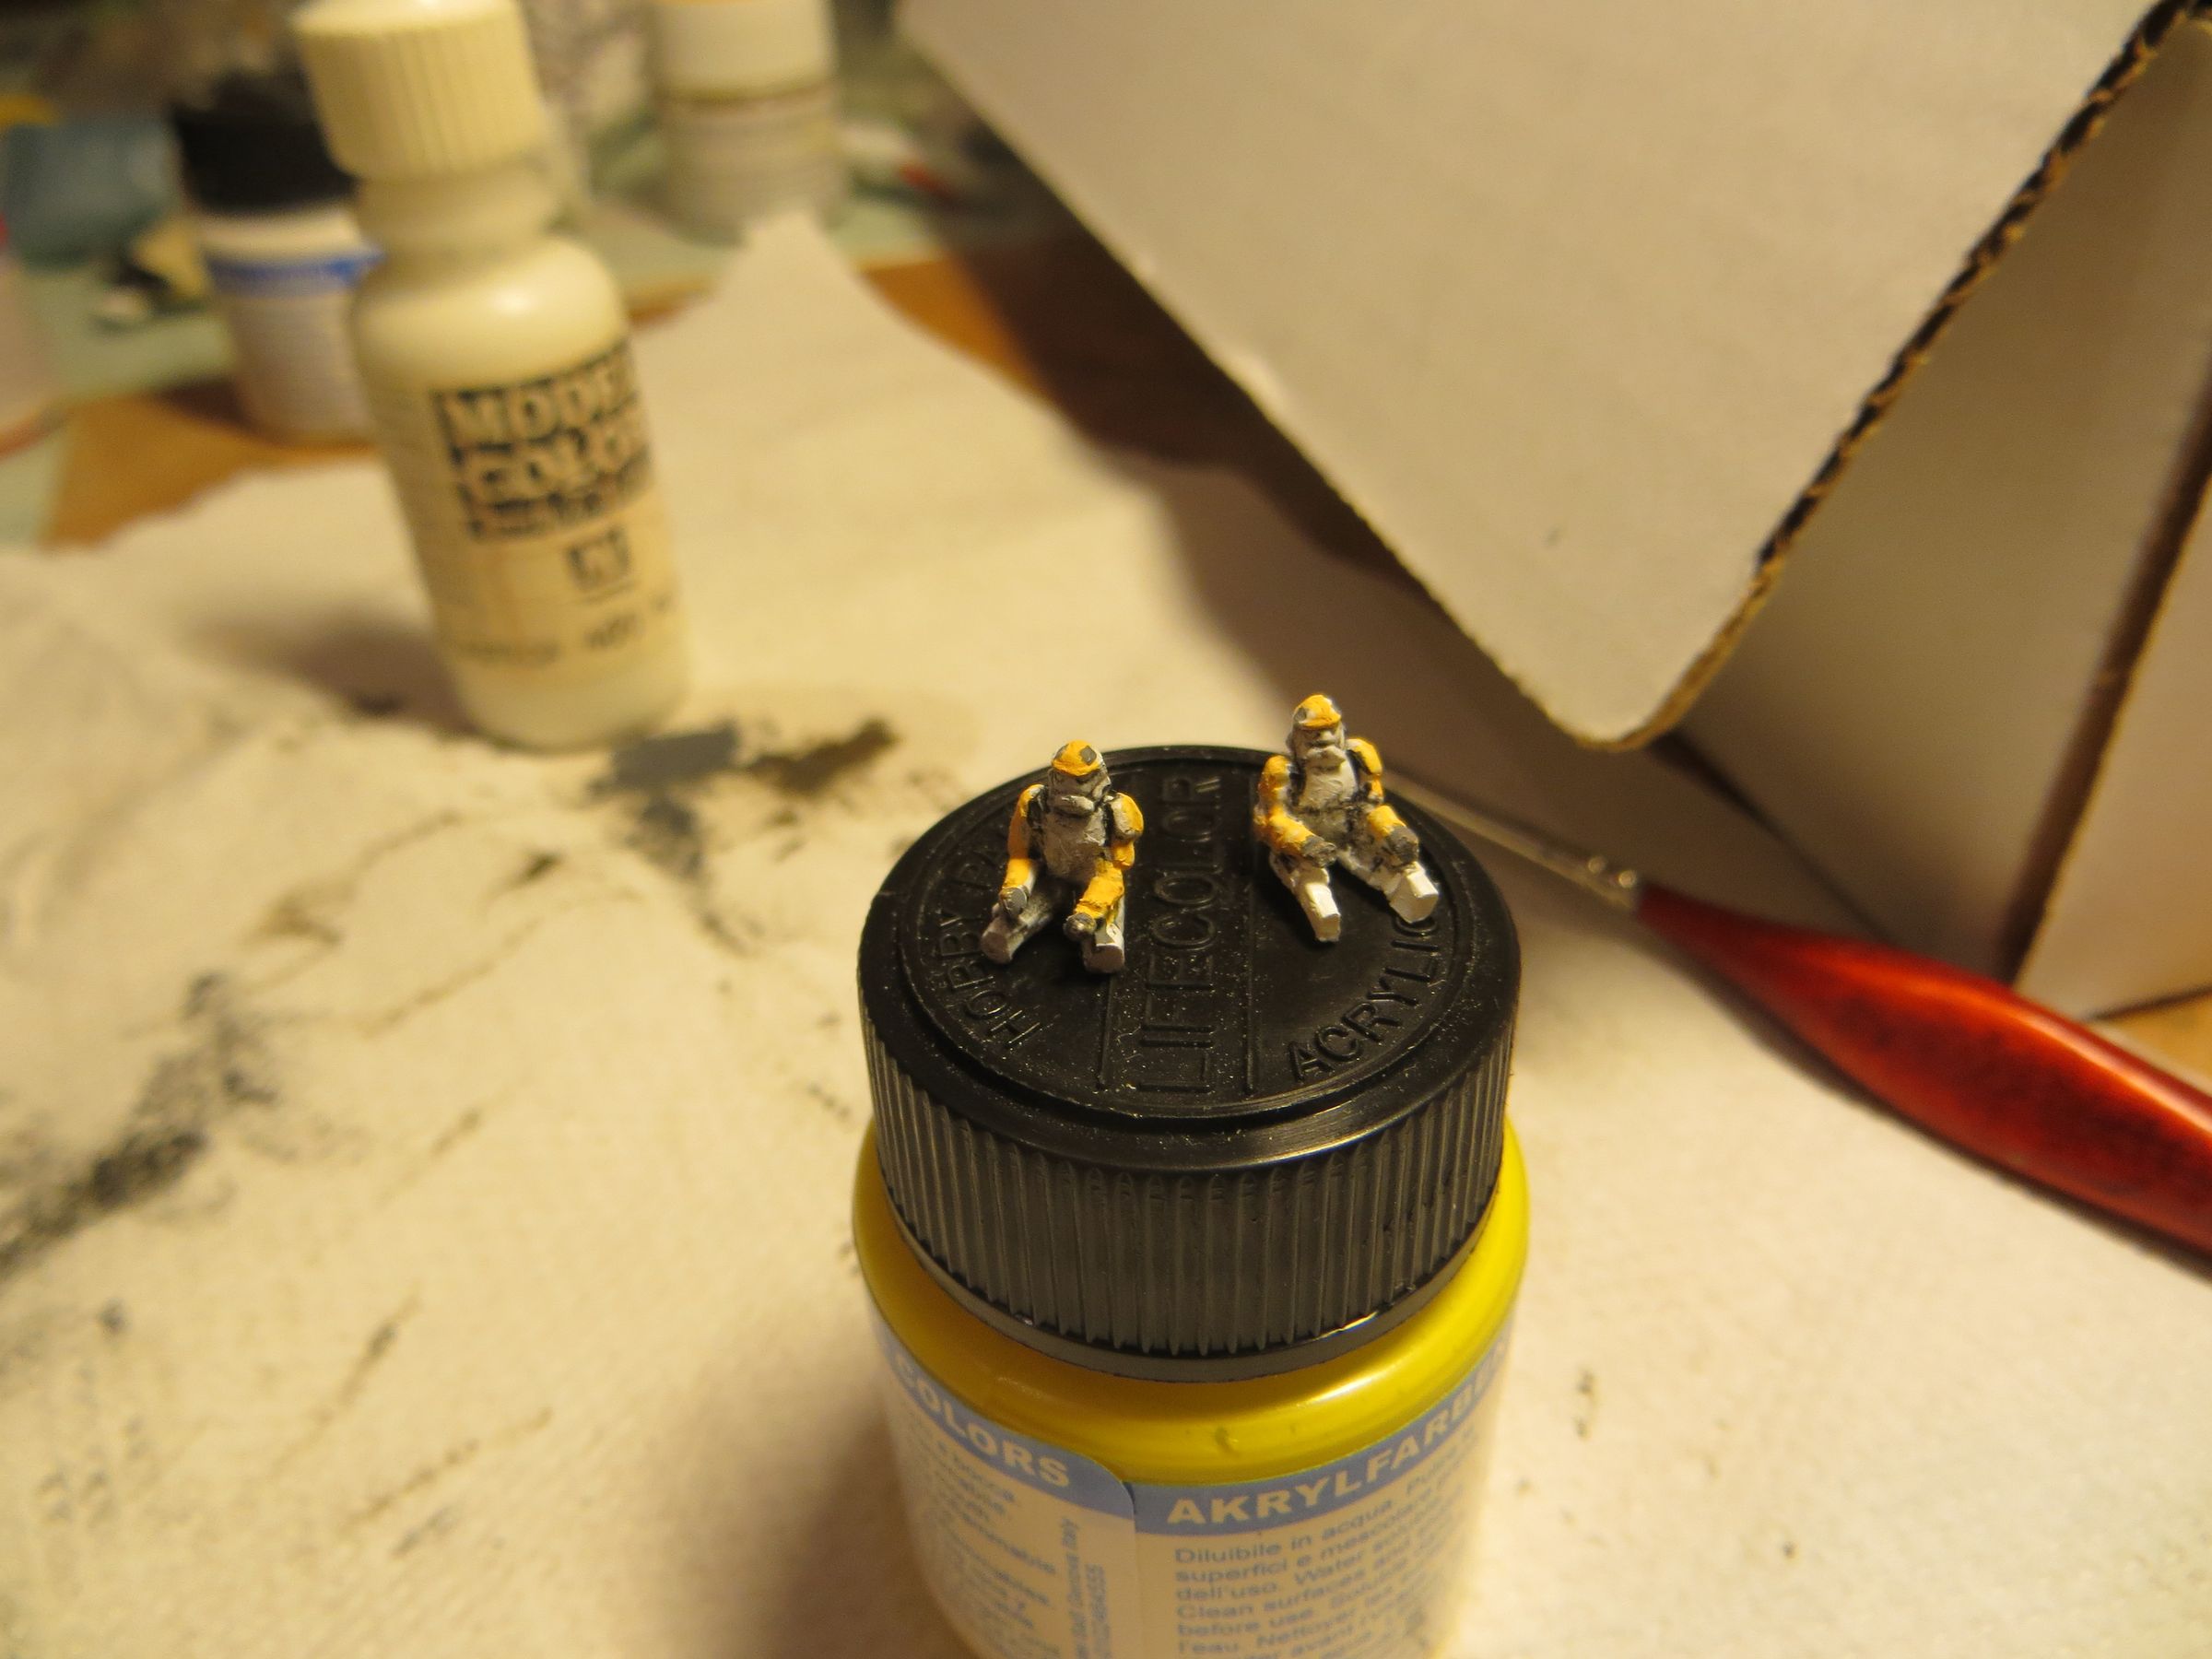
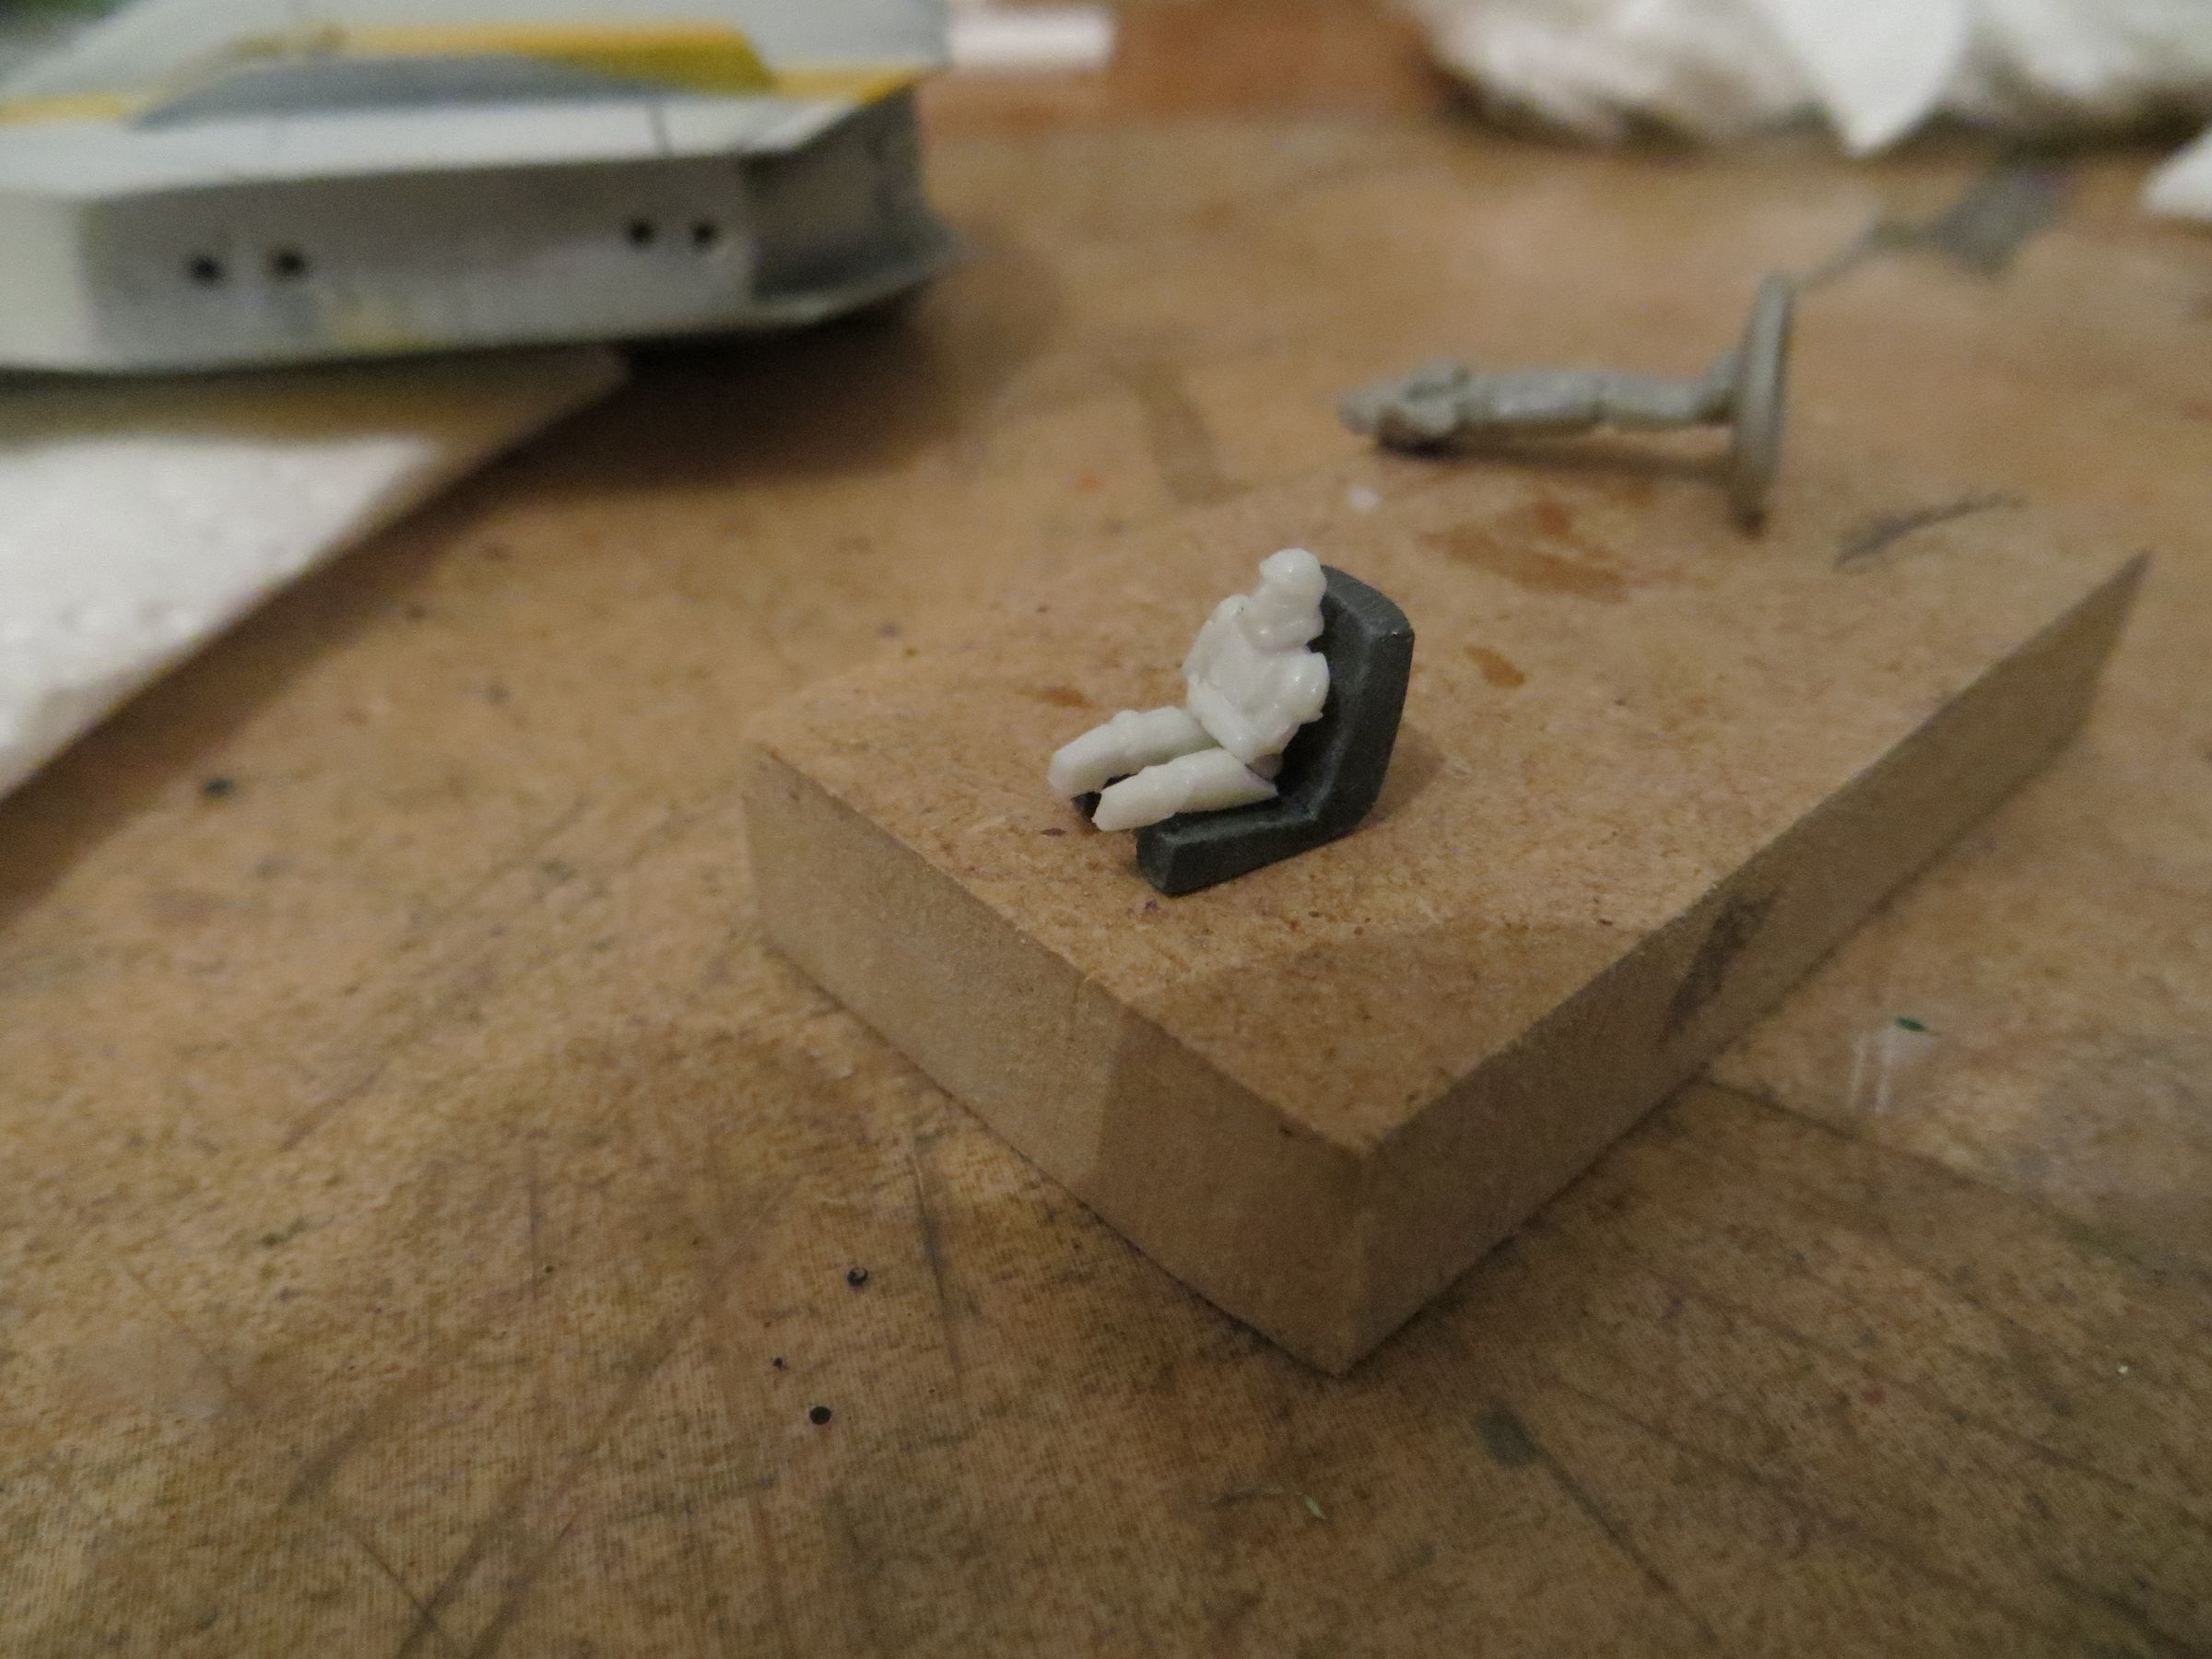
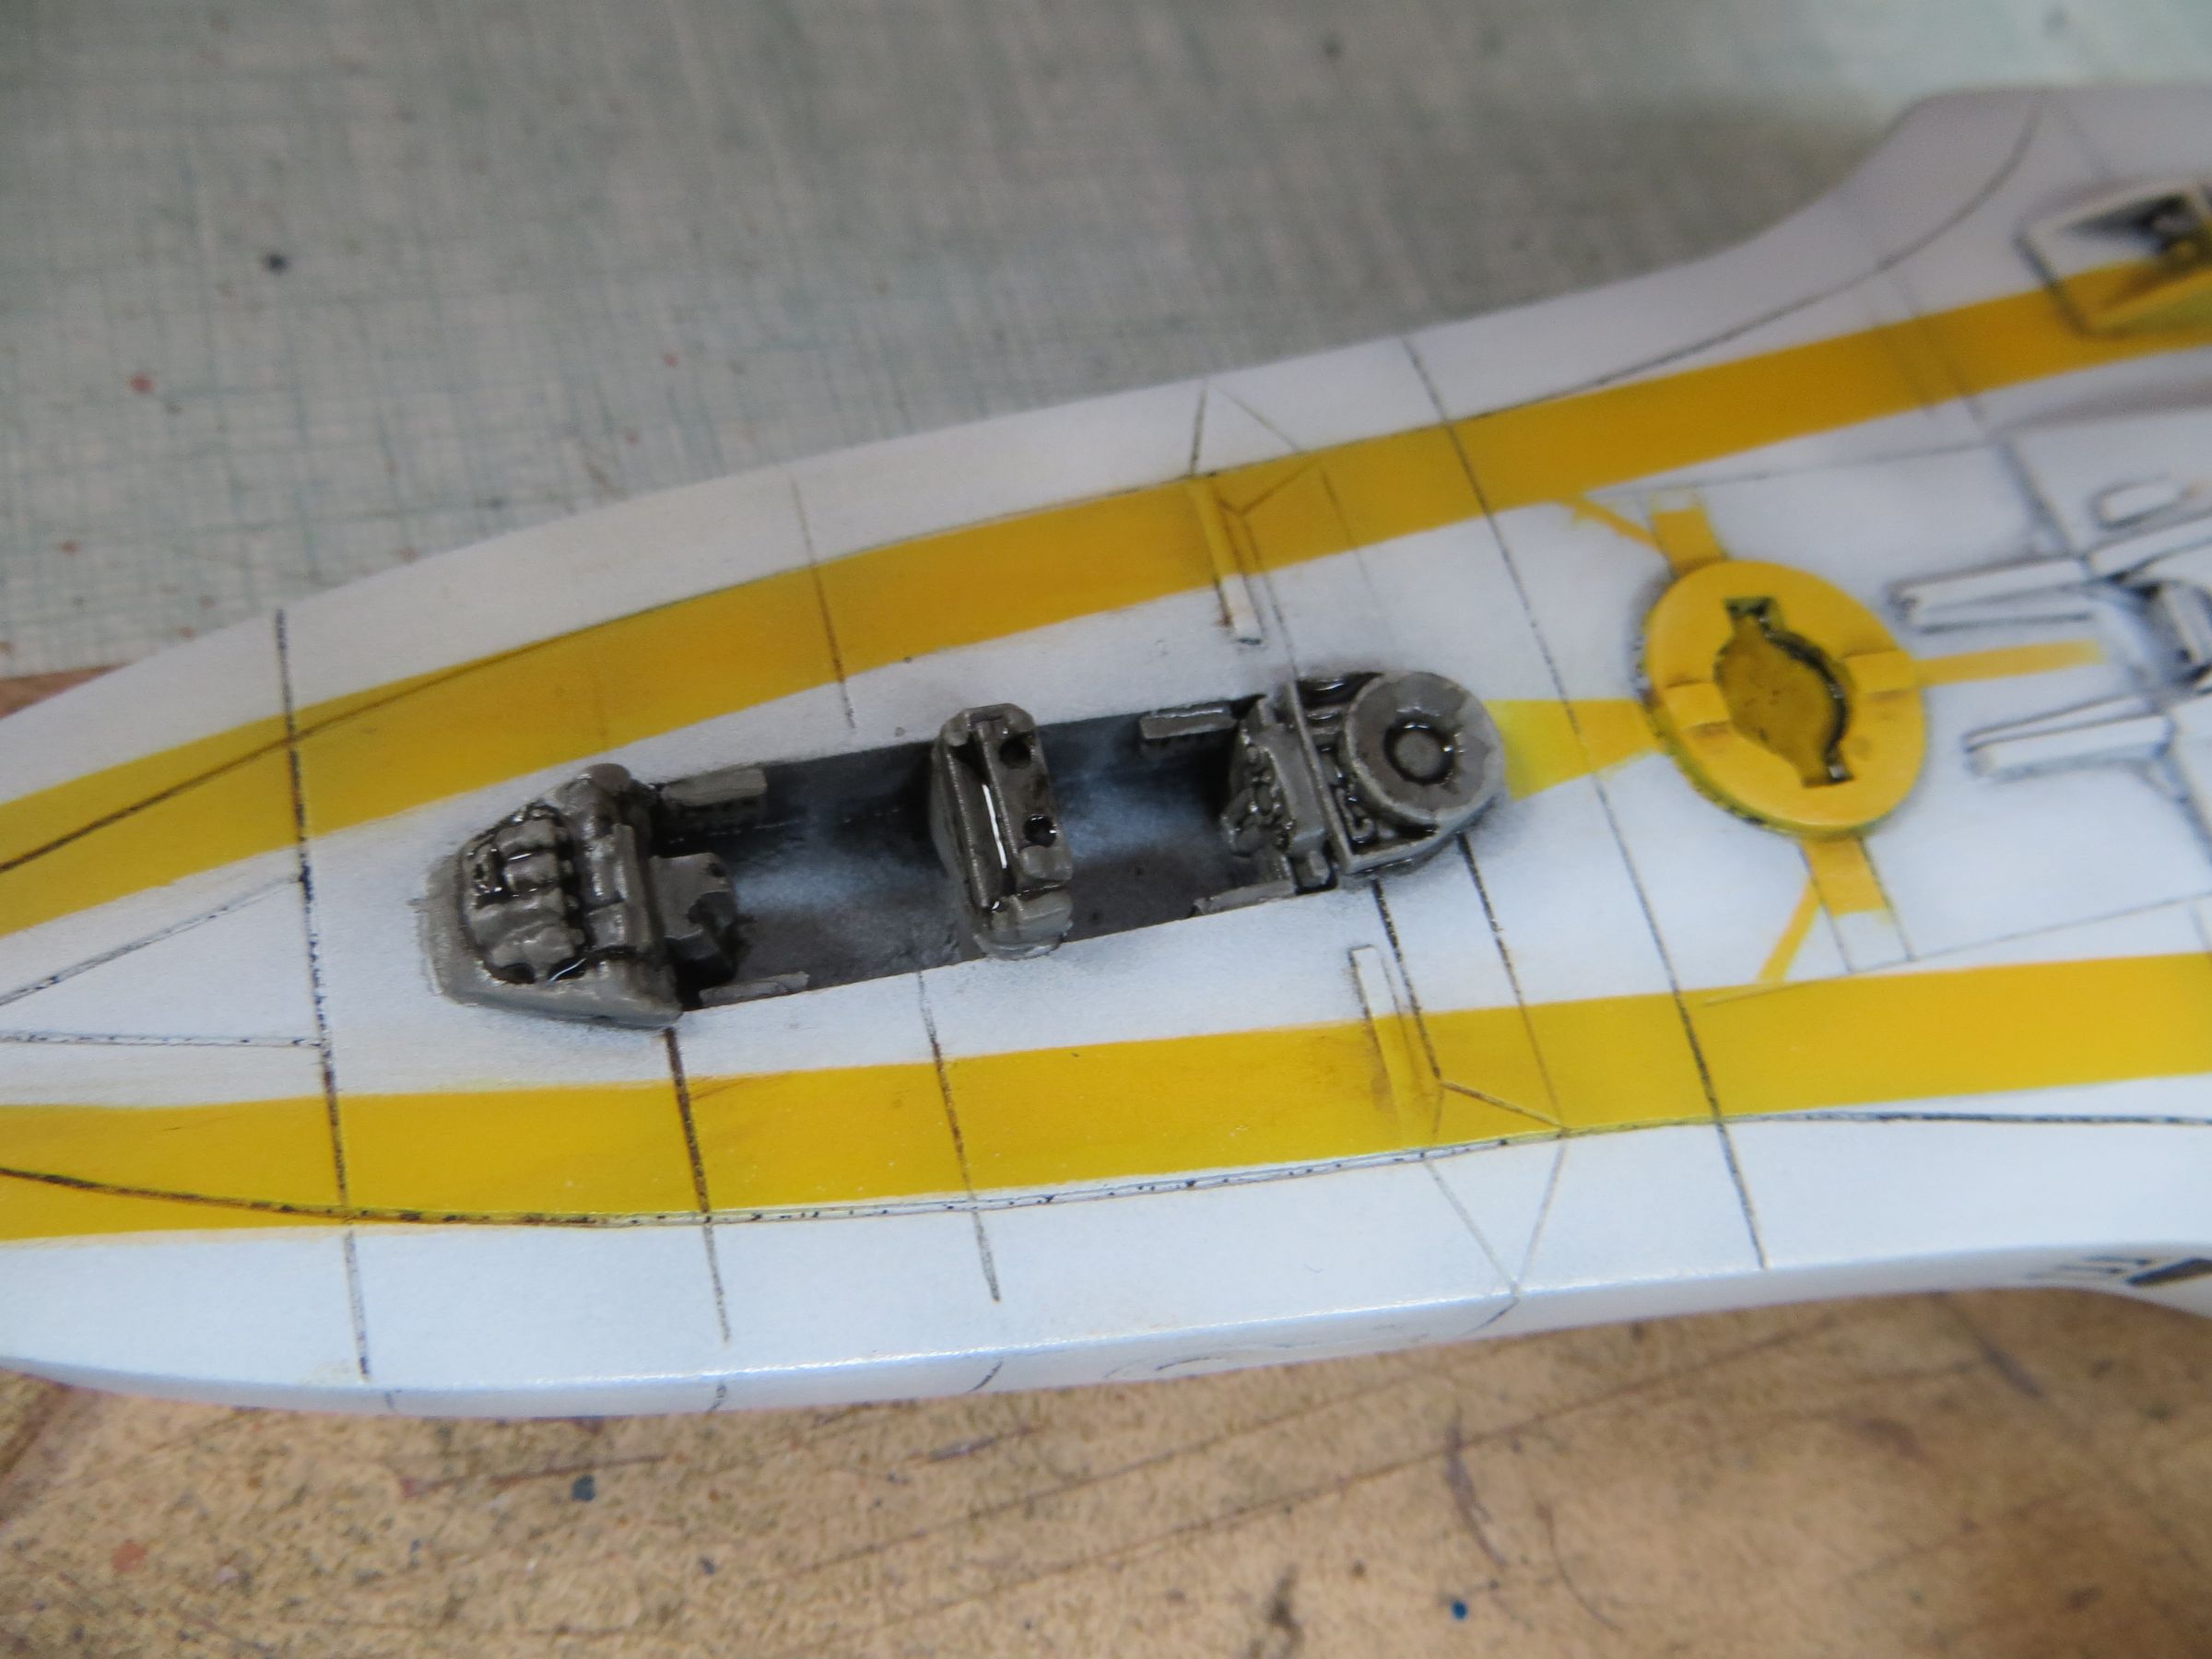
While this was drying, I painted the clone pilots :
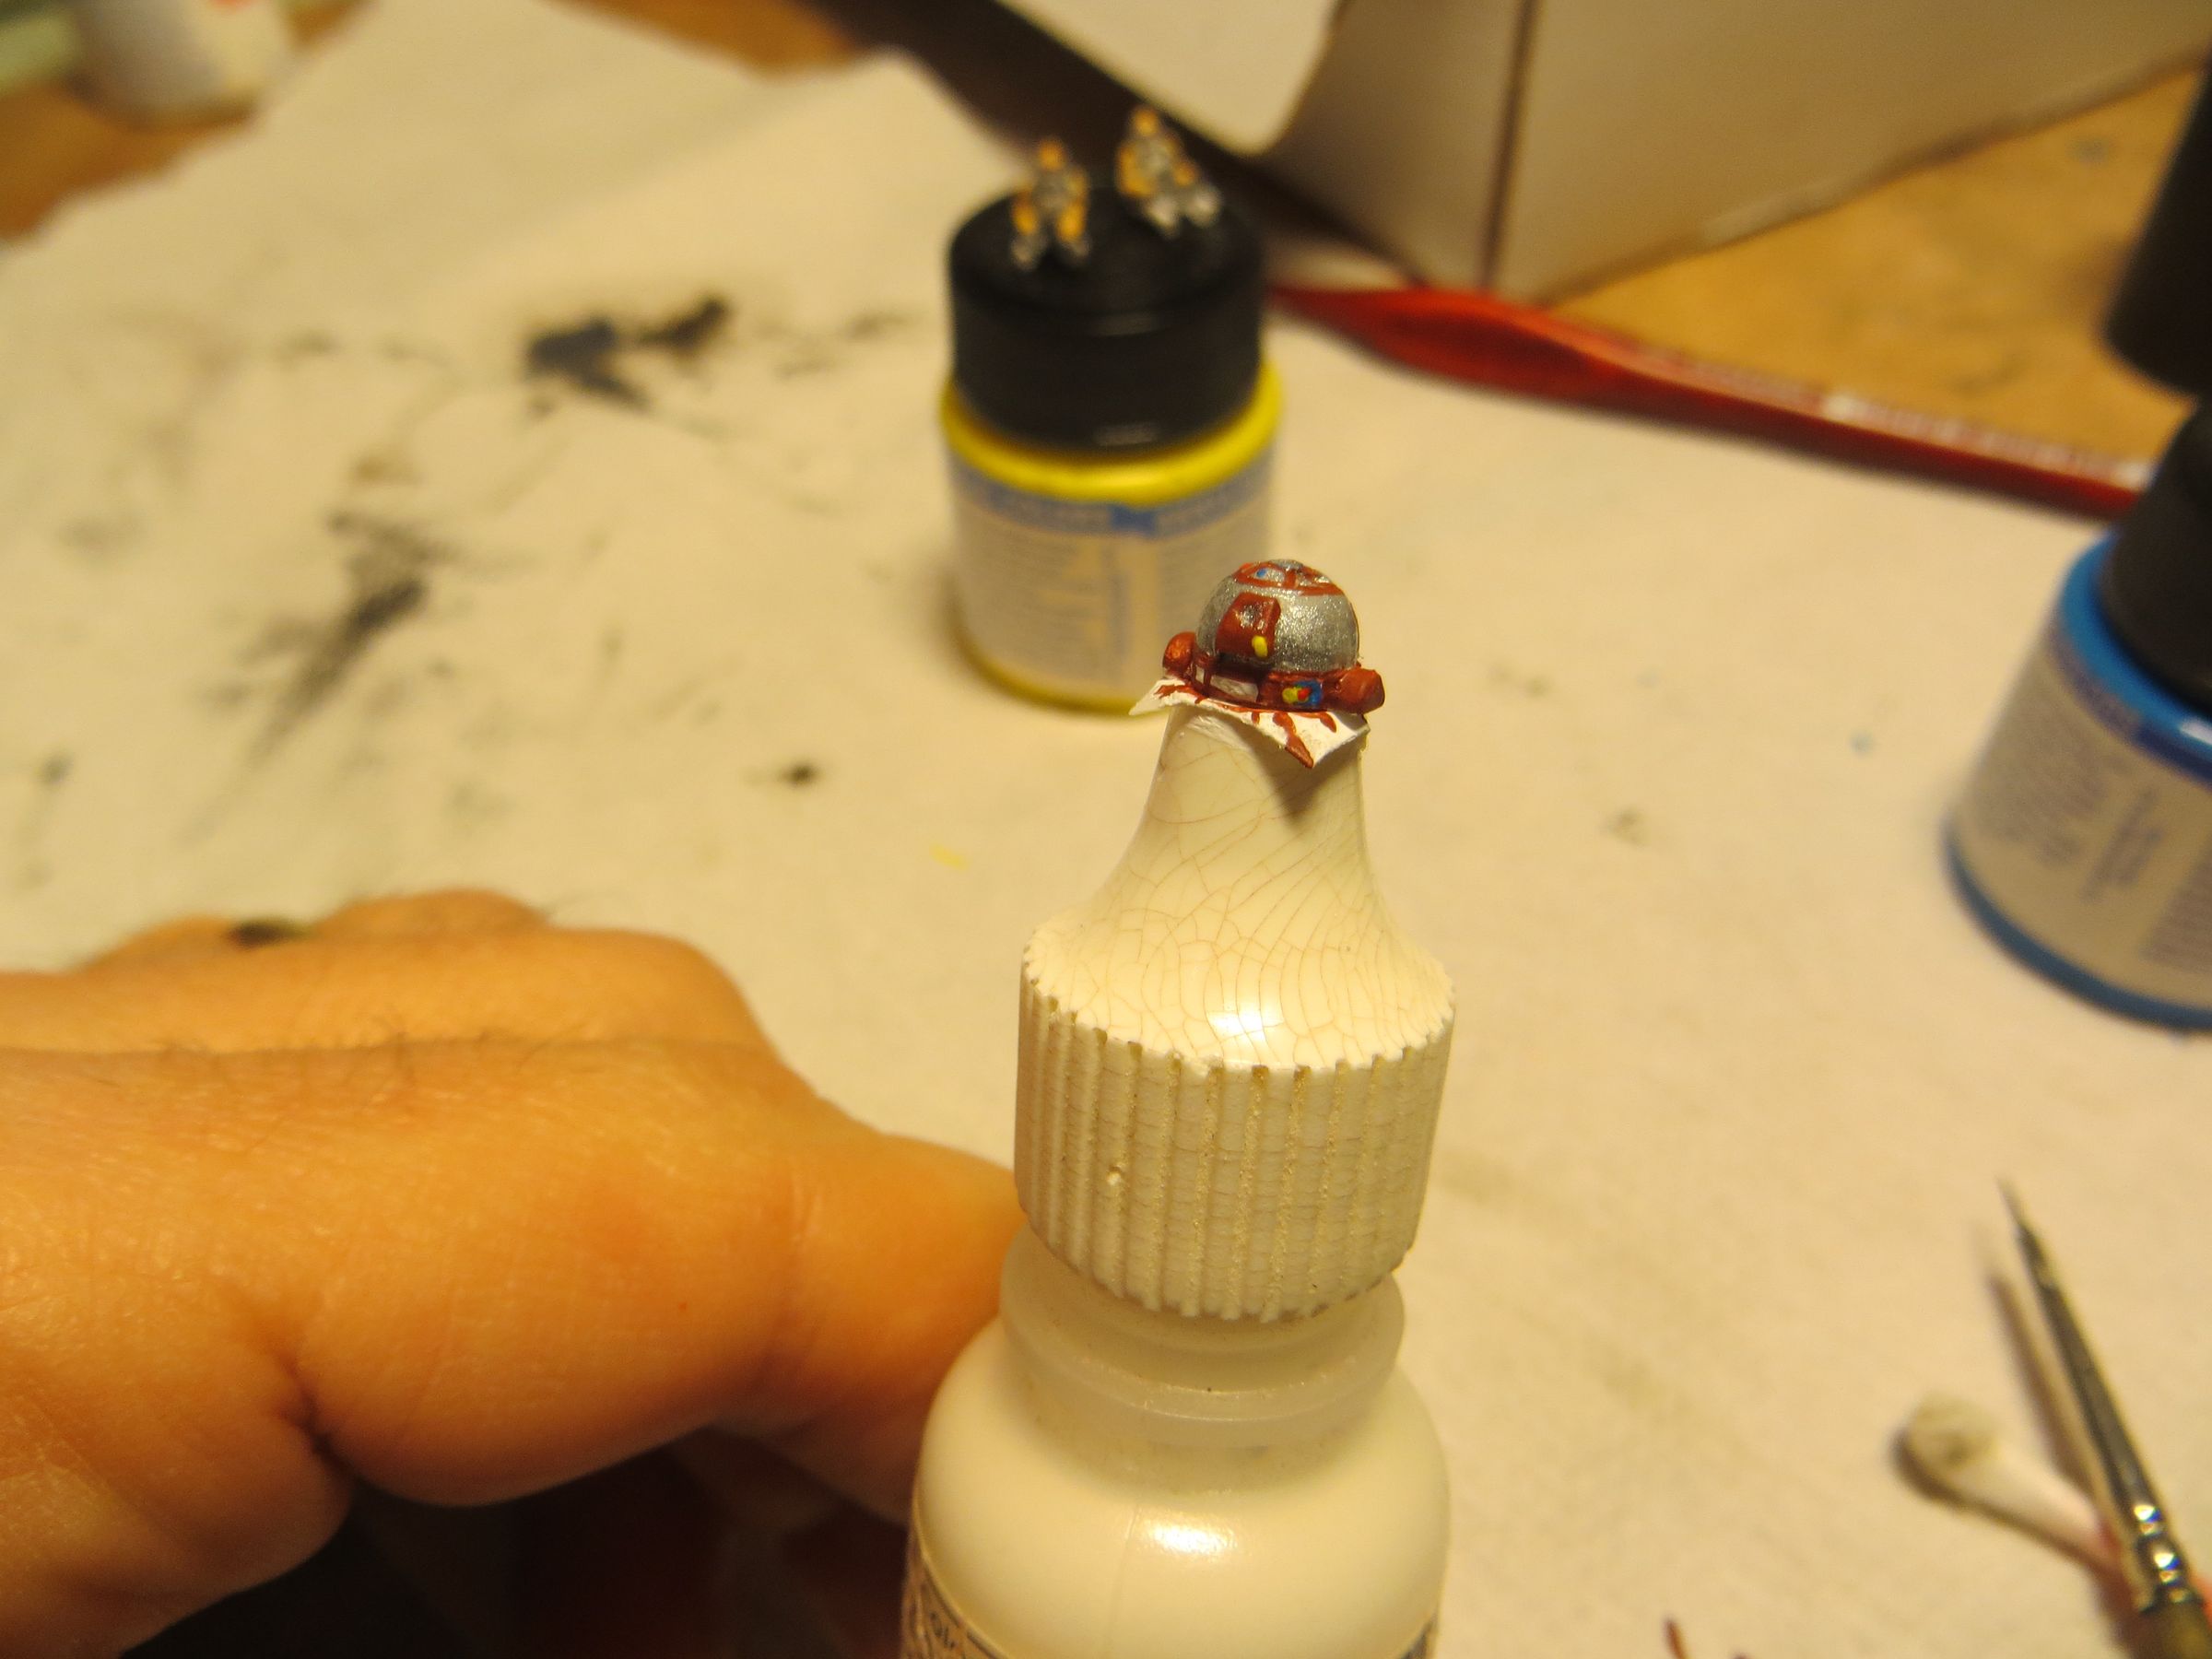
and the R2 unit
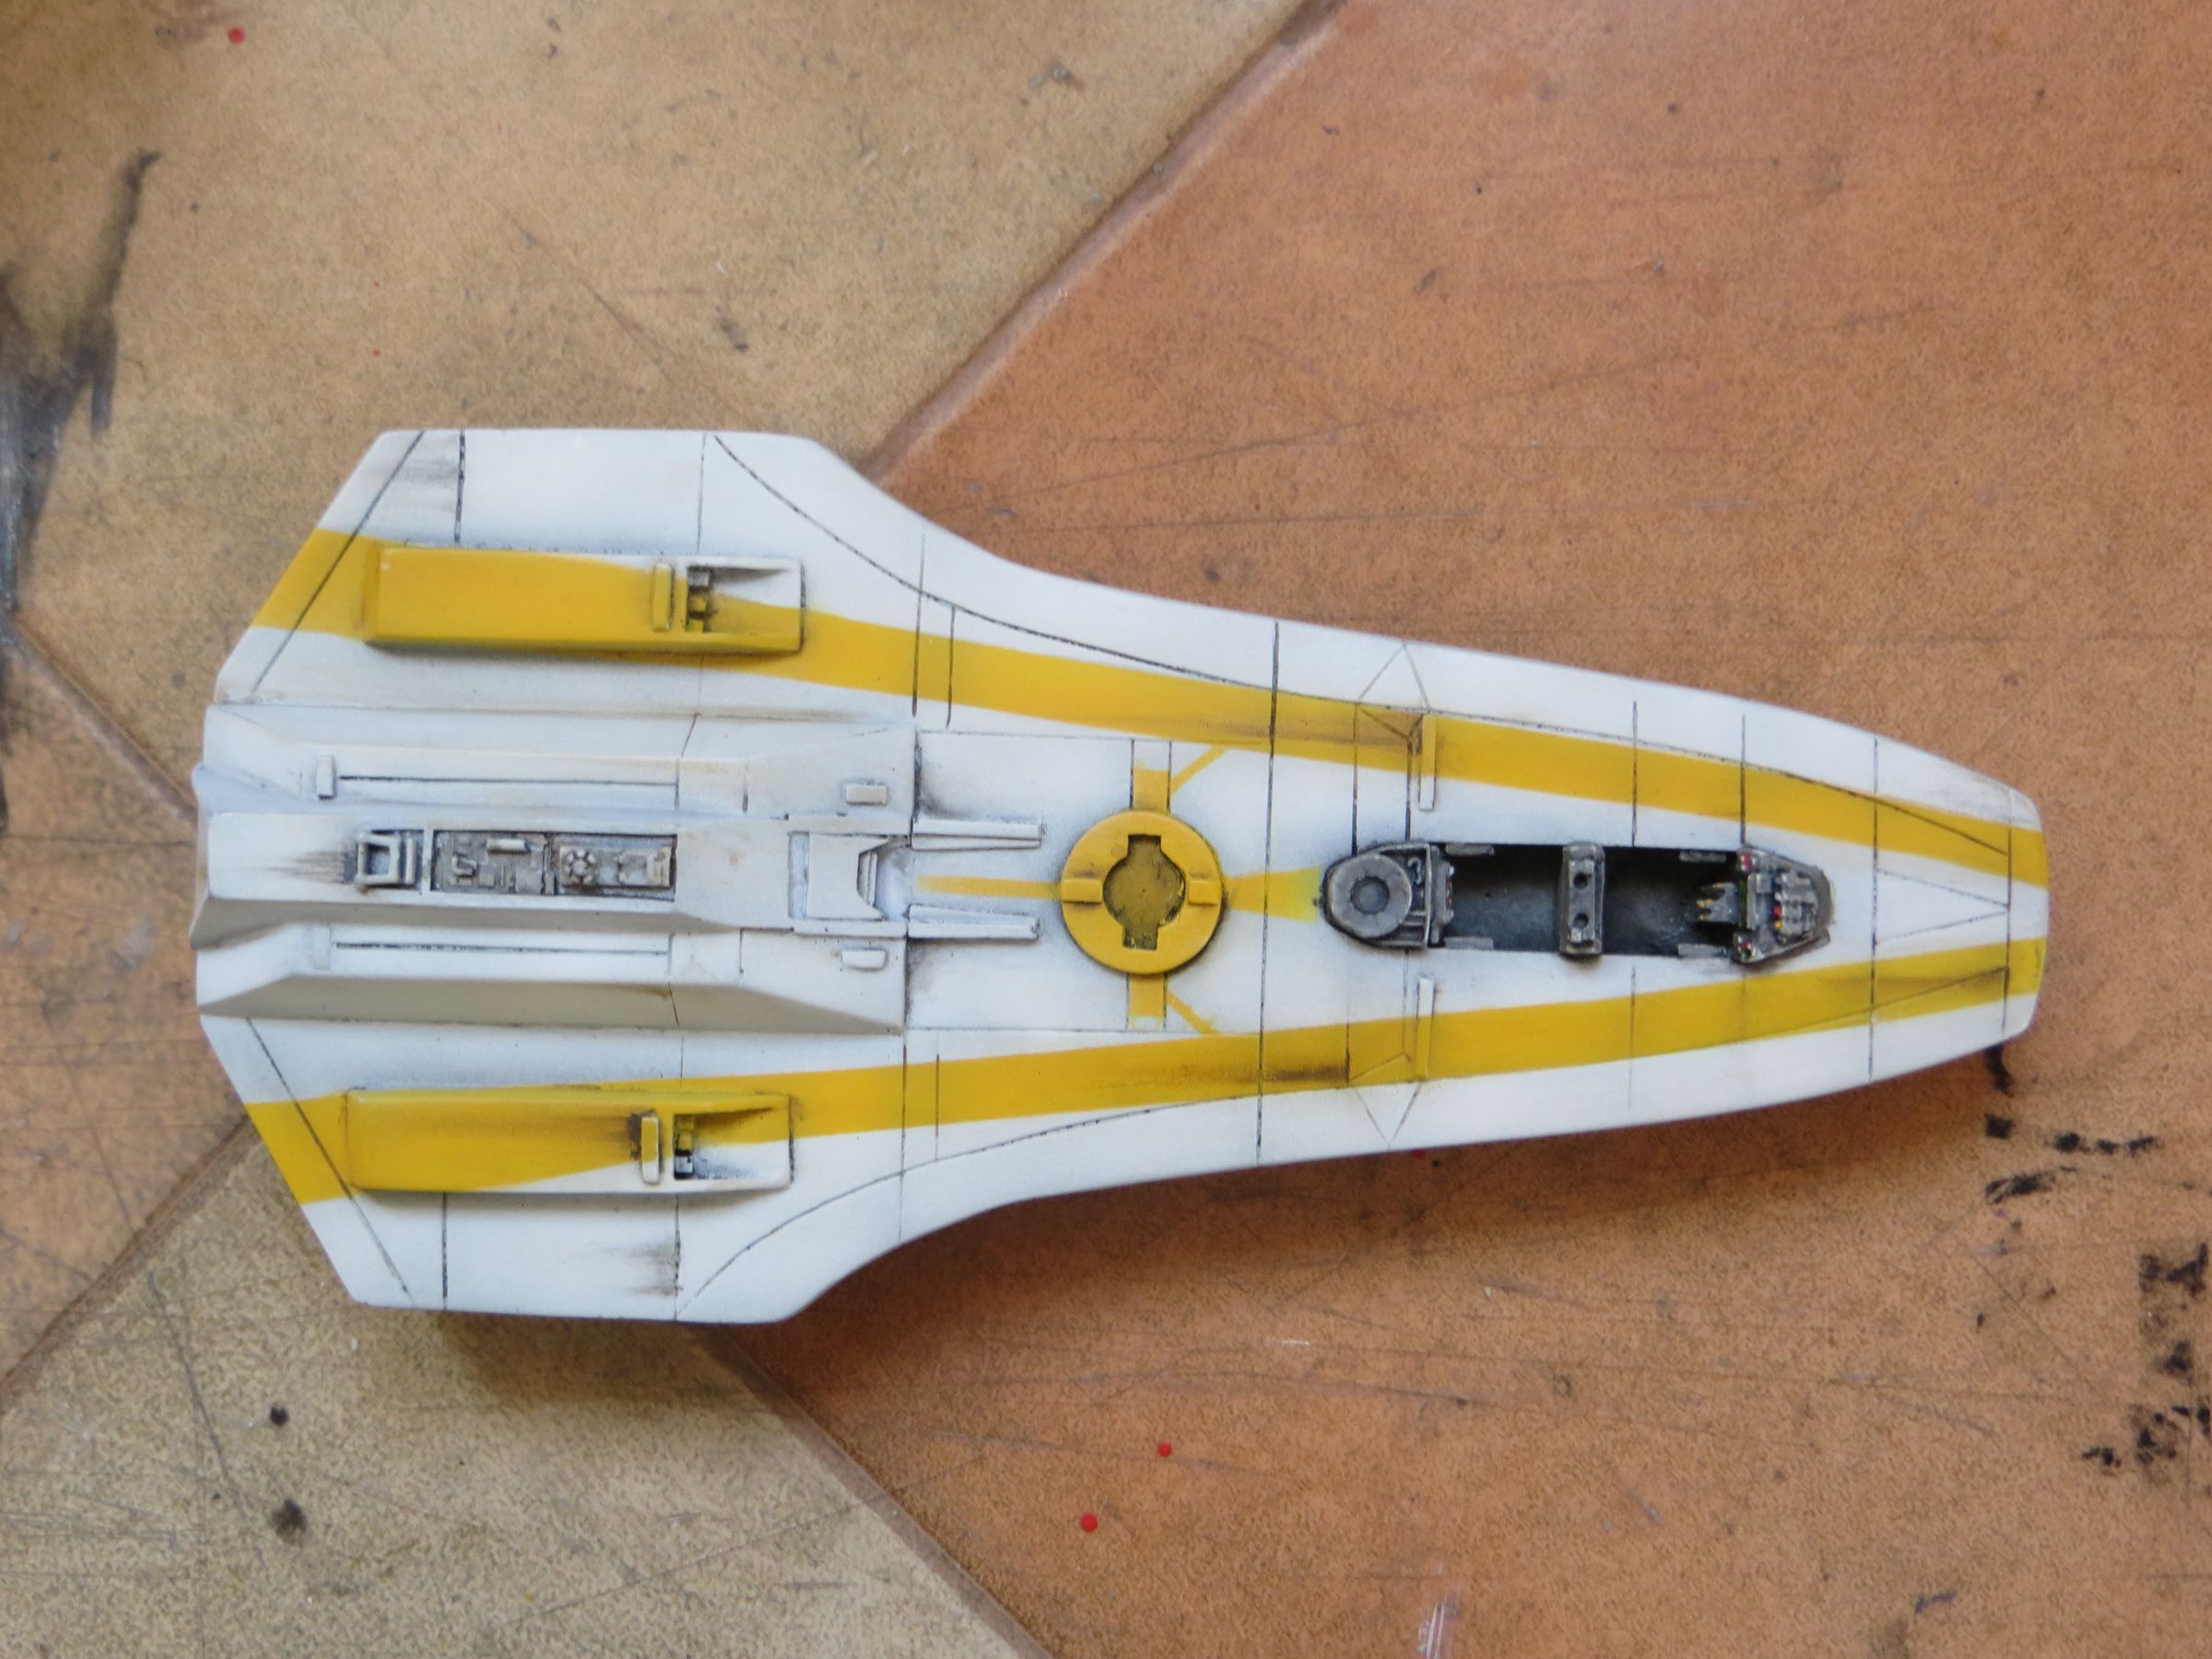
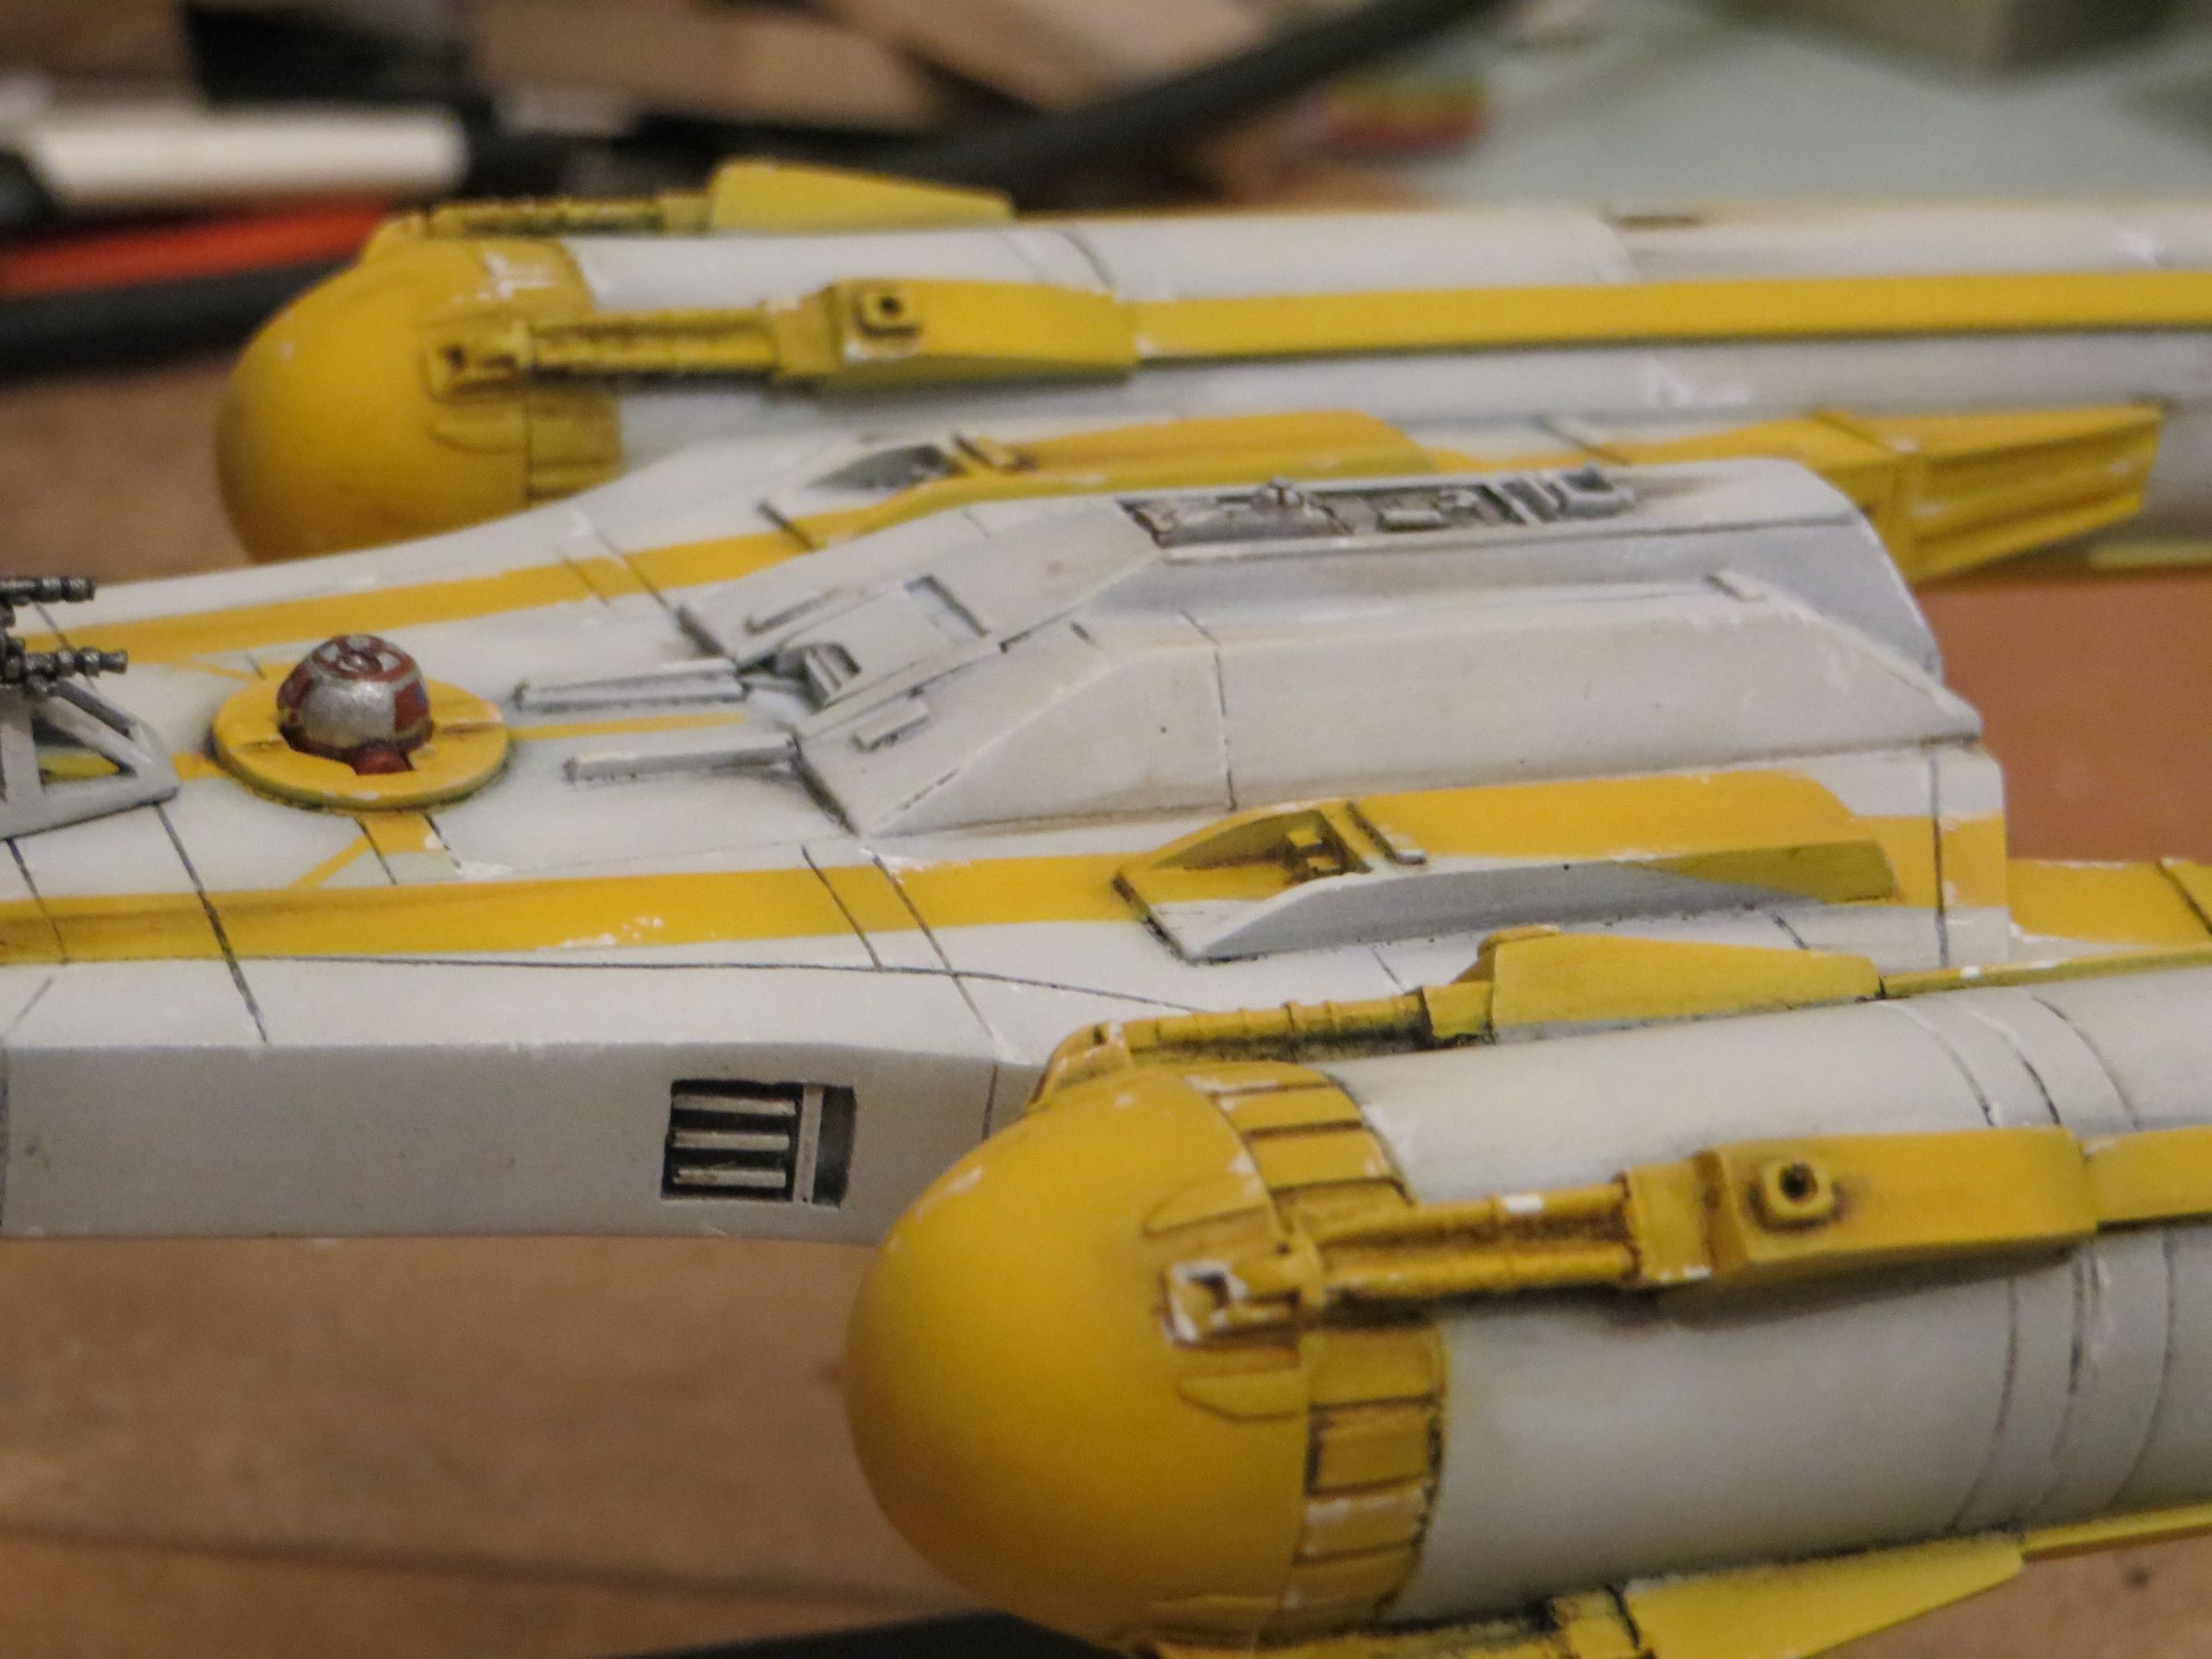
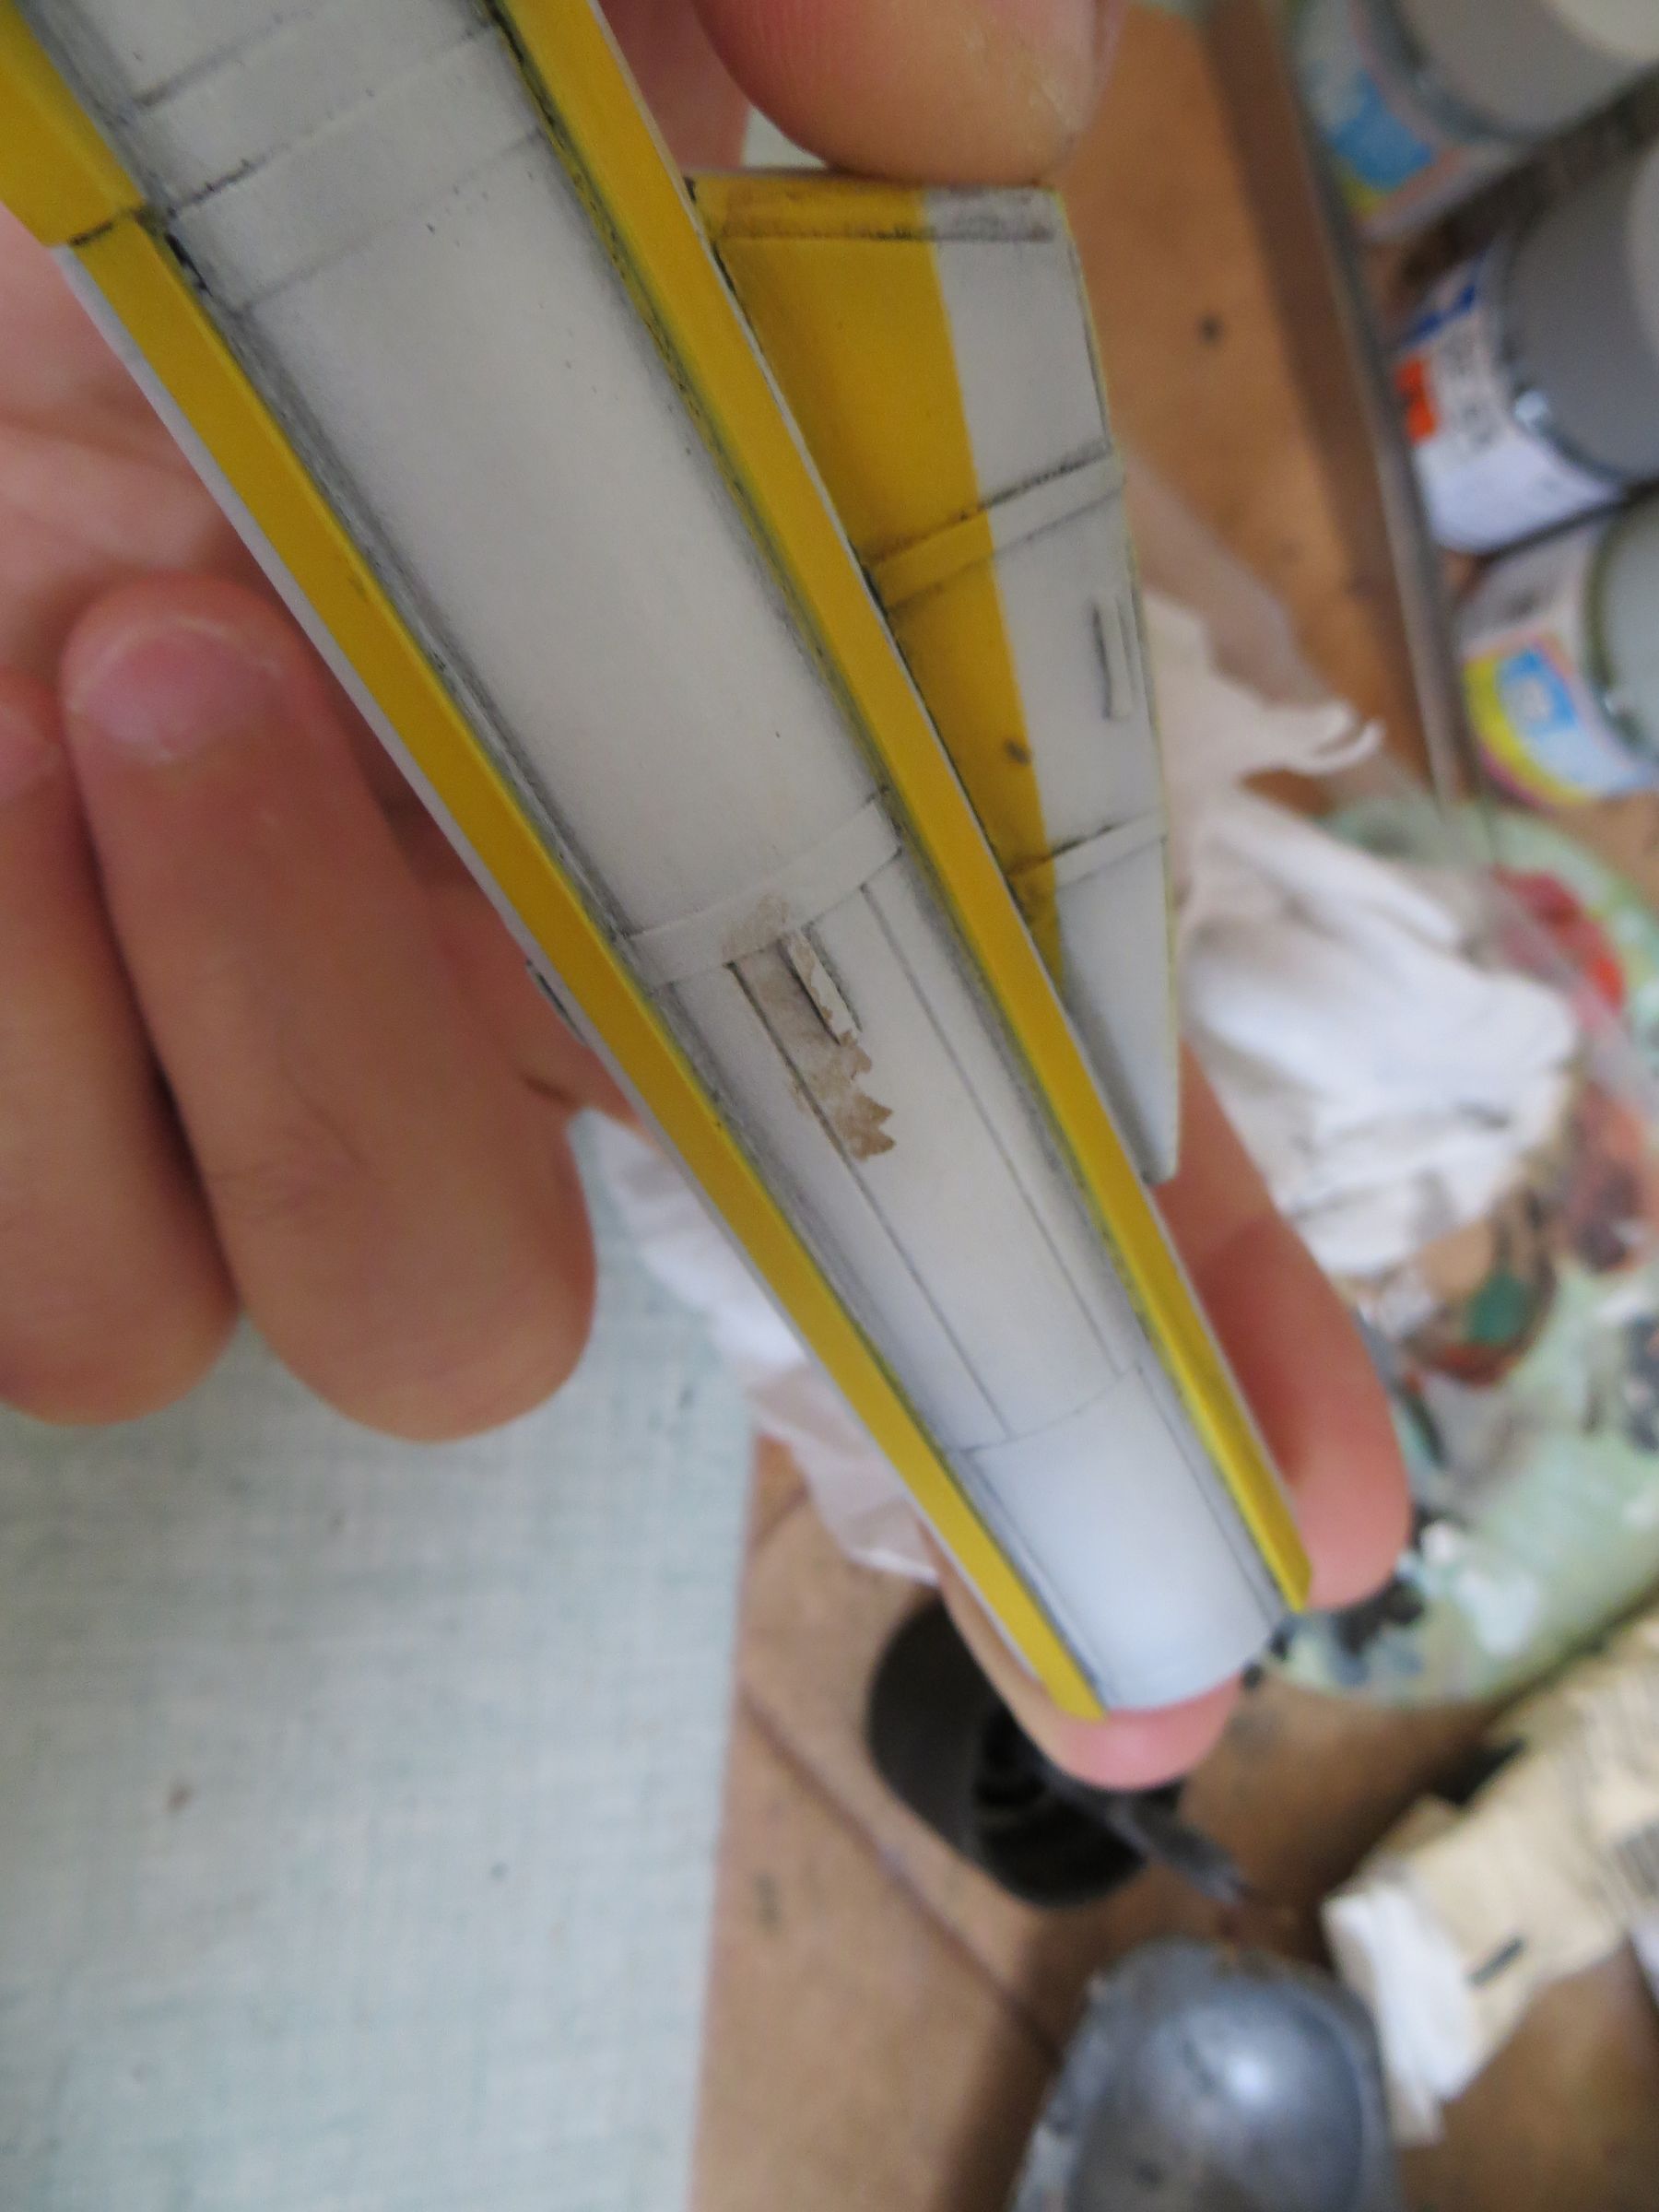
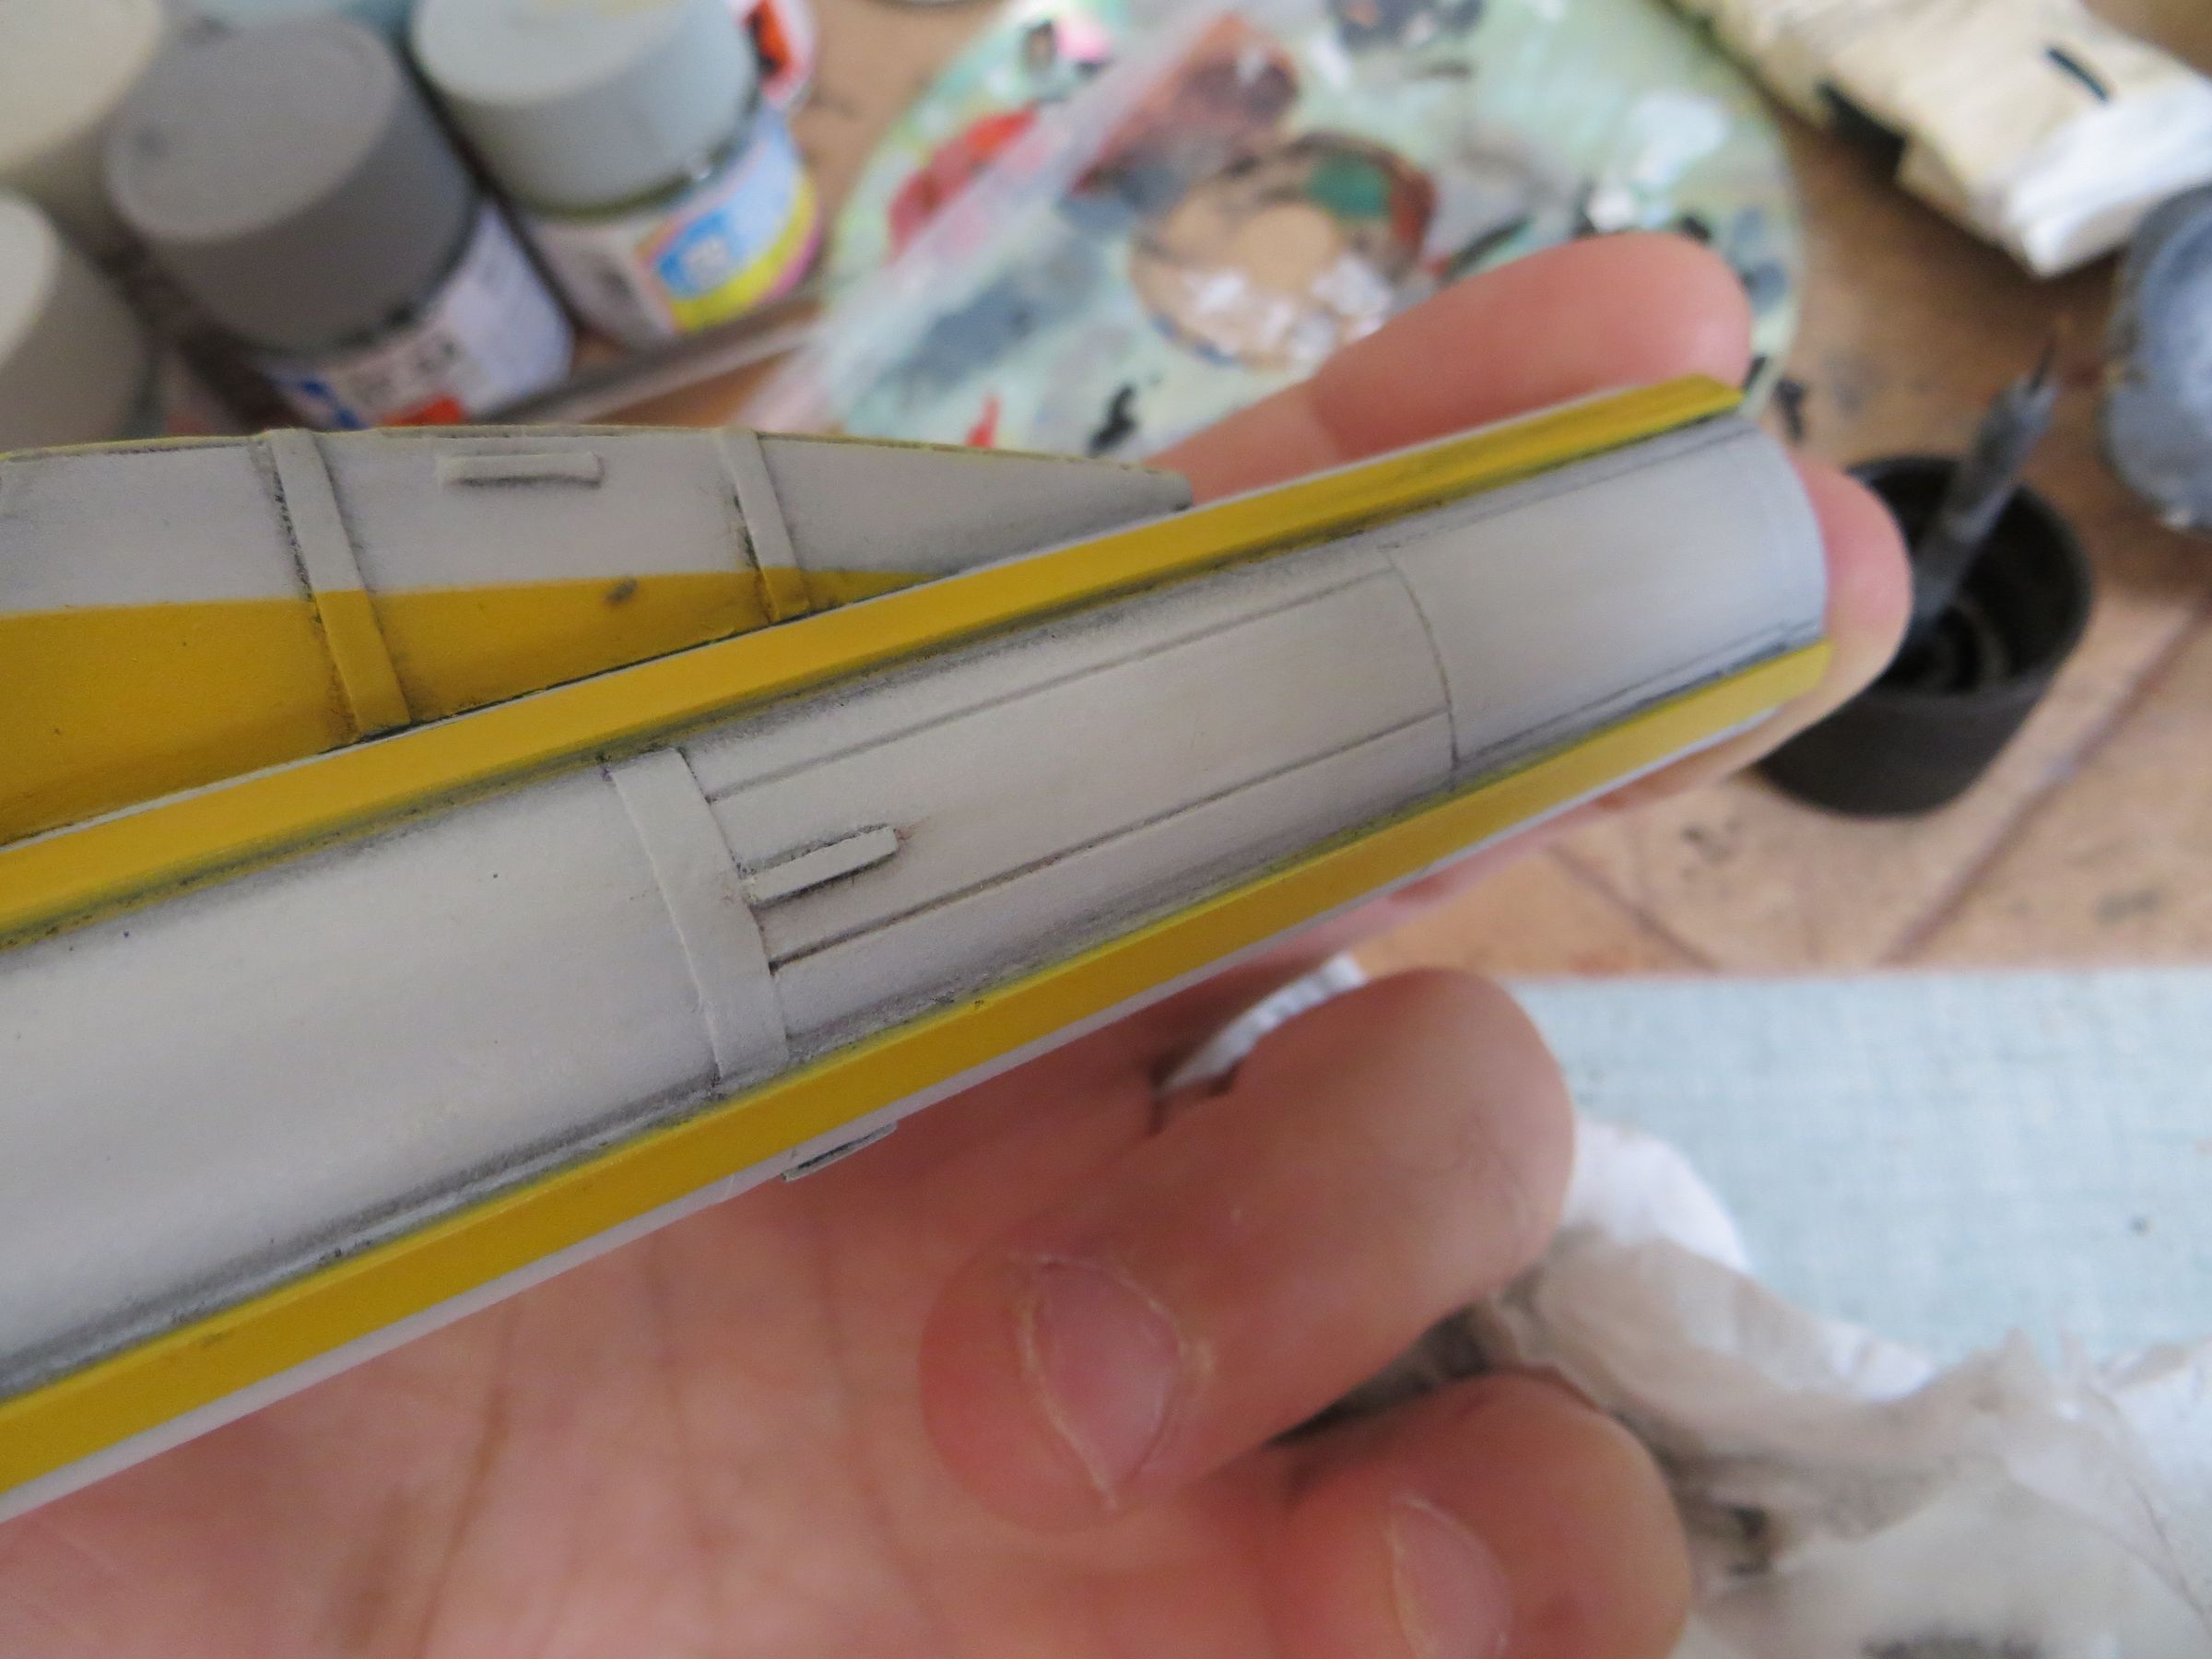
Then I did tiny white paint chips, which adds a very interesting aspect to the model (but very difficult to shot with the camera)

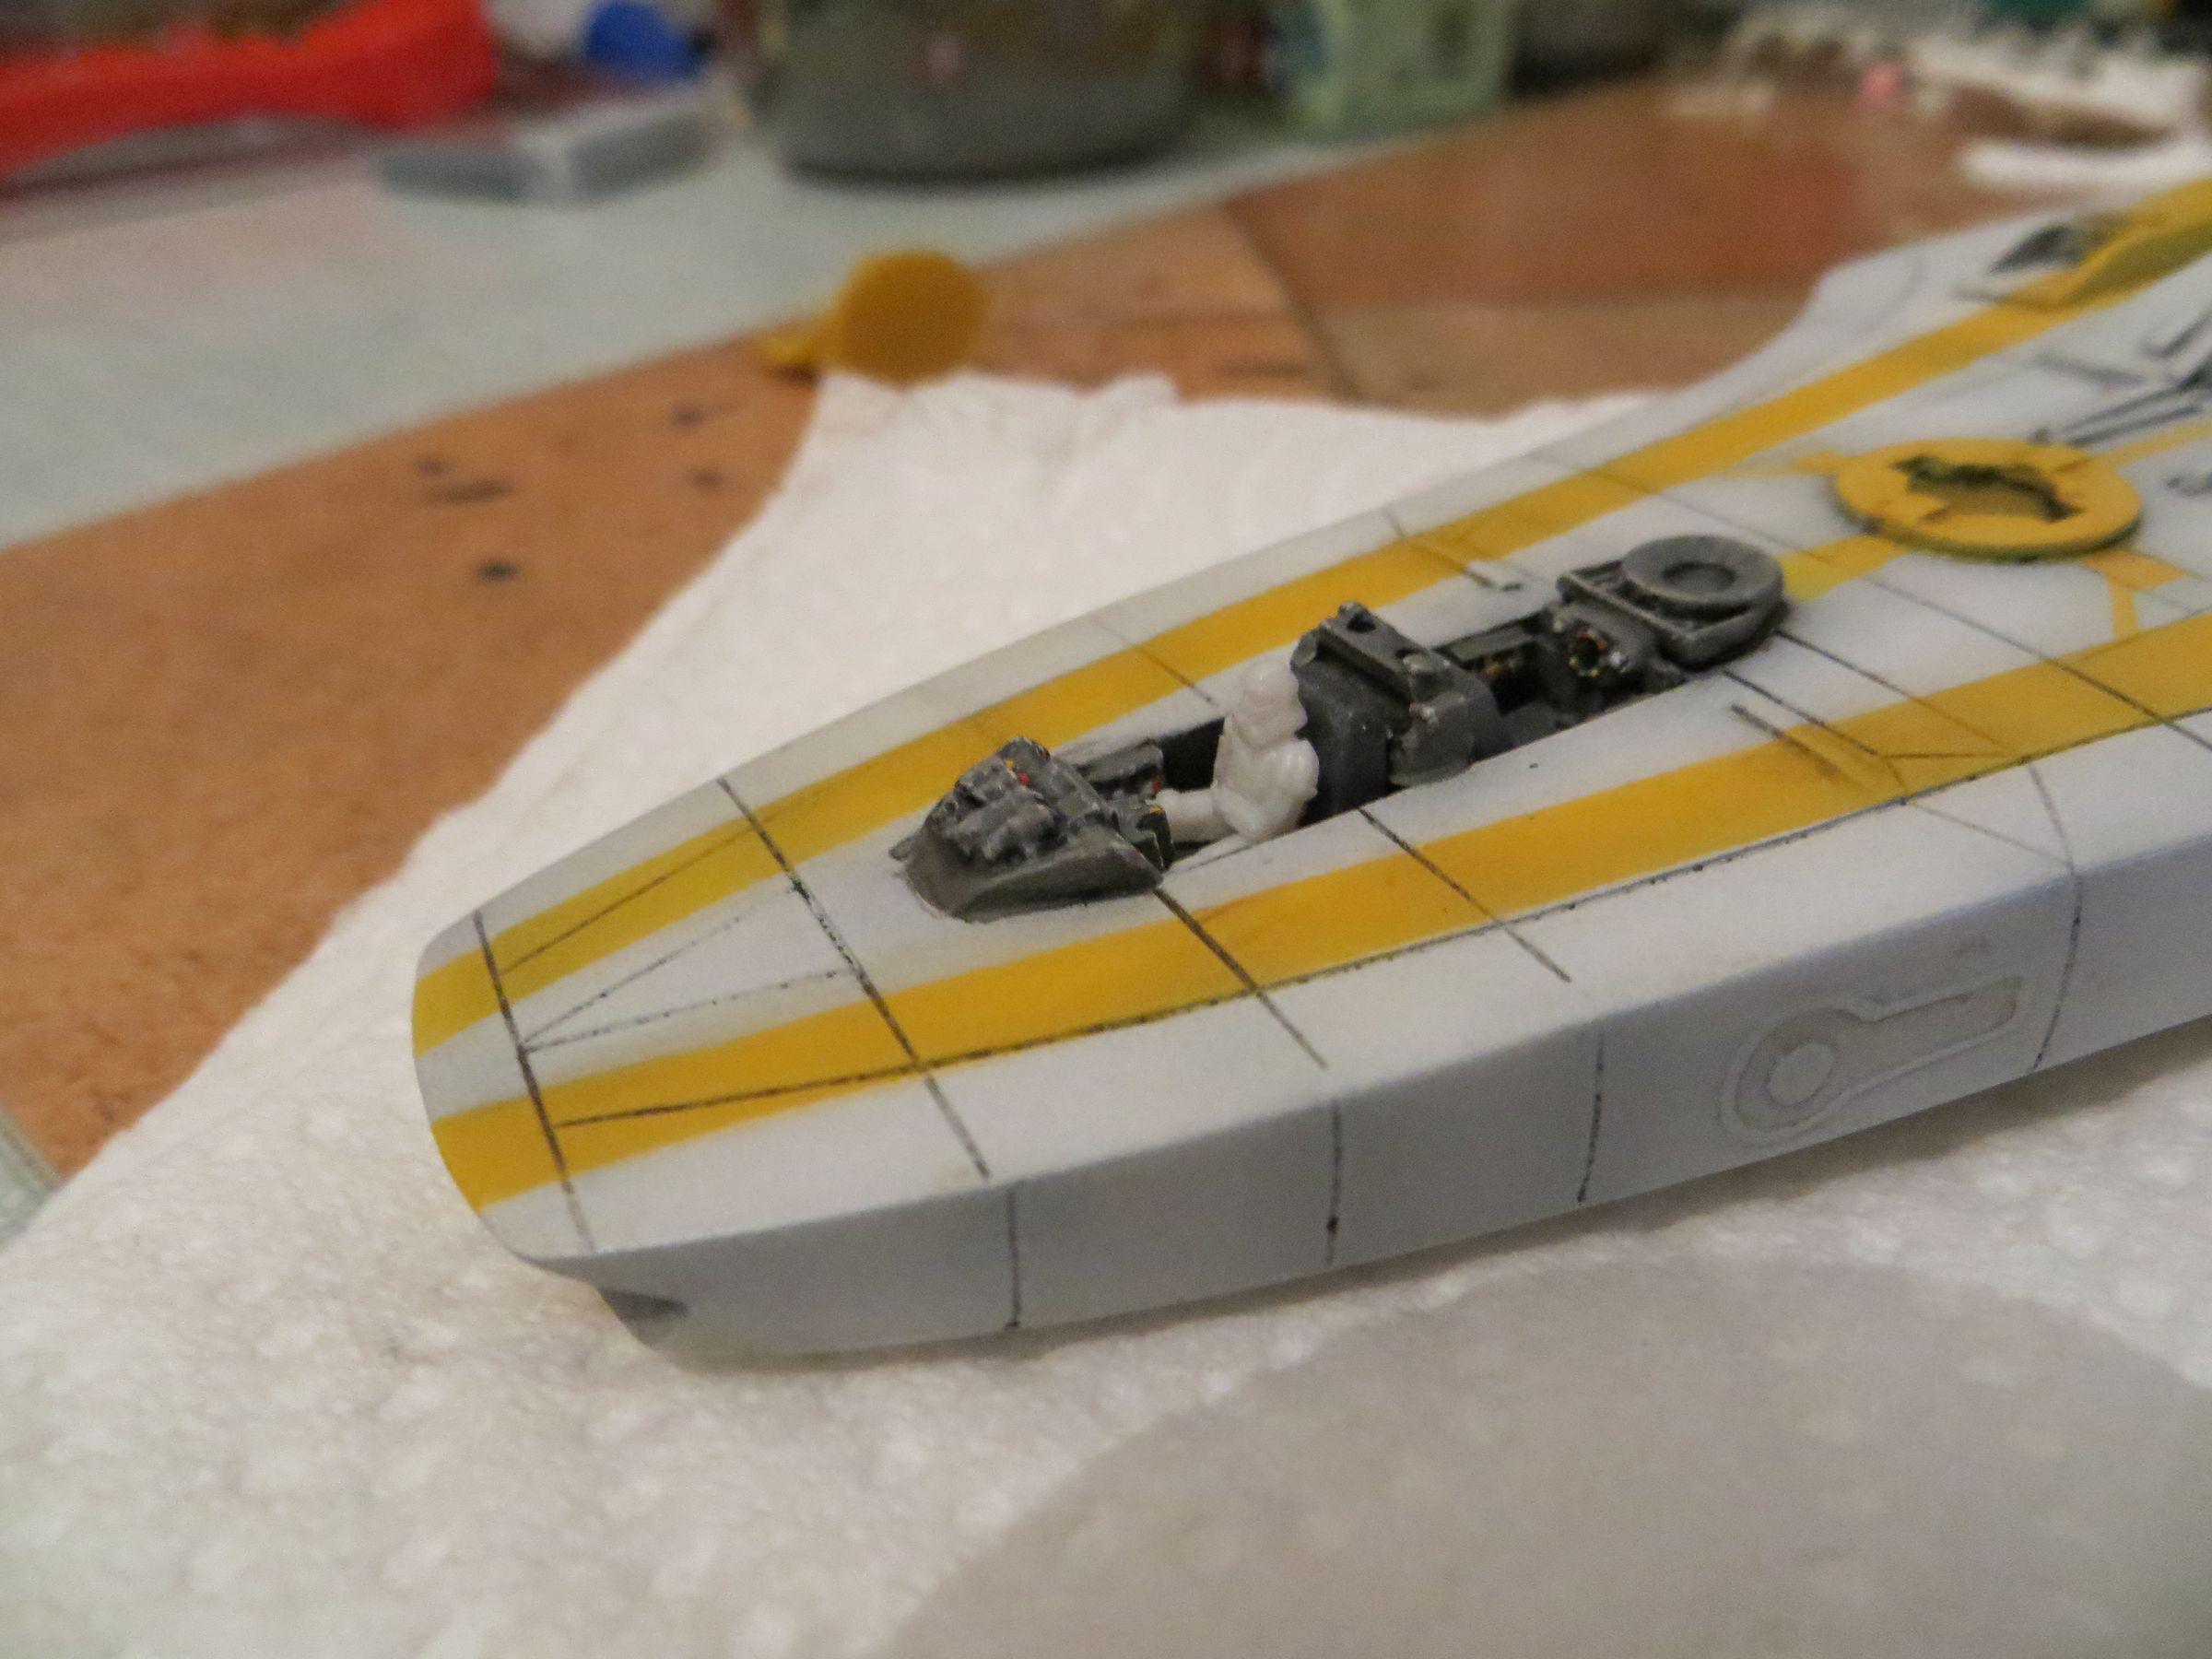
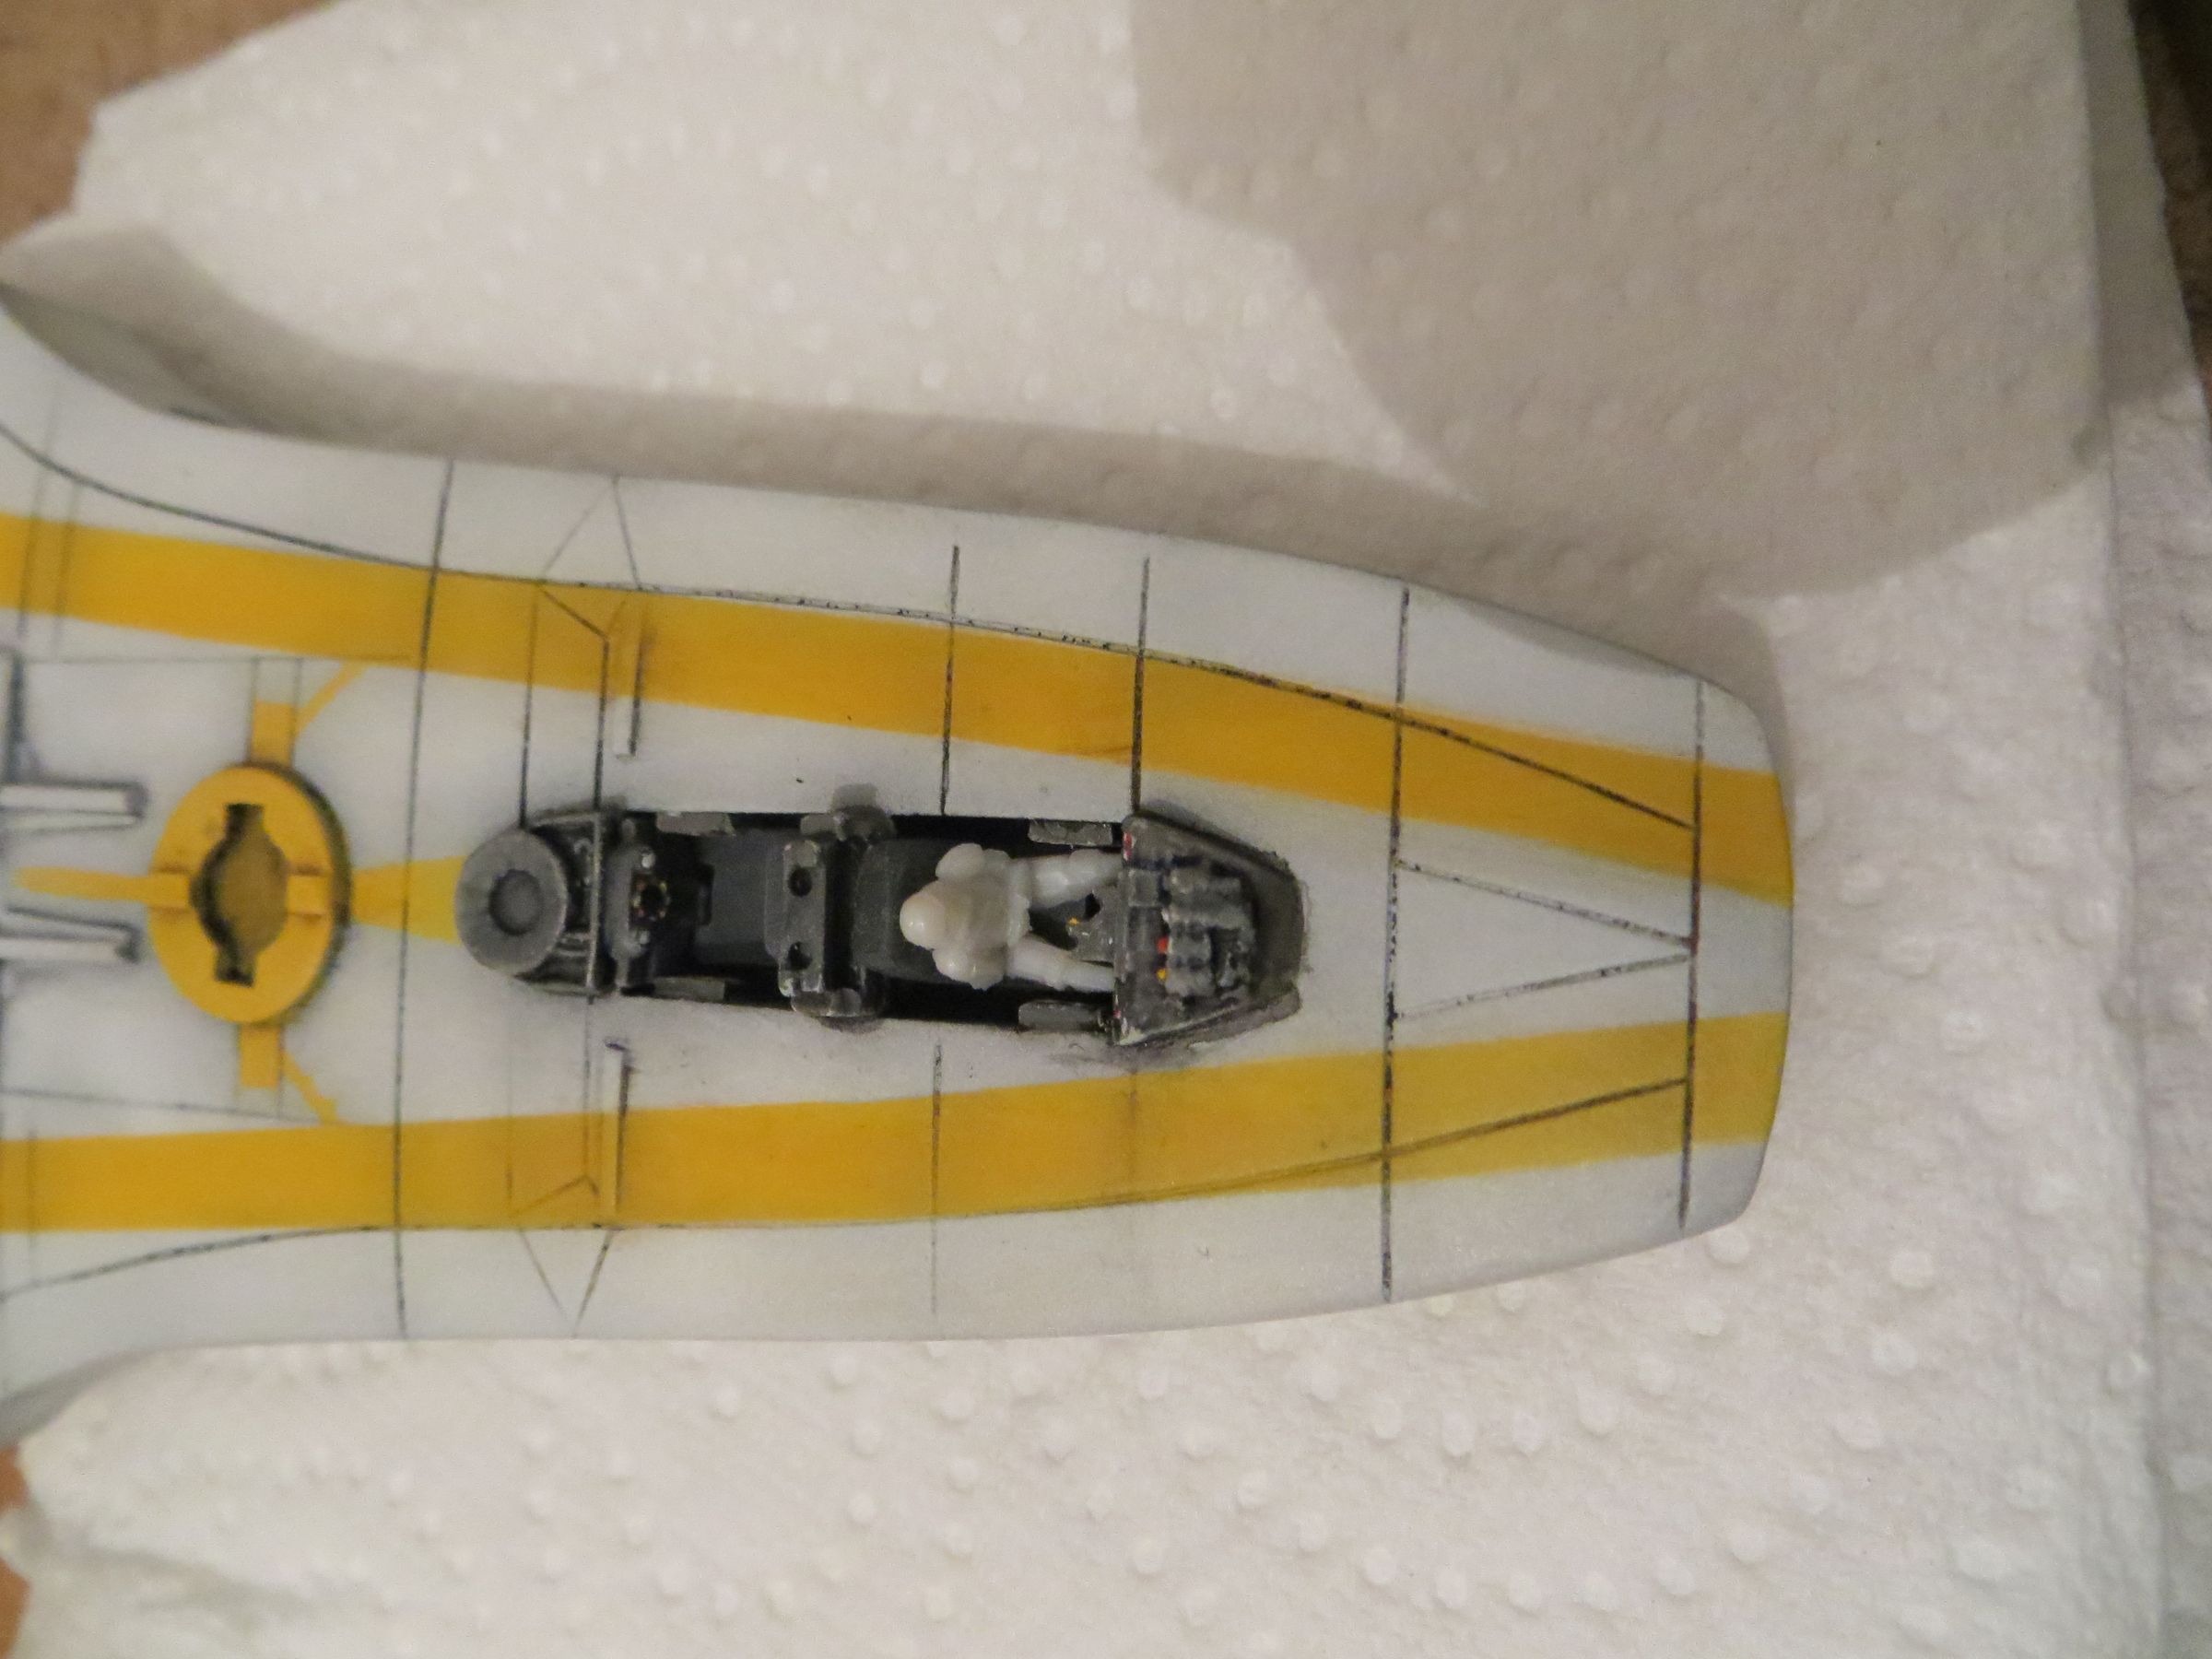
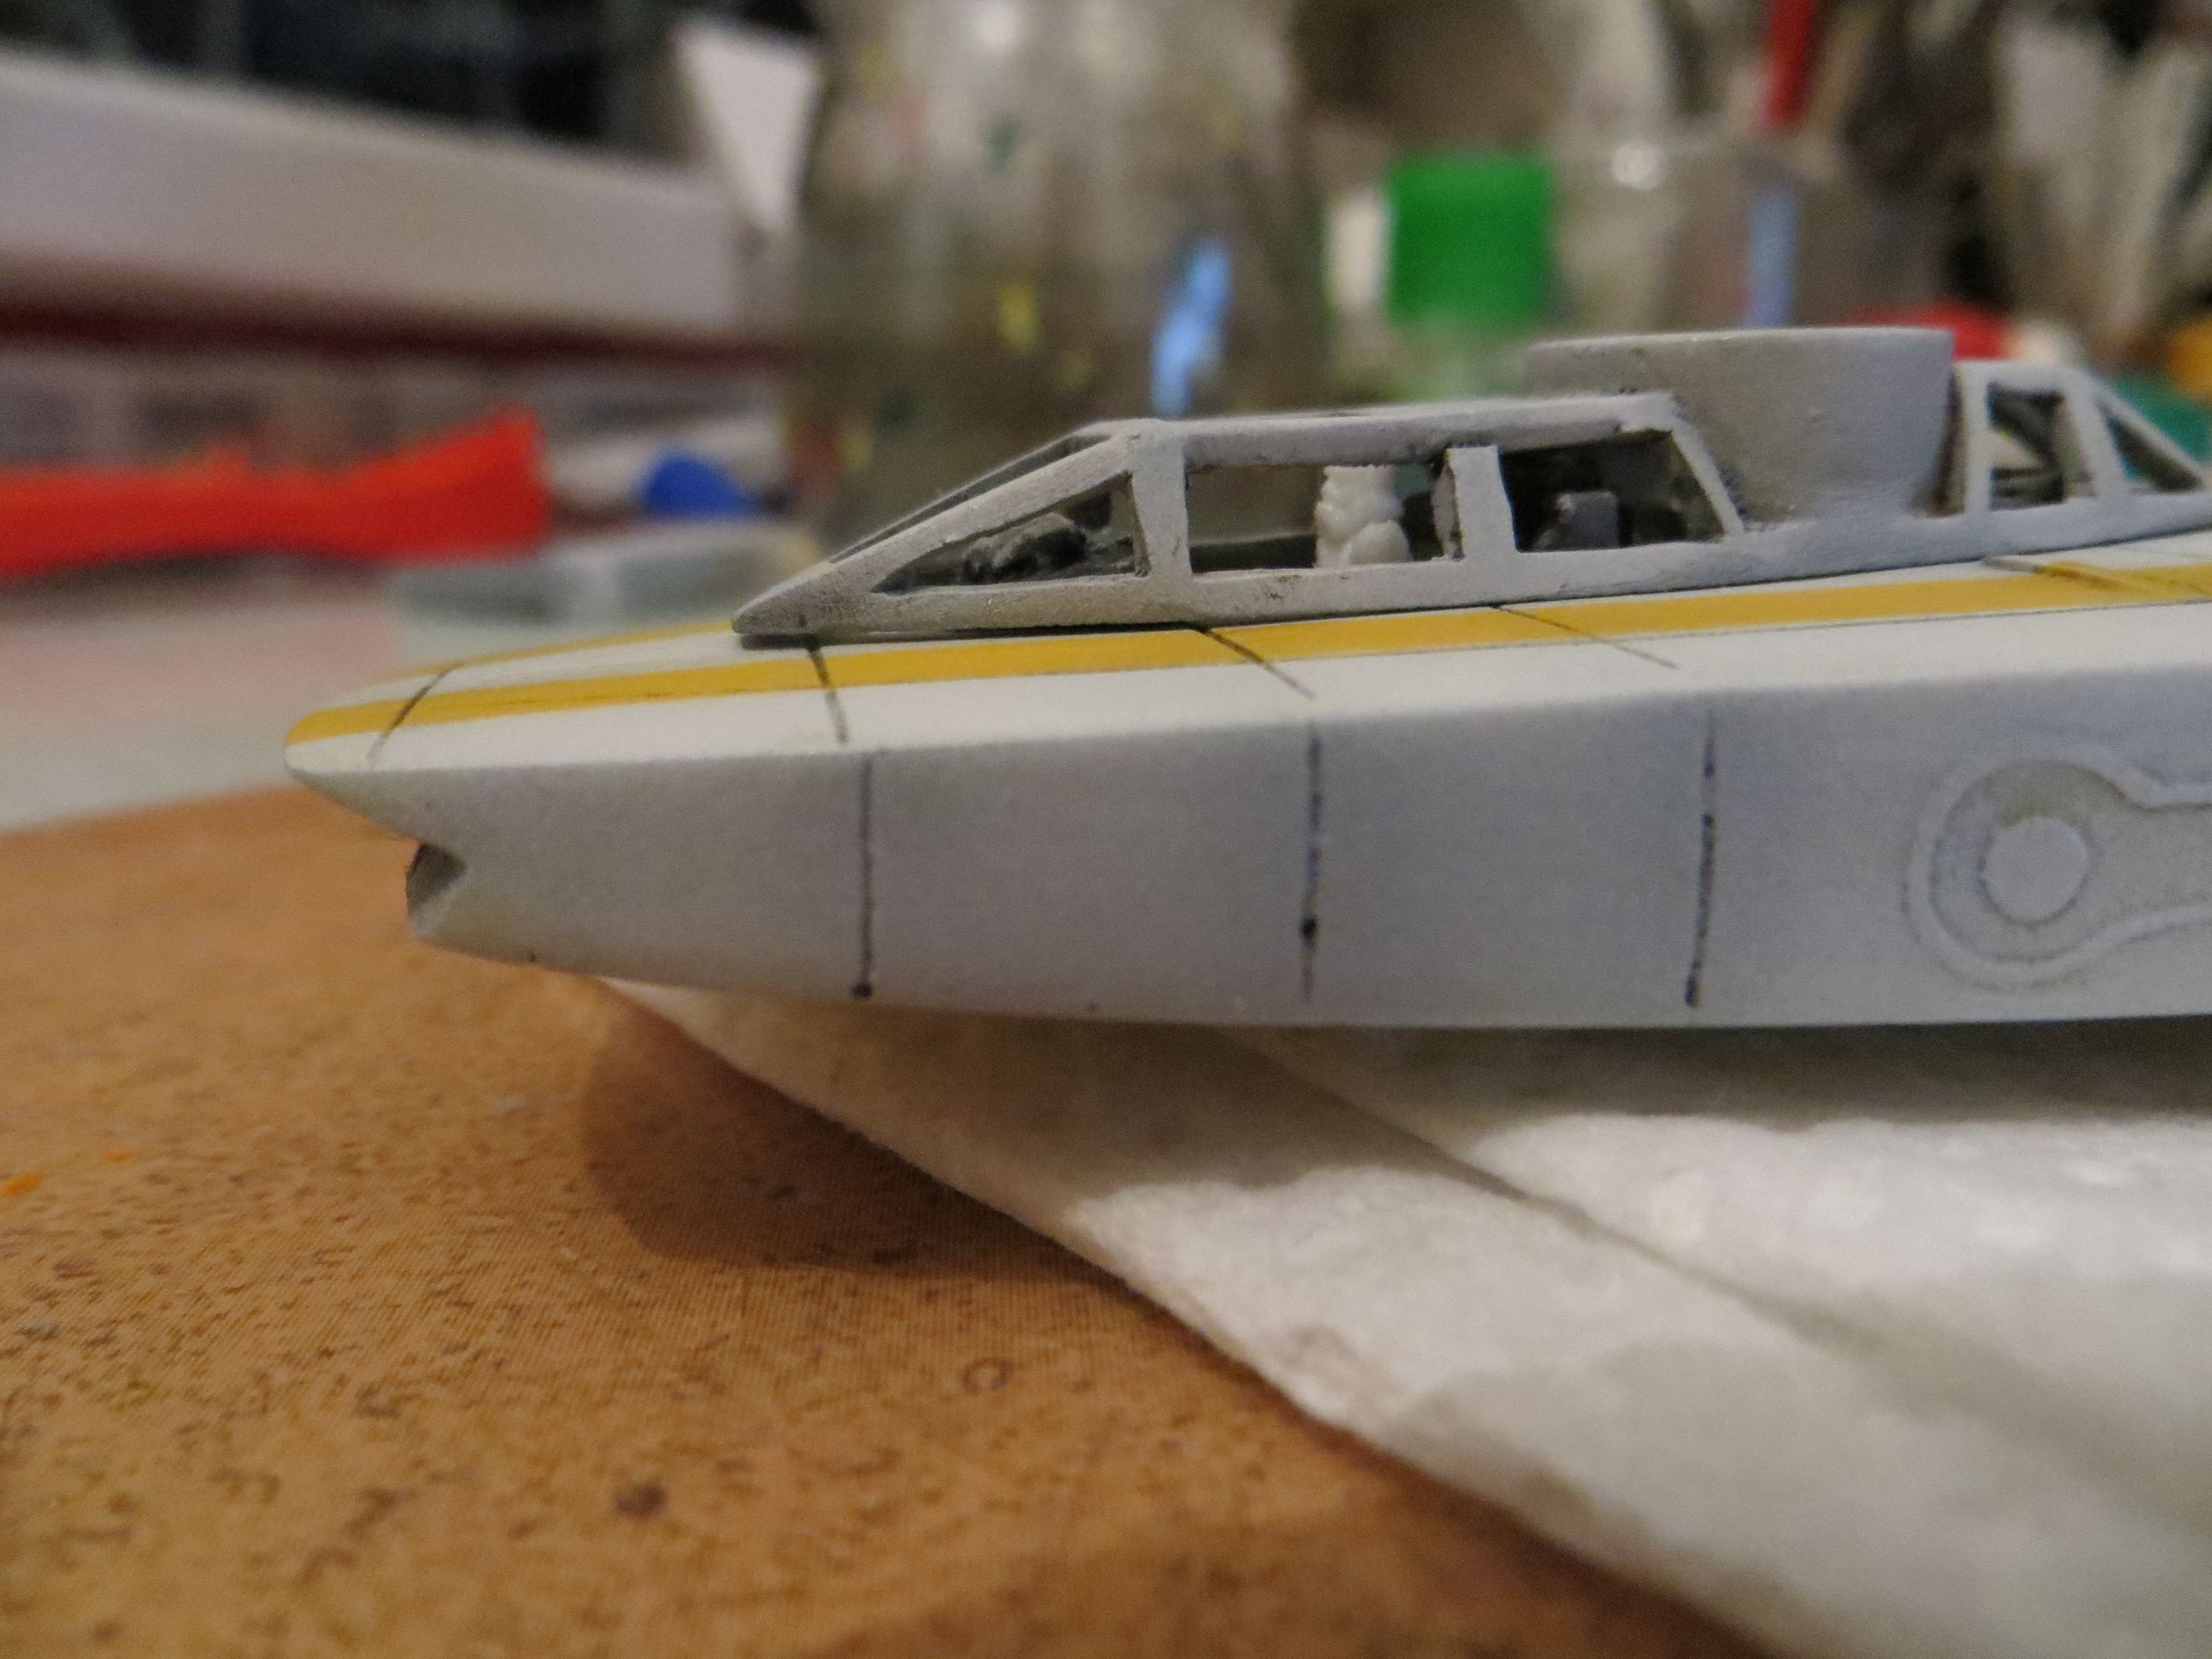
After bonding the engines along the fuselage, the seats and pilots are installed in the cockpit.
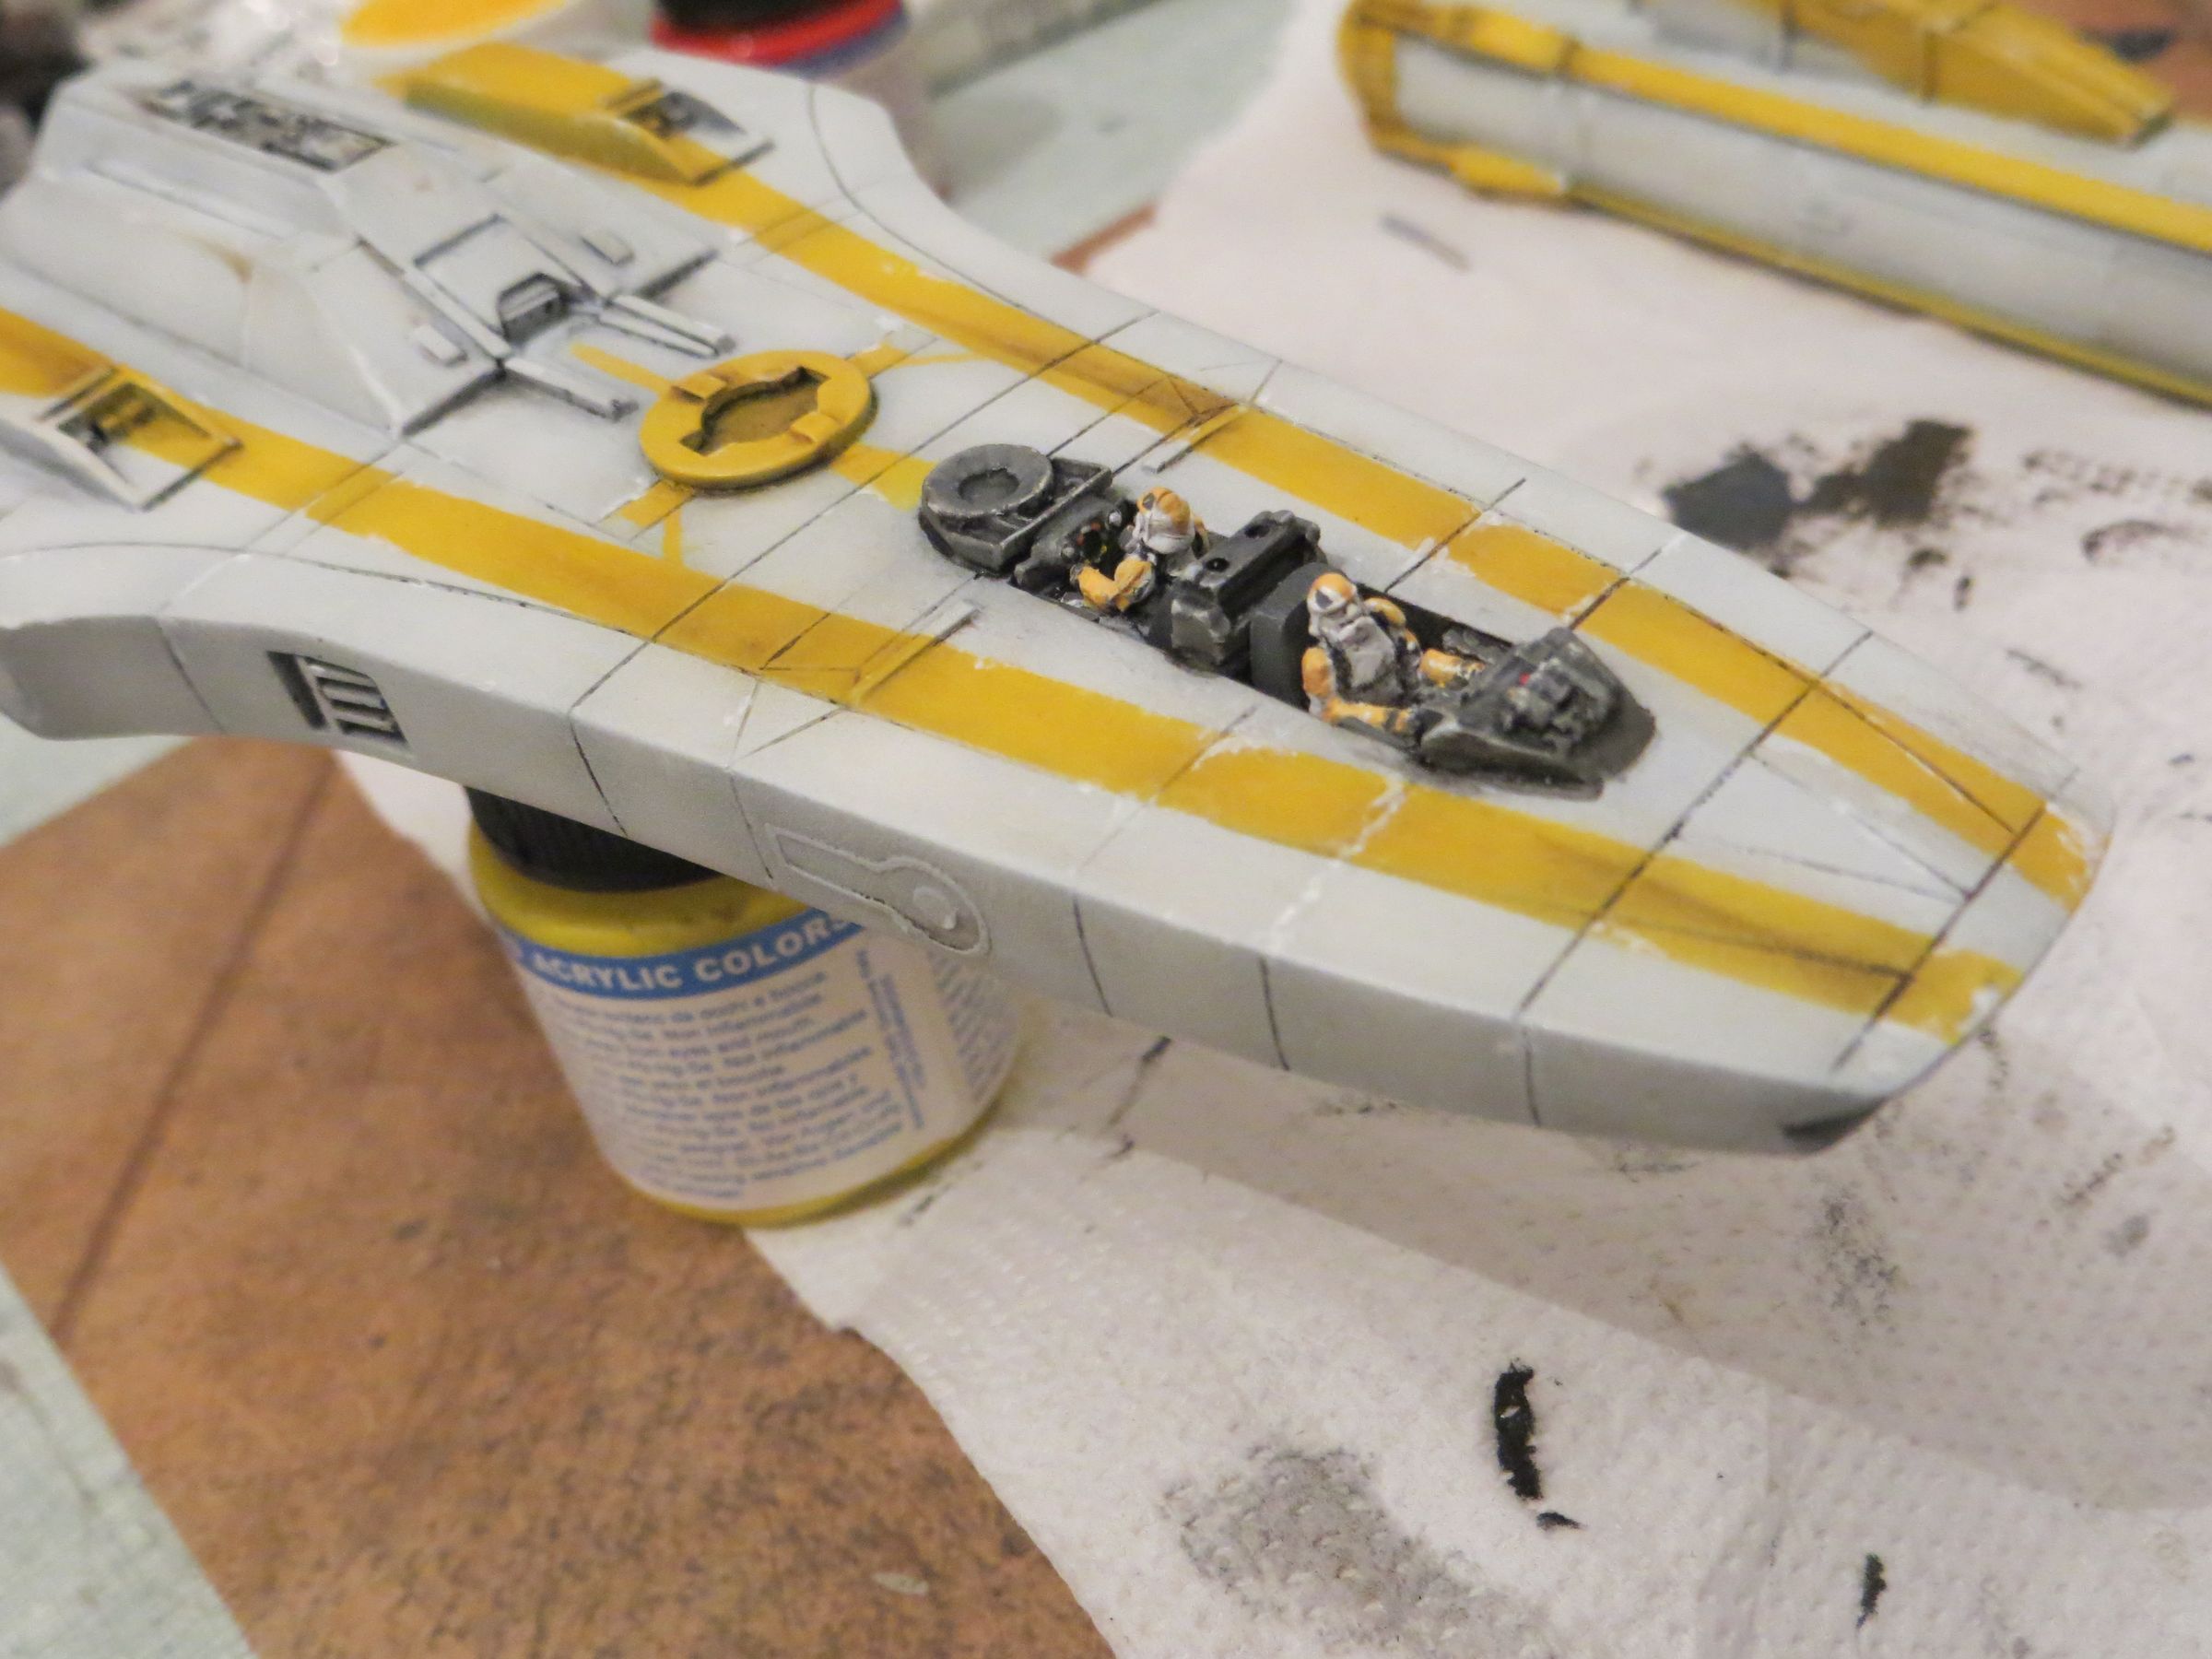

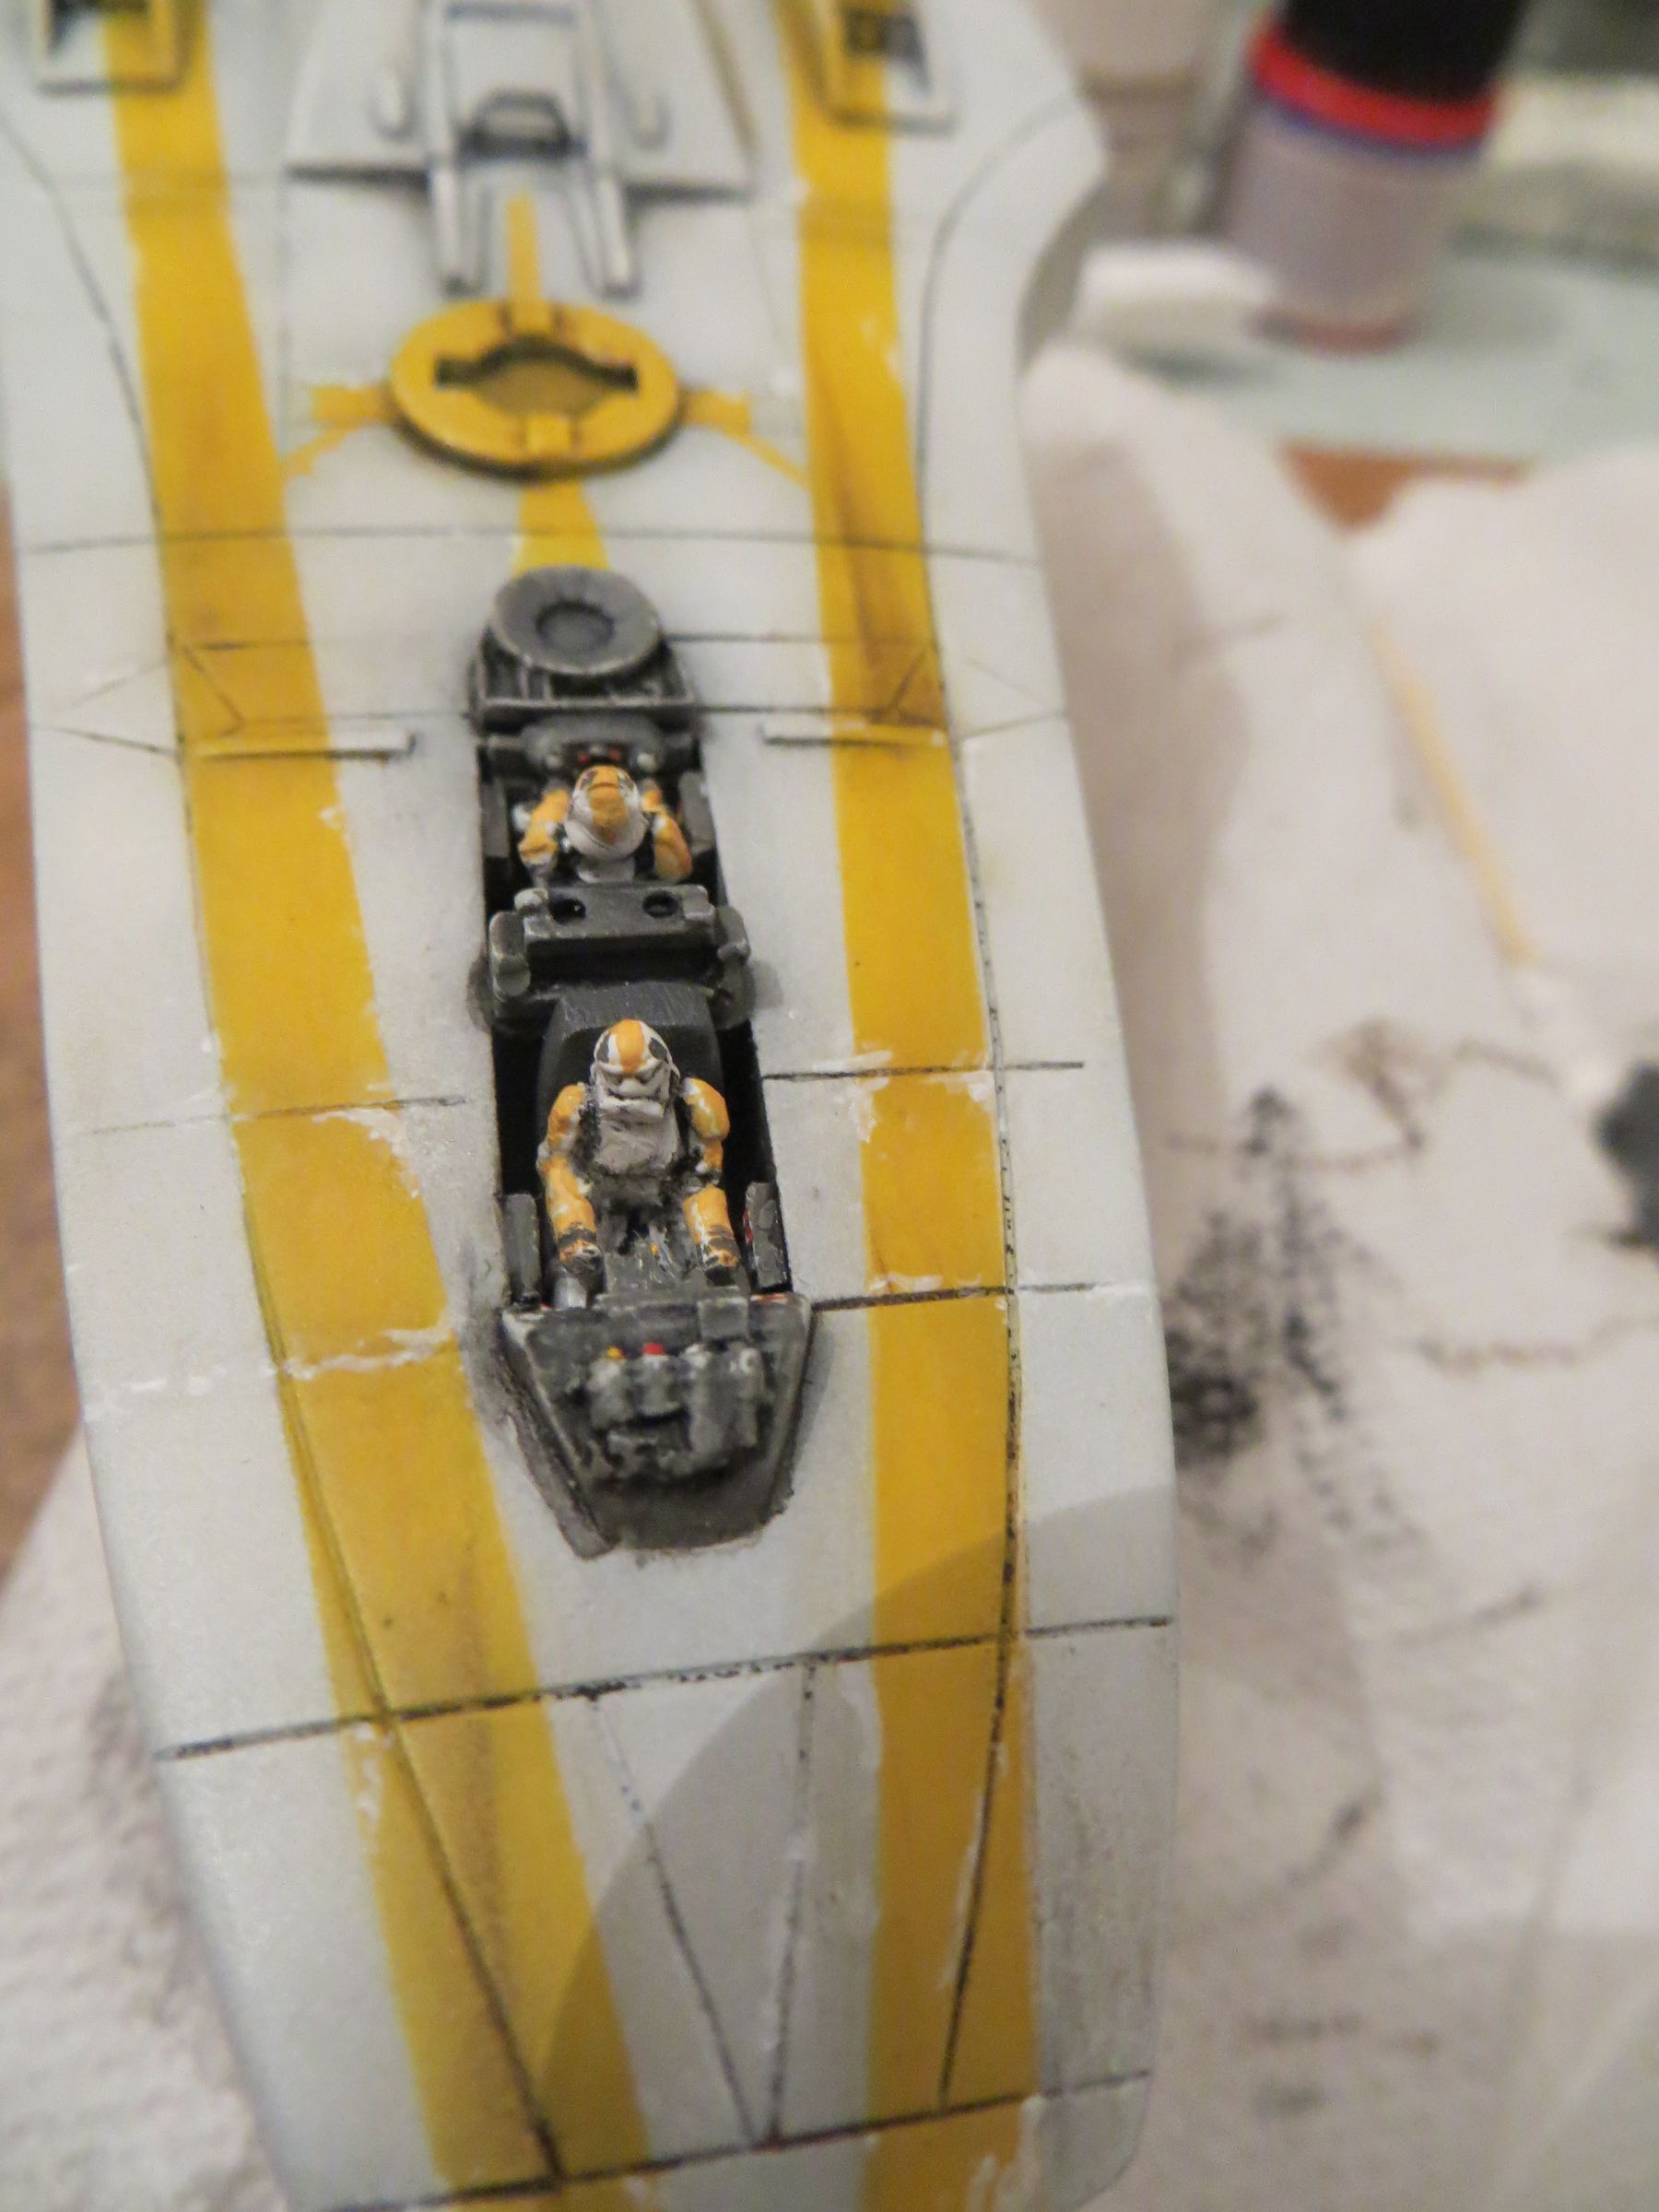
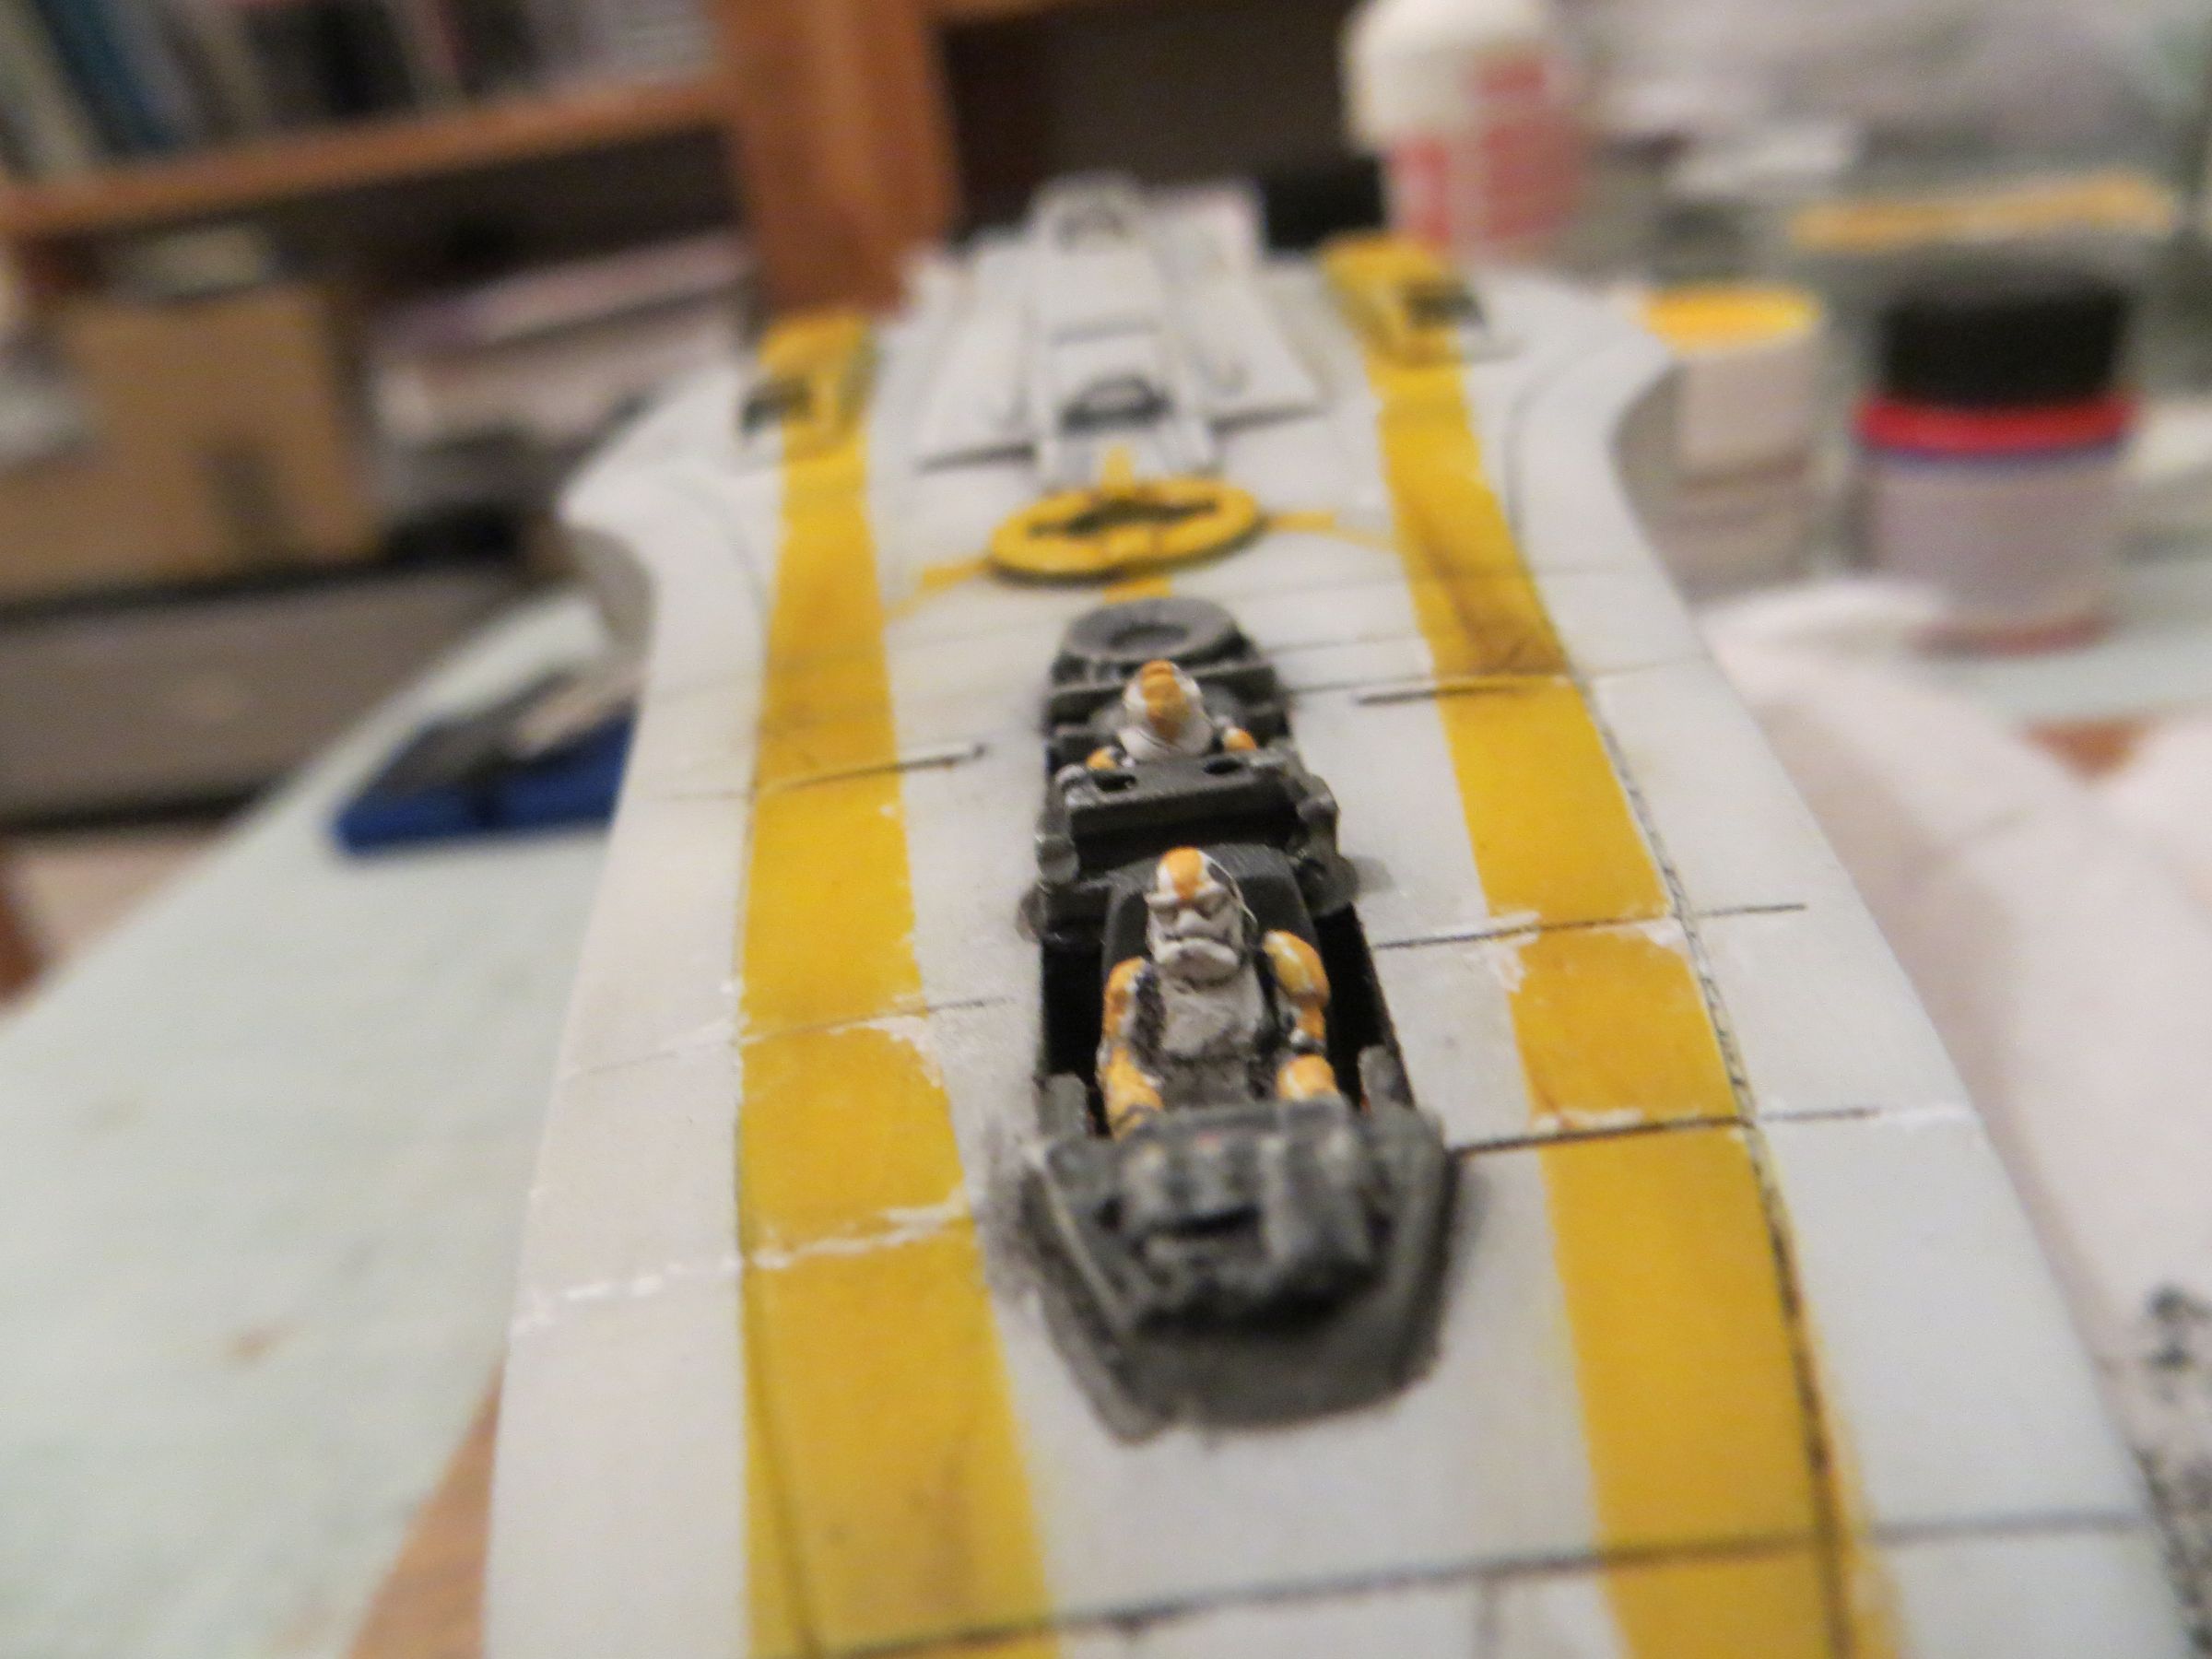
Then the canopy and the R2 unit.

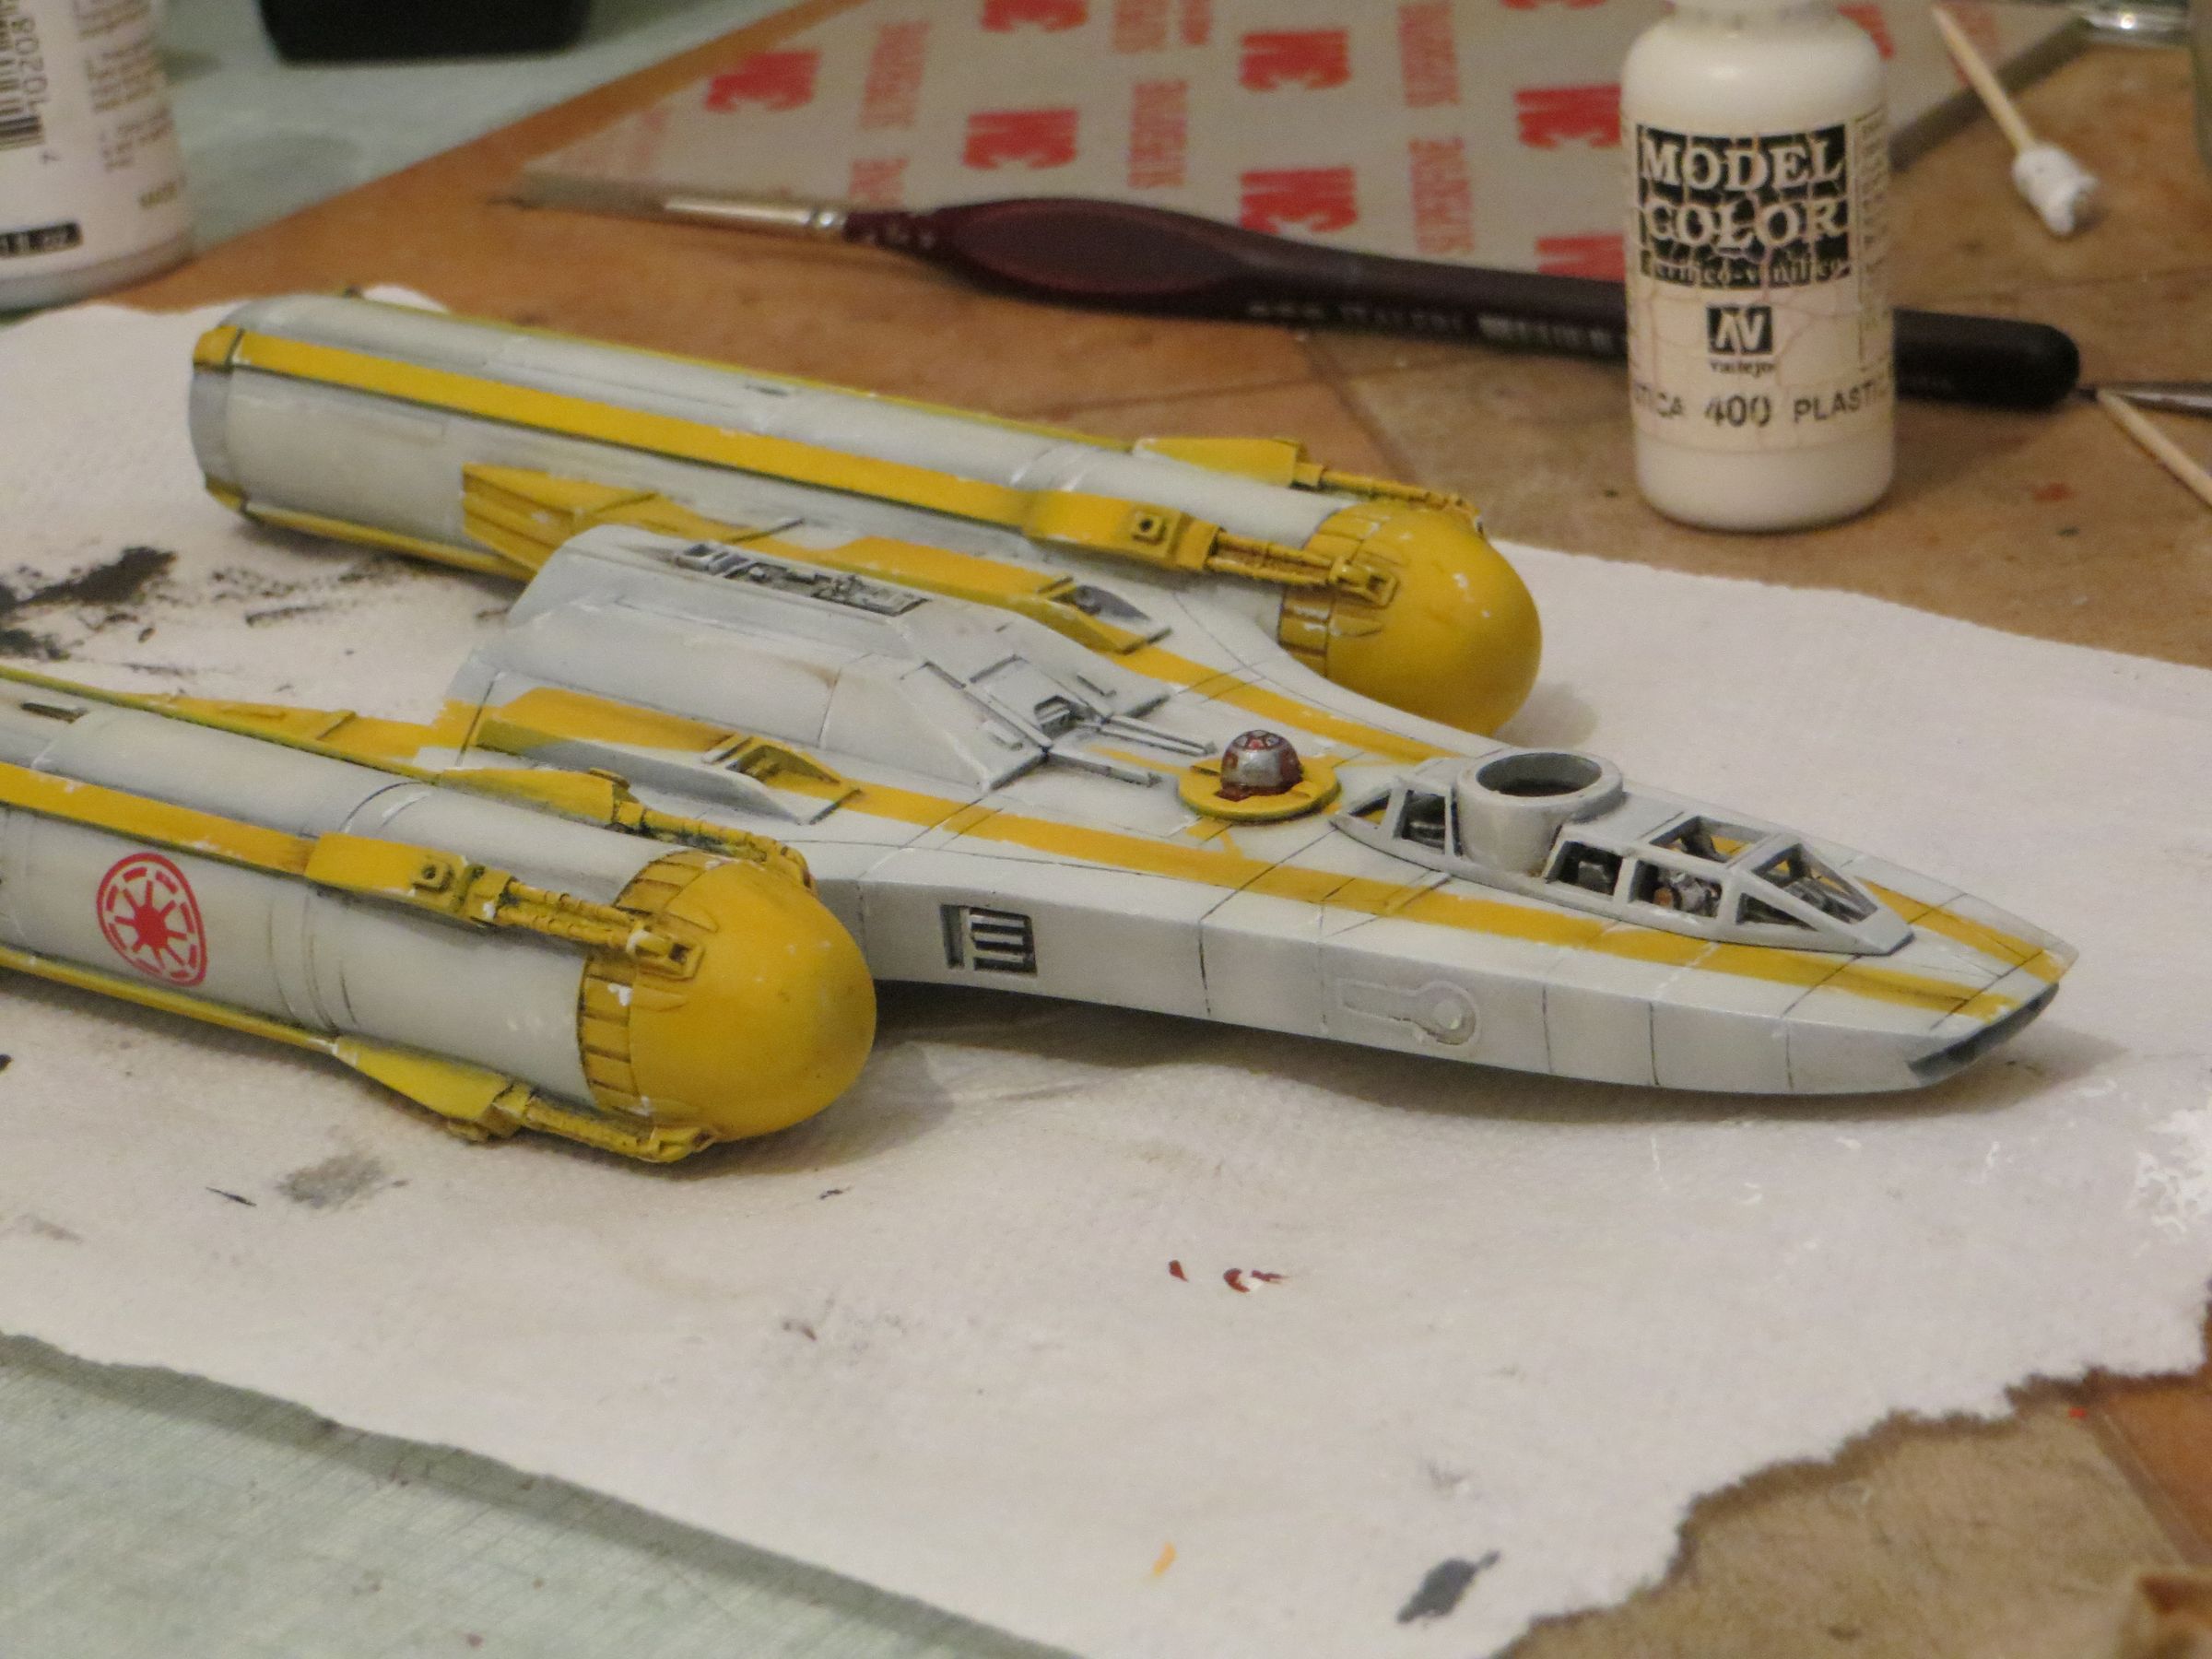
and finally the turret (with a repositionable glue in case of!)


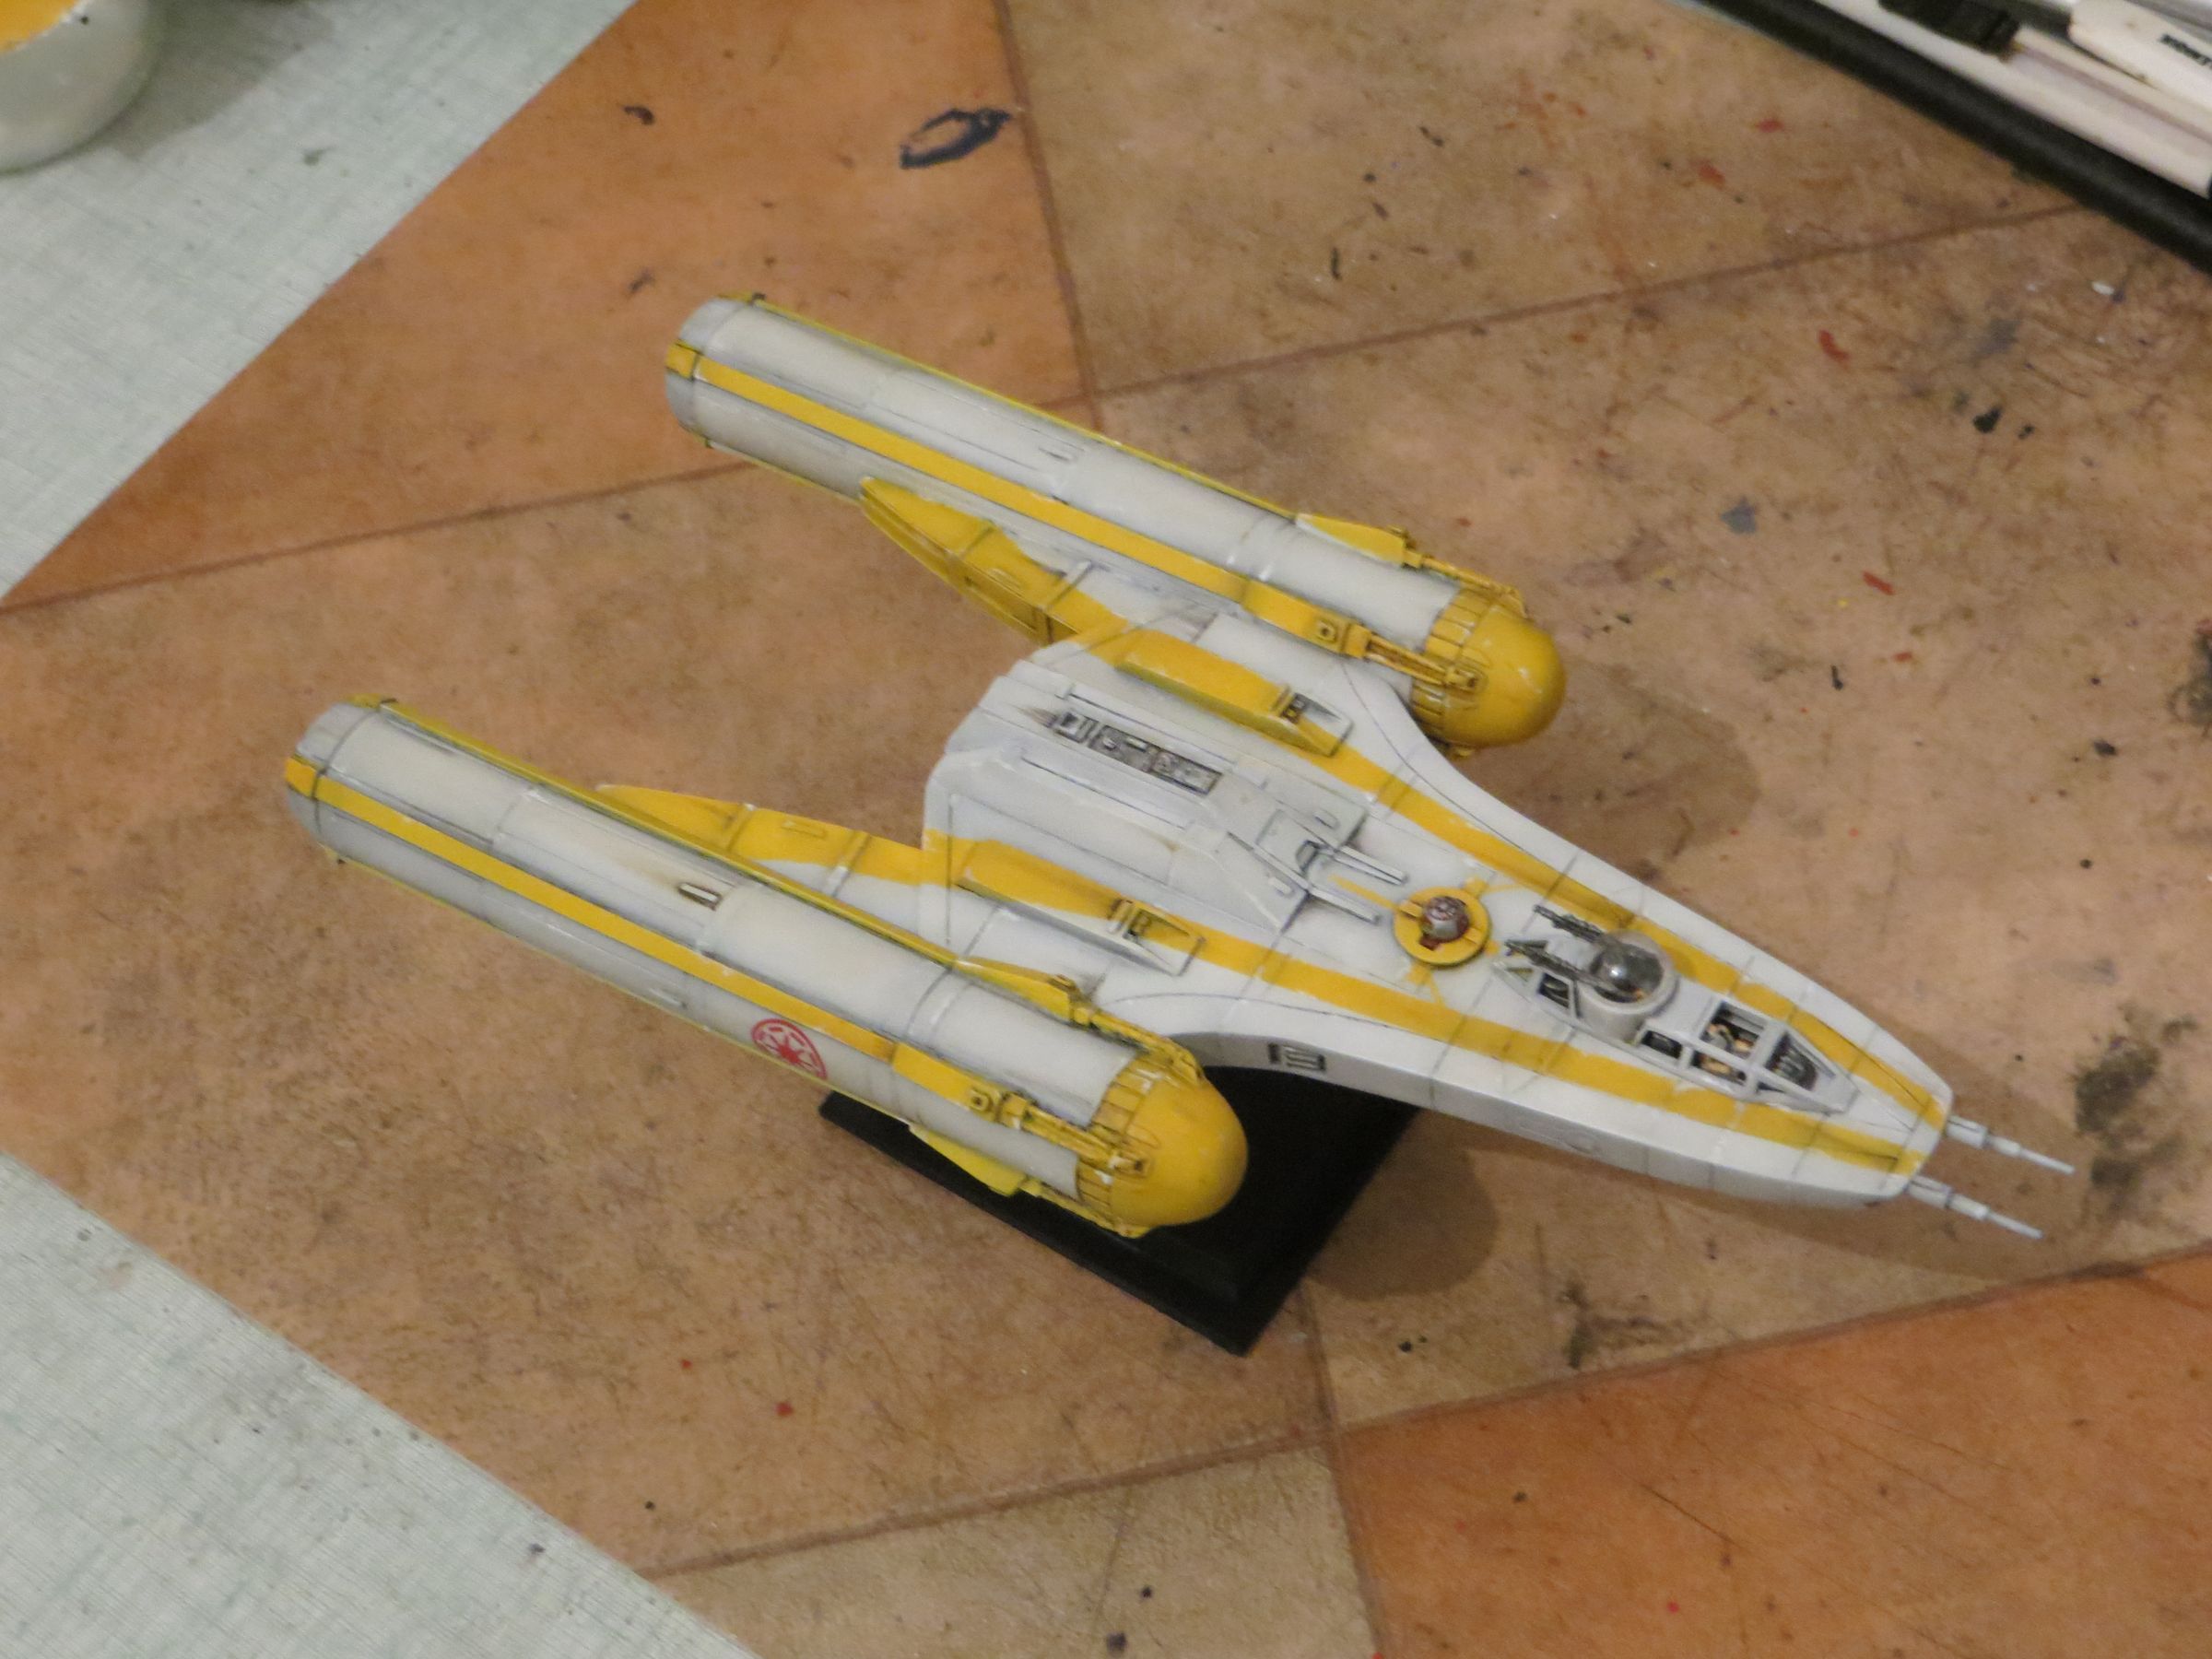
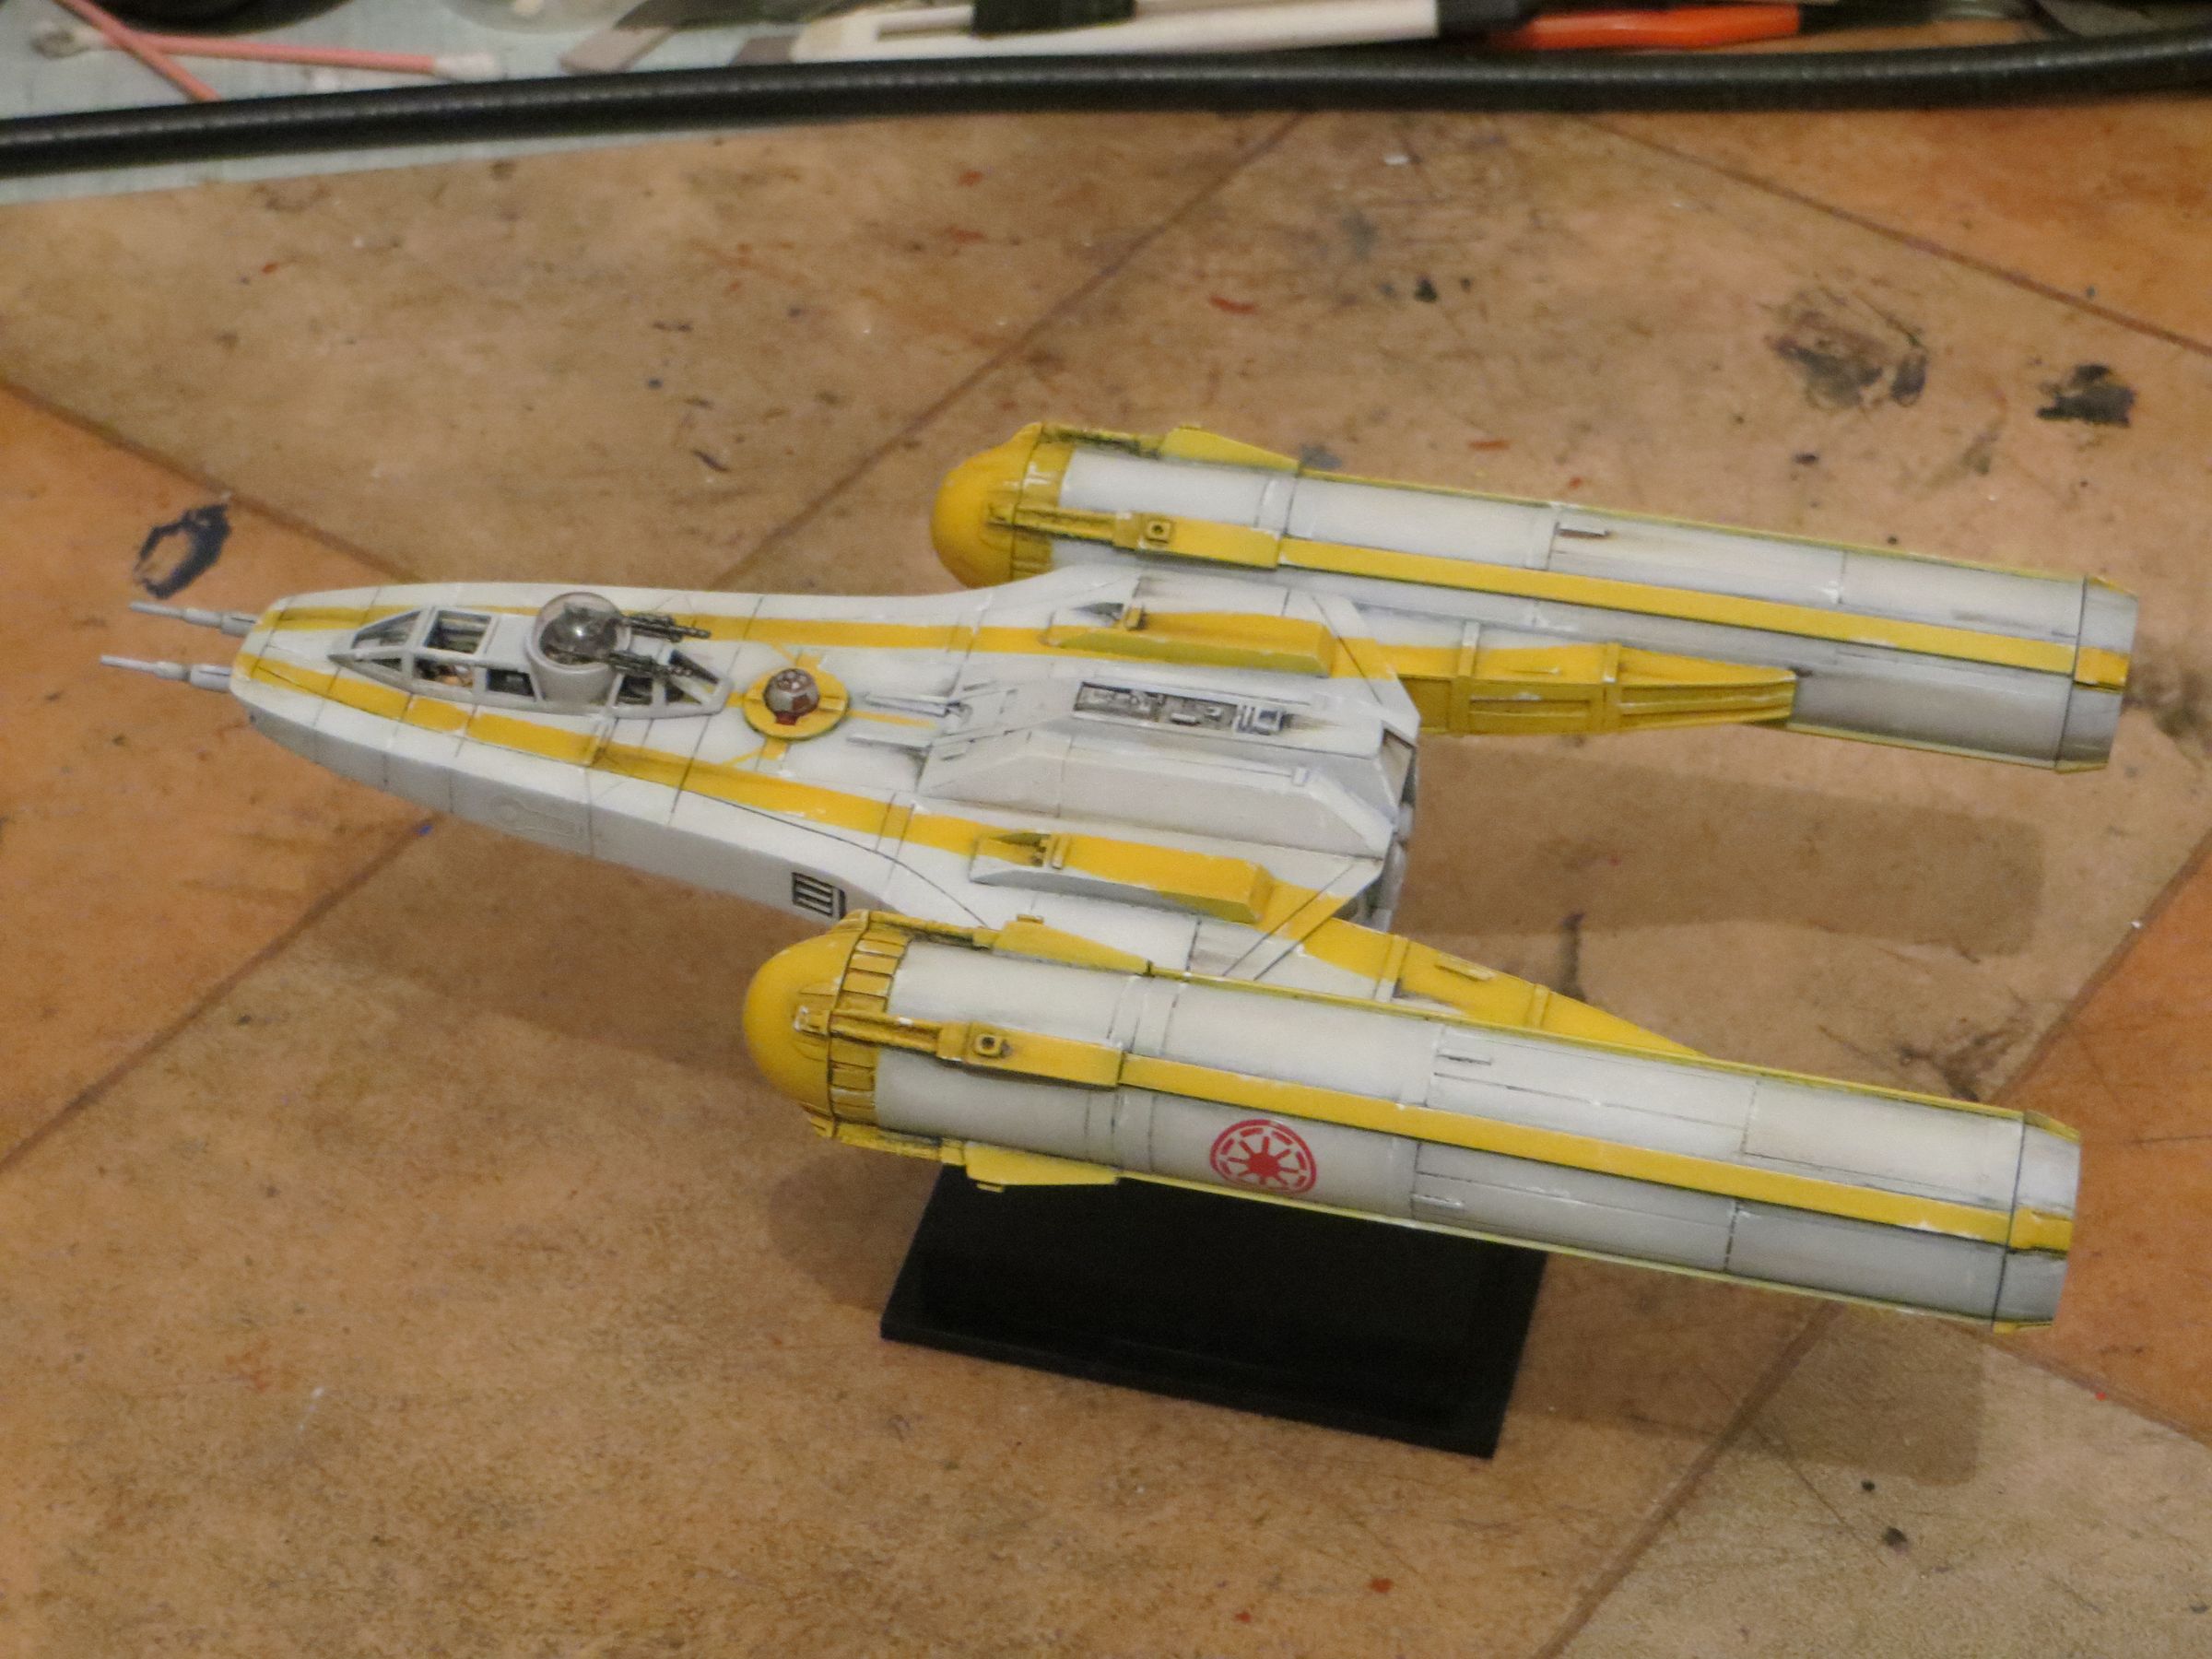
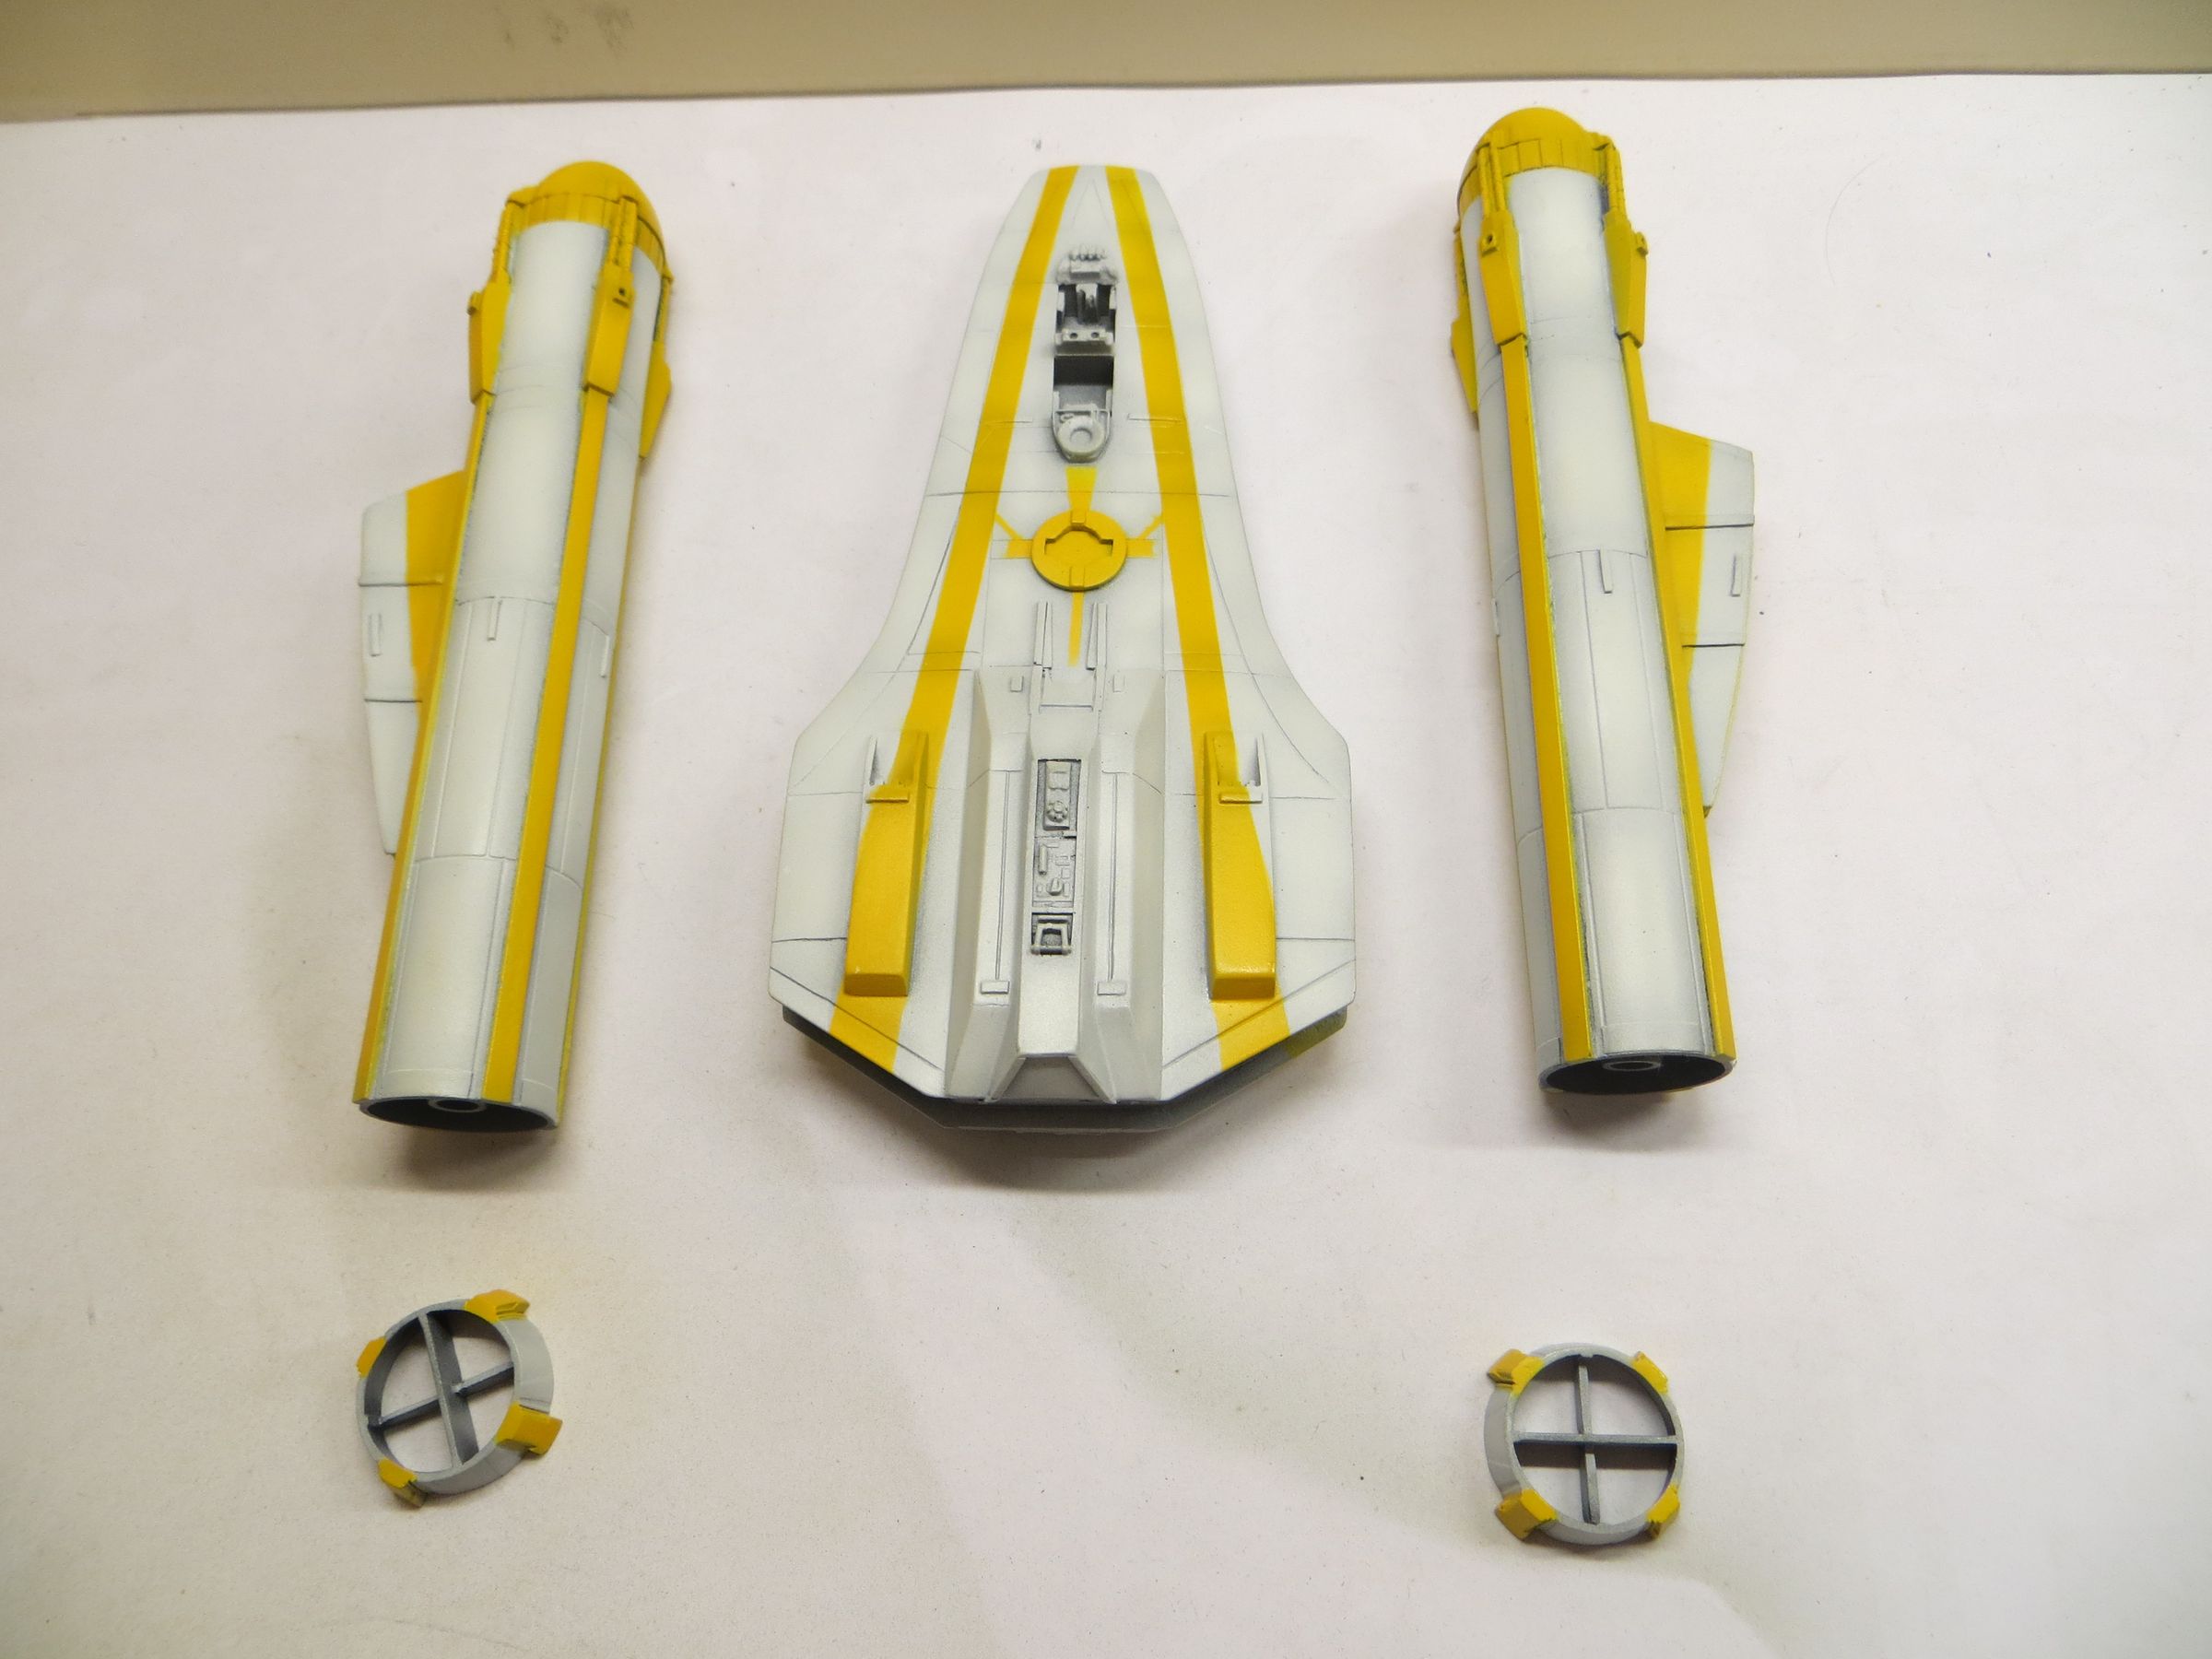
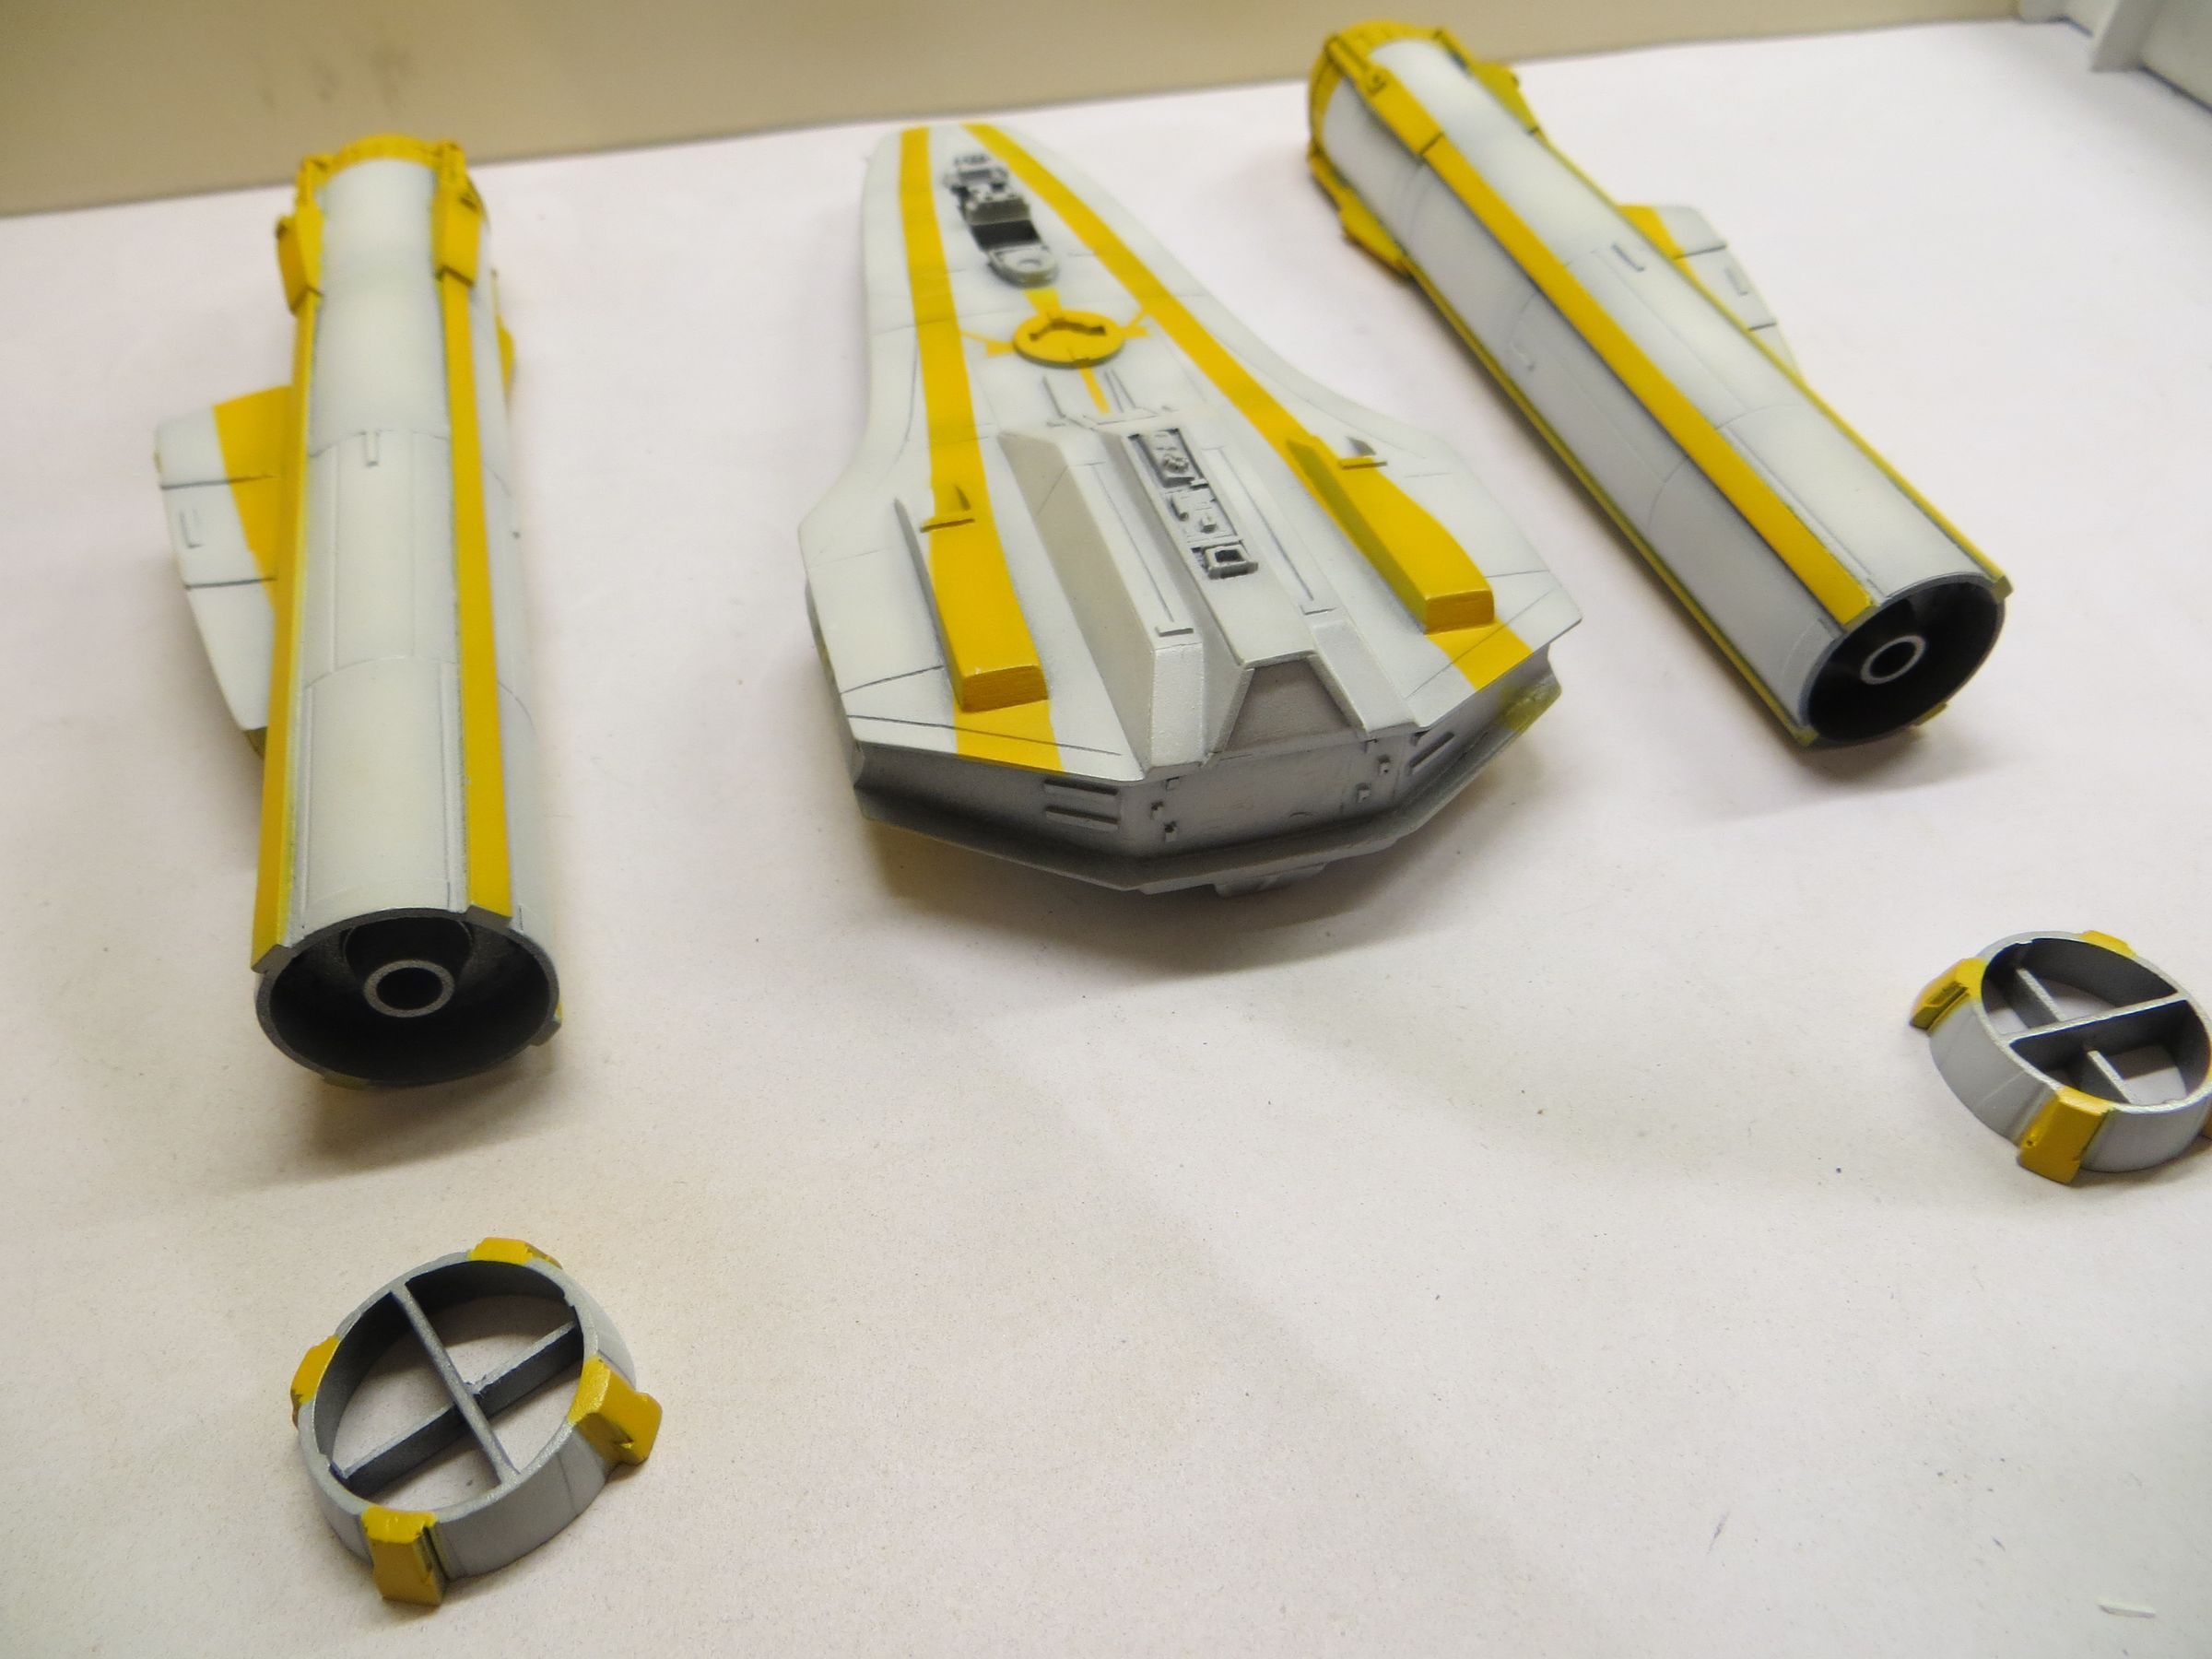
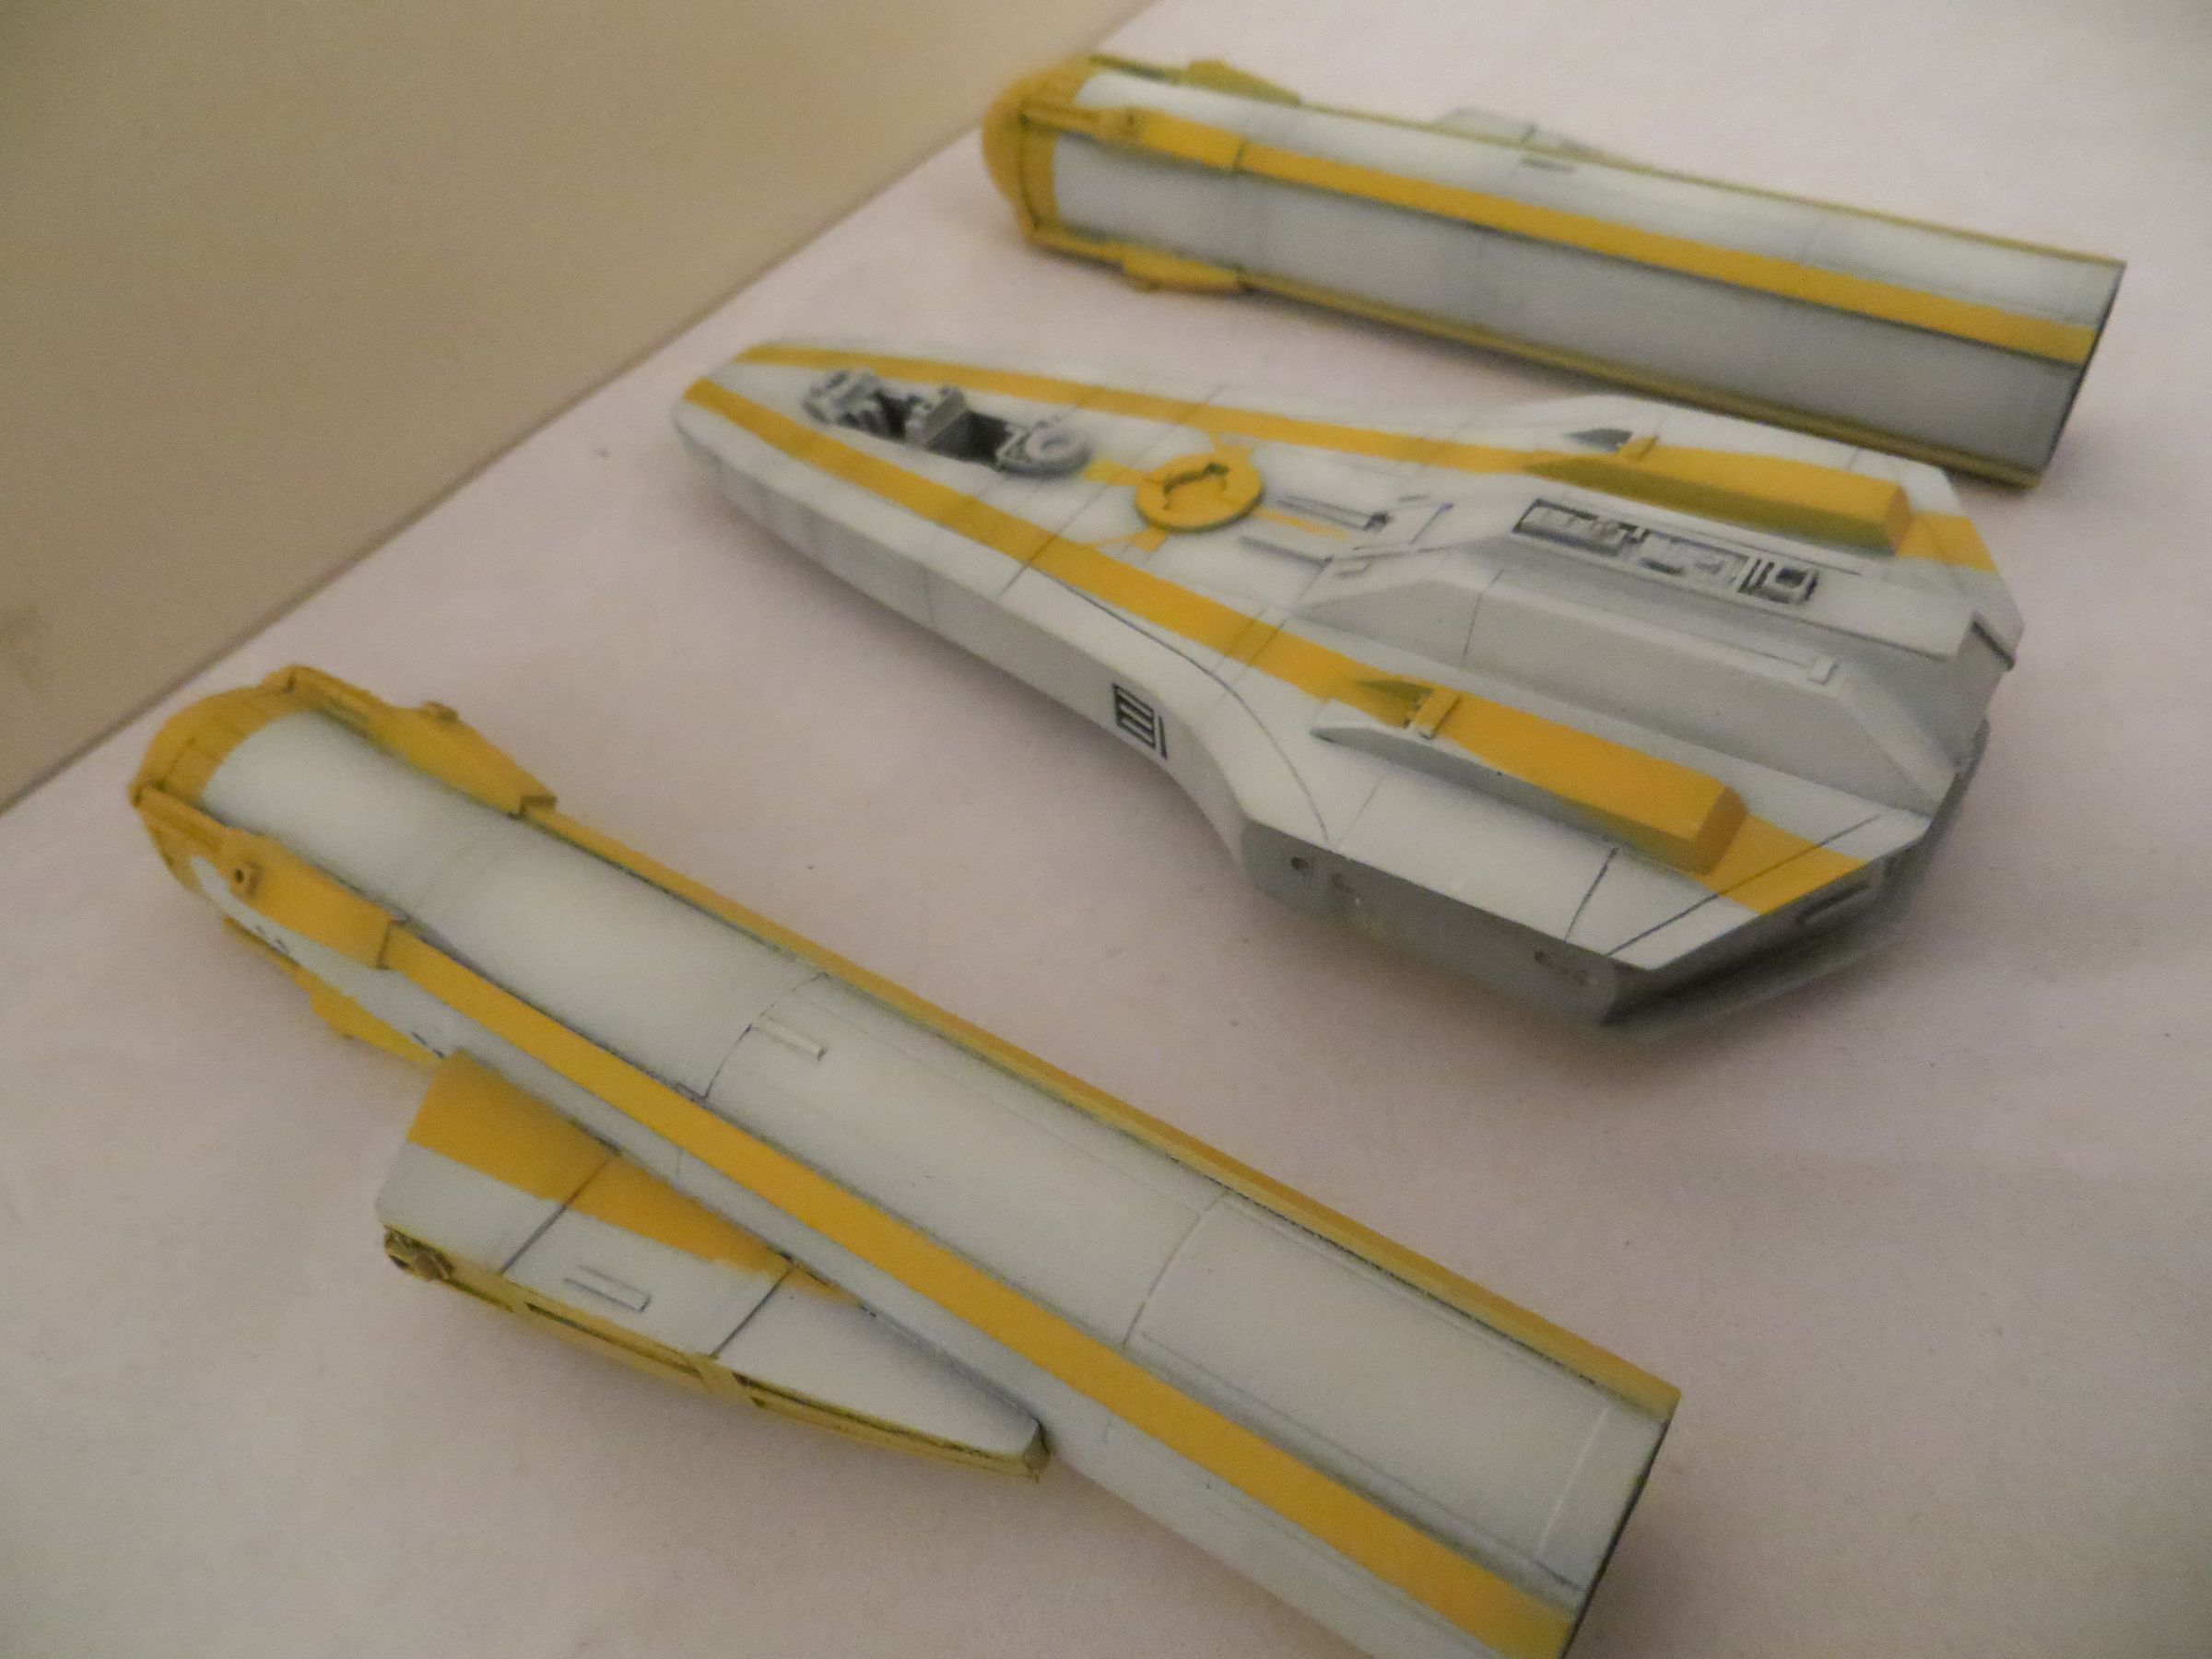
Finished !

dimanche, 17 novembre 2013
Par olcabour le dimanche, 17 novembre 2013, 16:41
I still have not complete the weathering of this bird (as I switched on Battlestar Galactica for few monthes to prepare a display stand in a collector convention here in France).
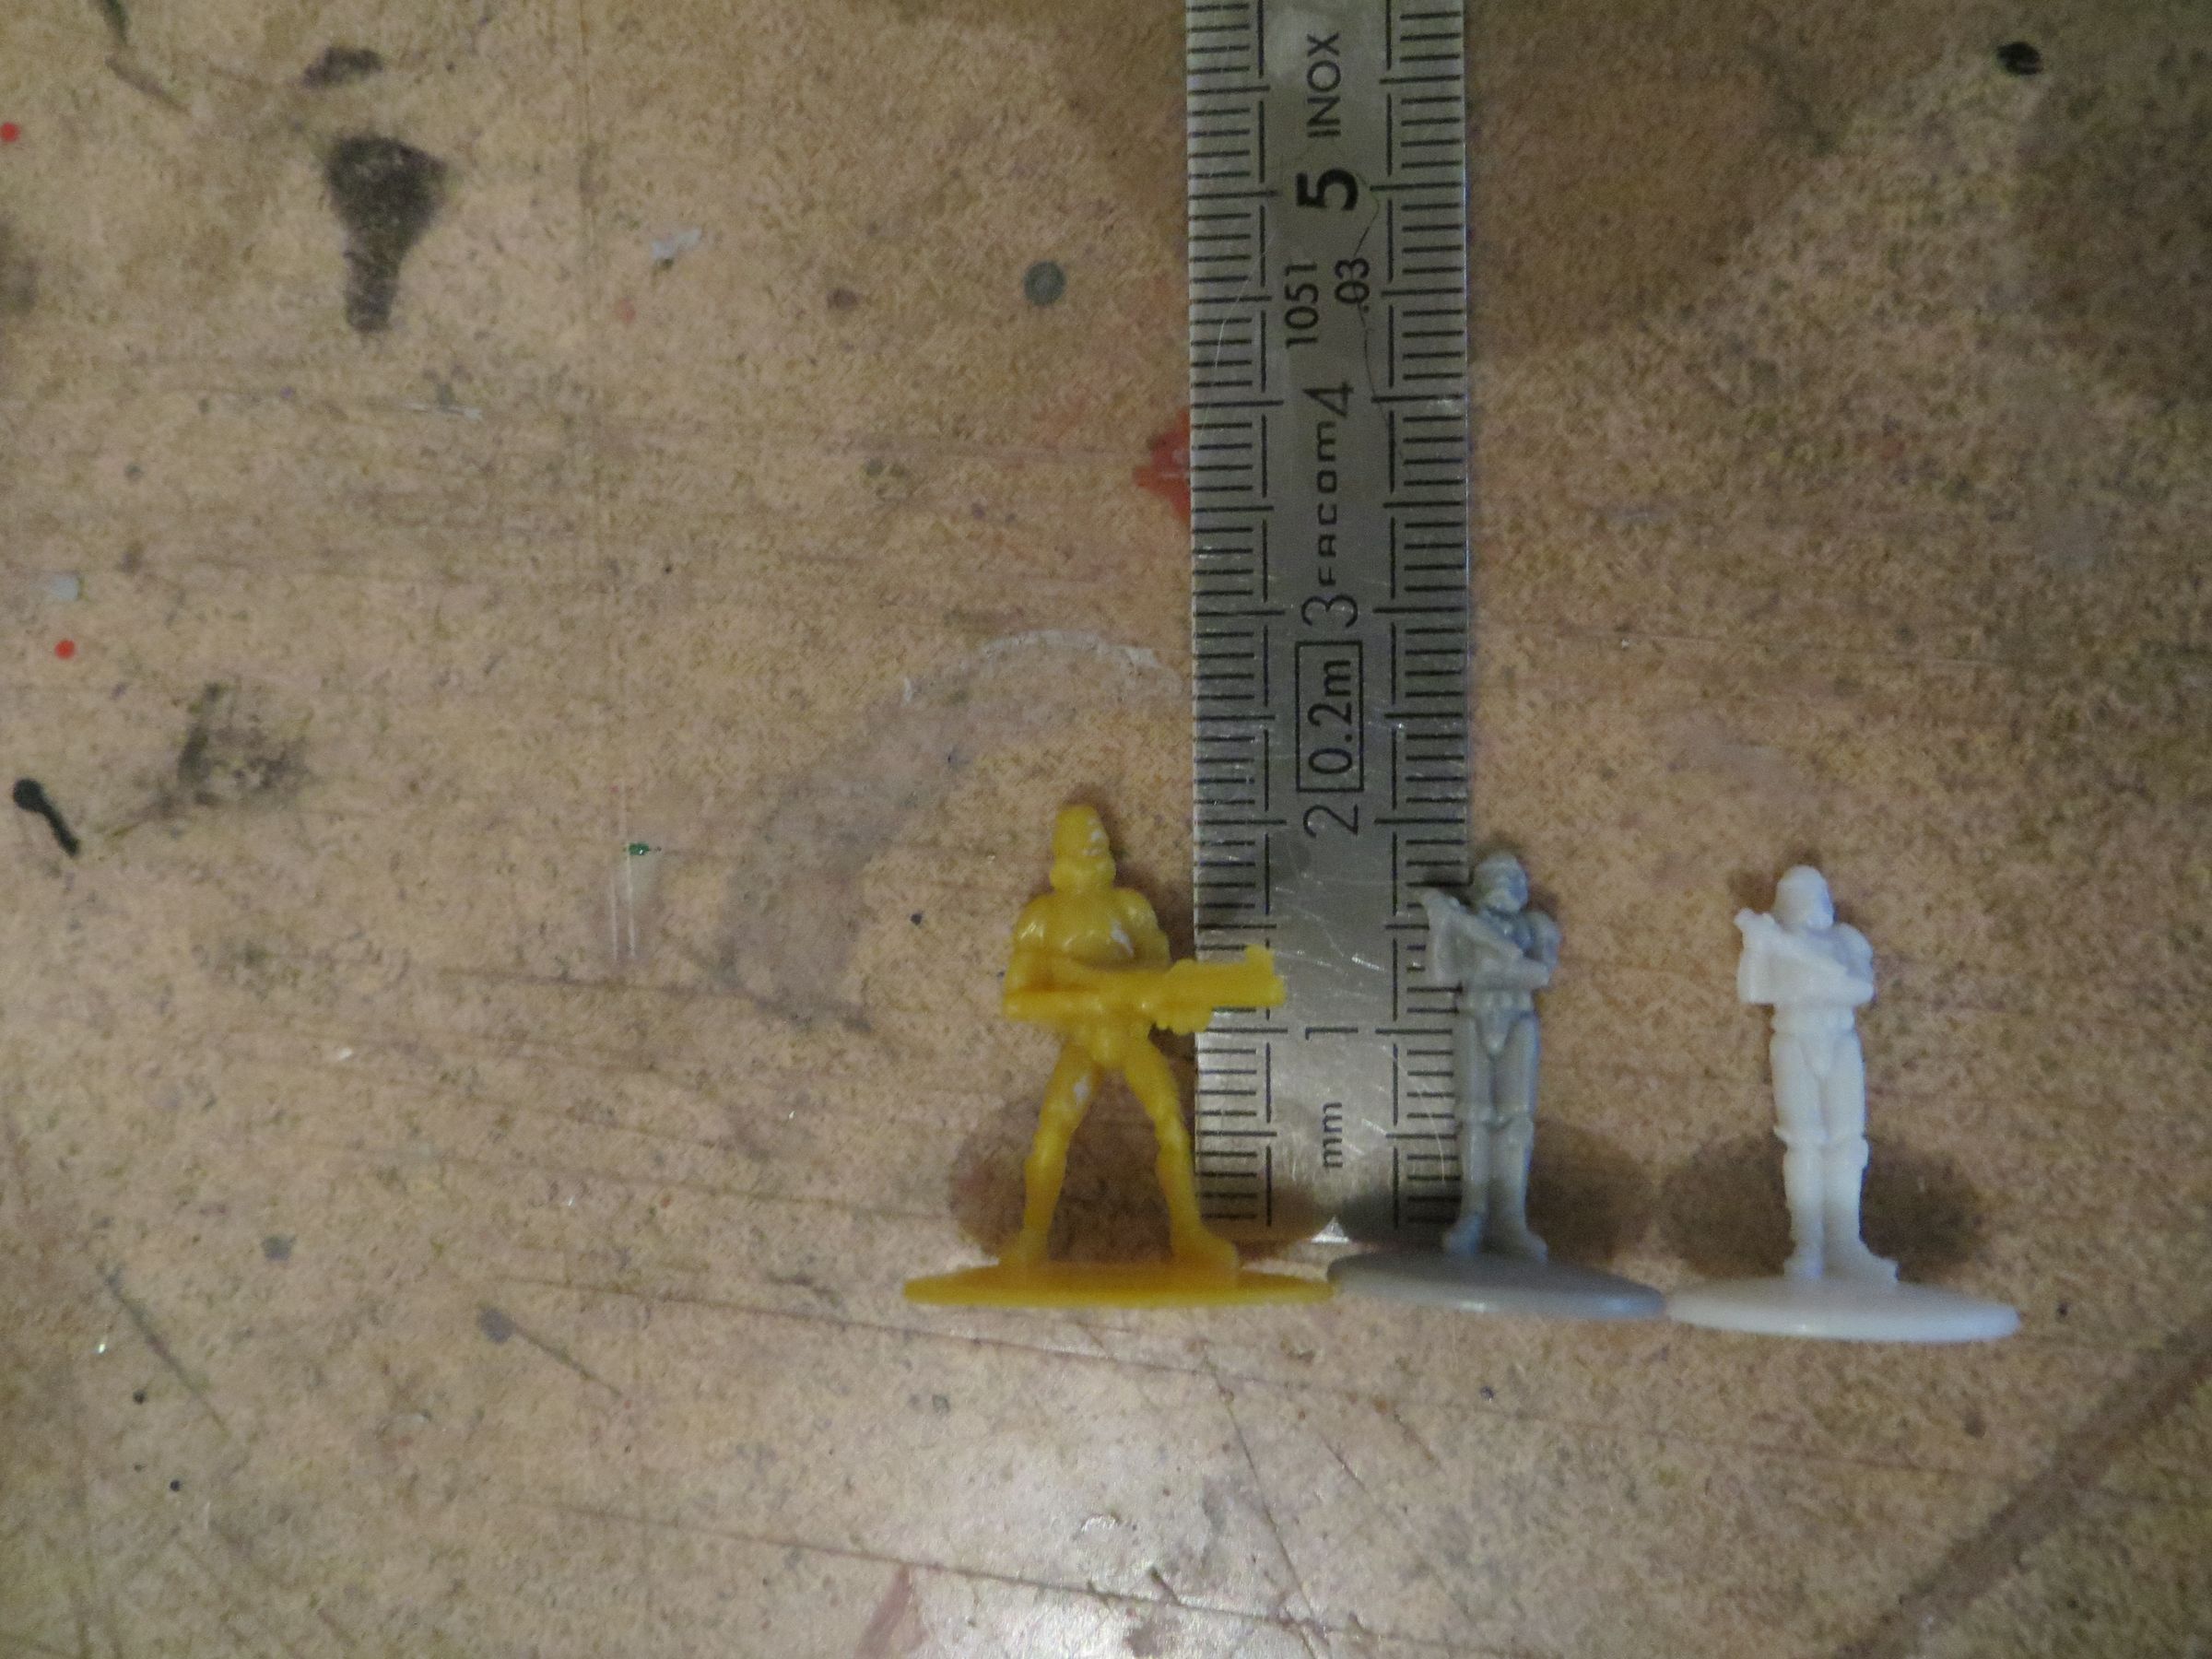
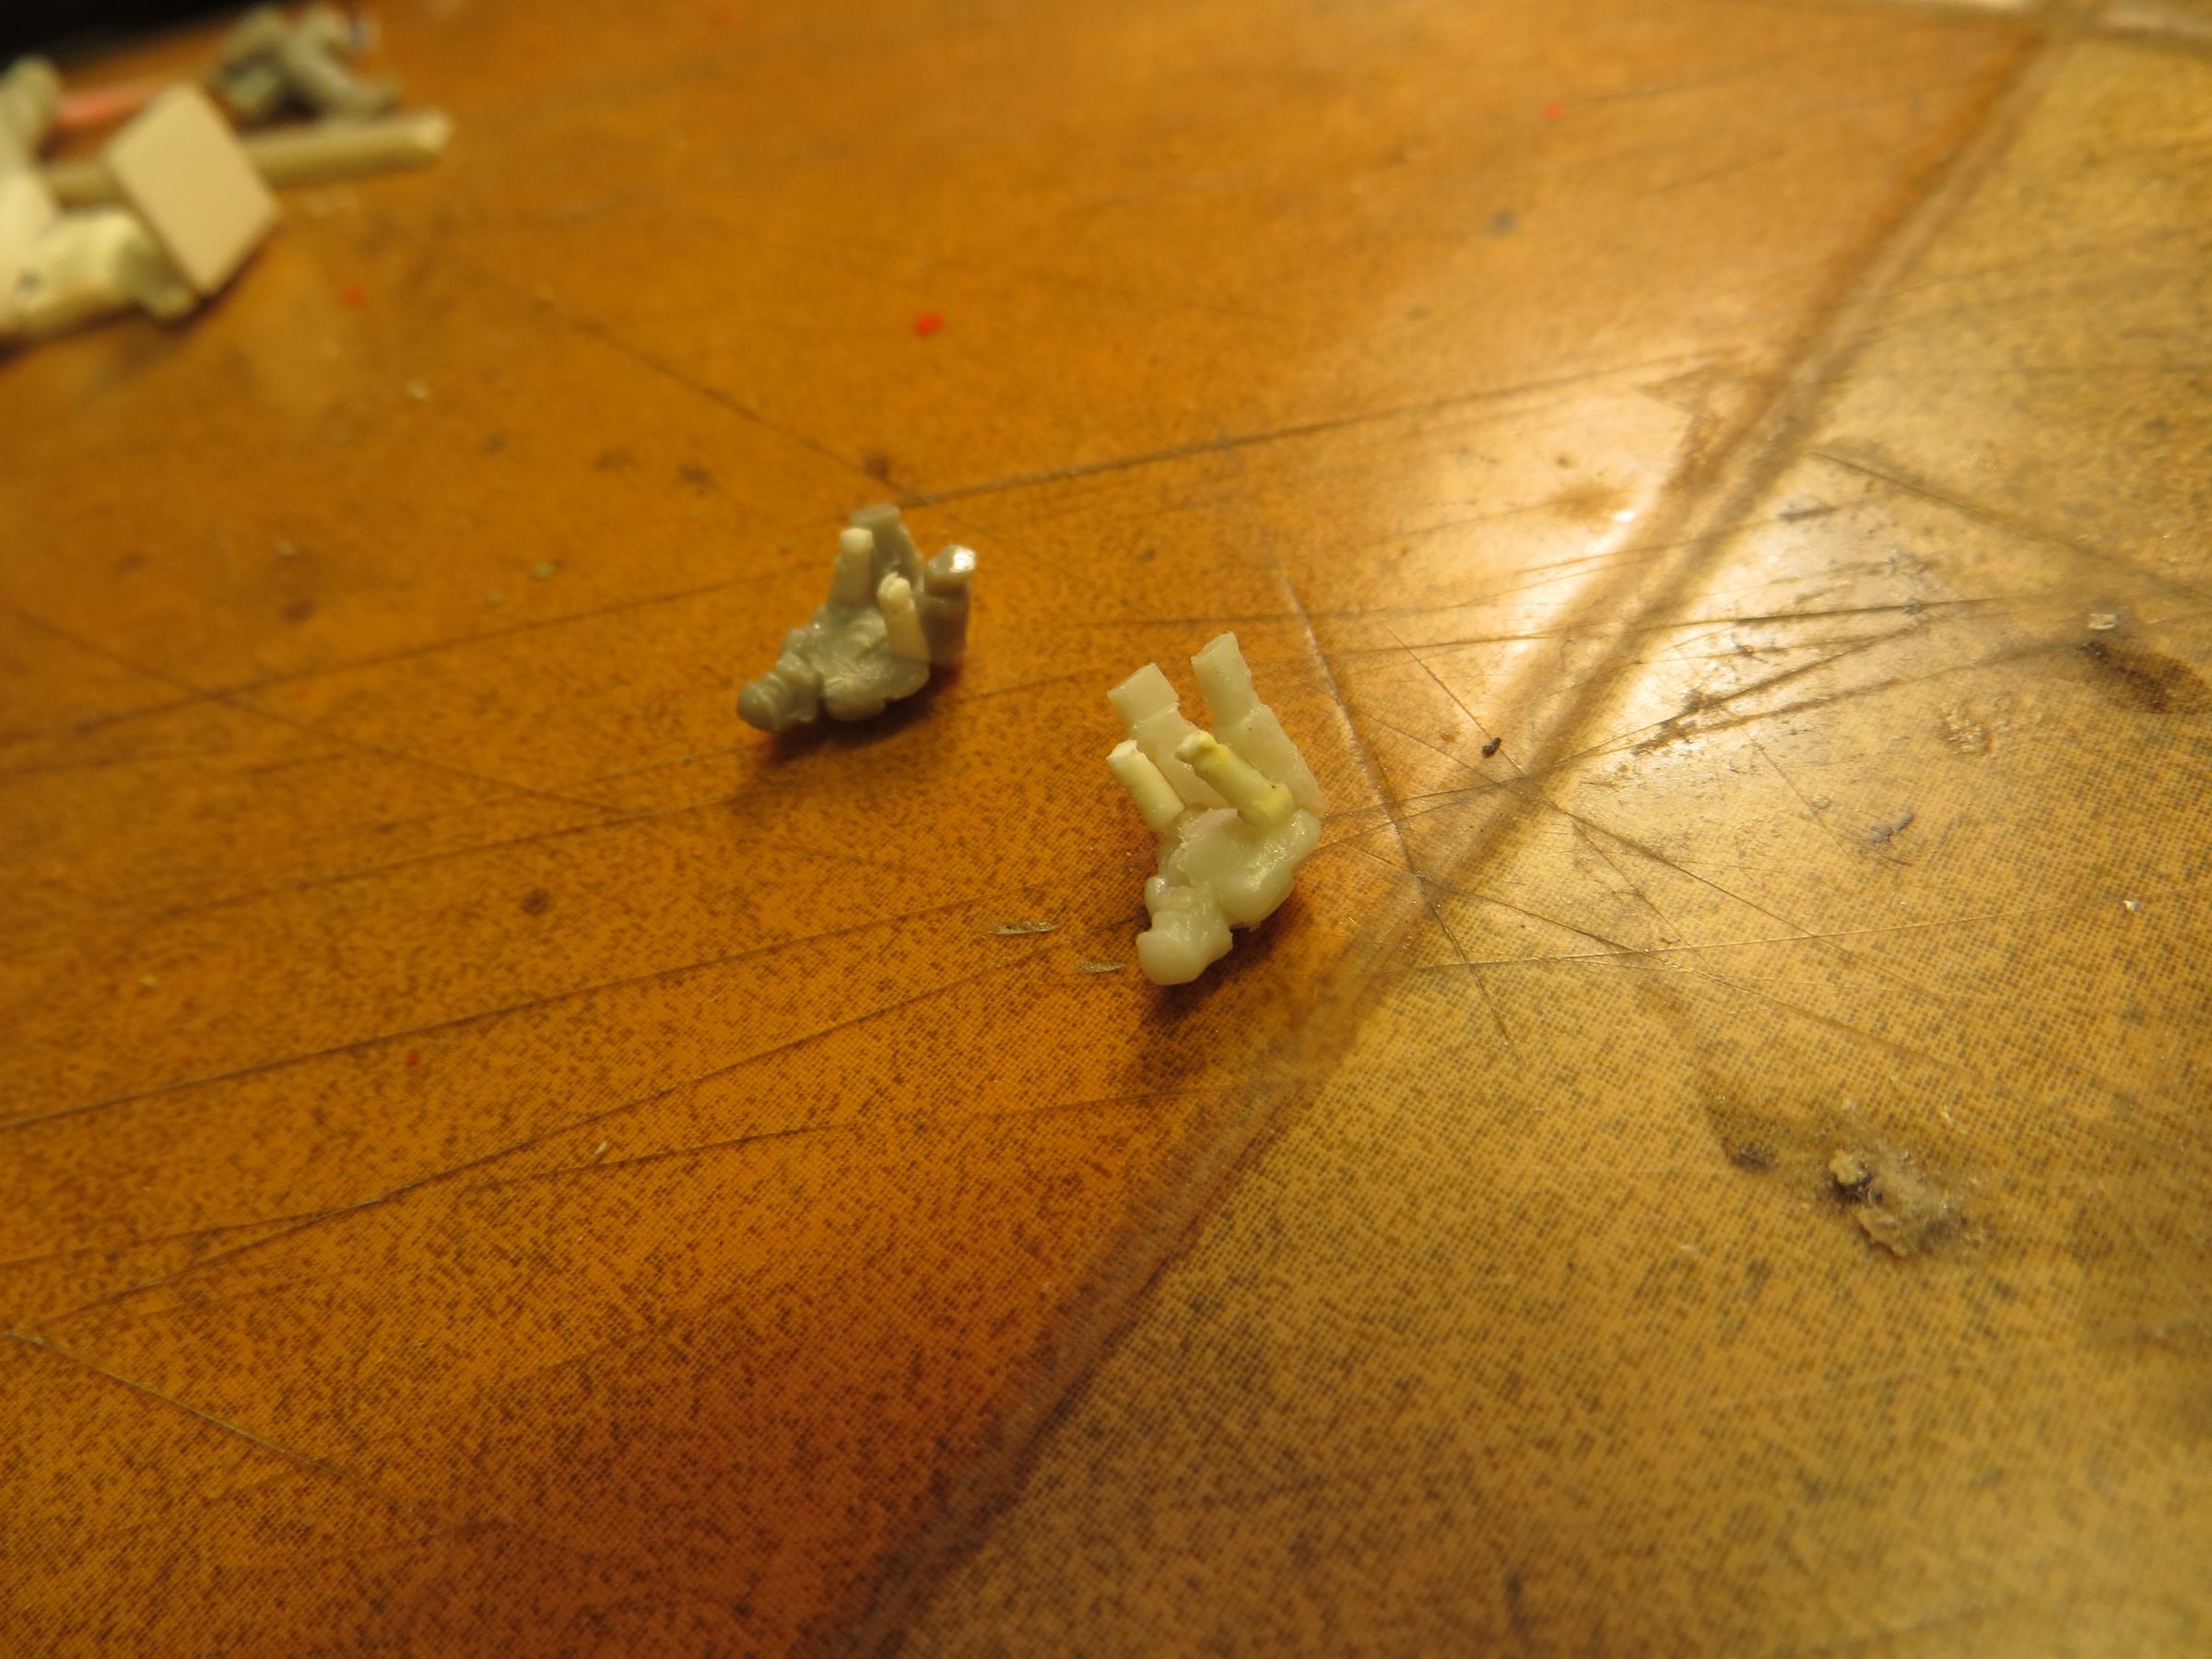
There are no pilots in the kit. So to people it, I first intended to use and cut a clone figure from the Clone Wars Risk boardgame (that are 1/72th. The yelow clone on the left in the photo below), when I remembered the SW classic trilogy Risk has smaller stormtroopers. And indeed, they are close to 1/100, and they will be perfect in the cockpit of this Y-Wing (the 2 on the right)
After a few amputations, i get this.
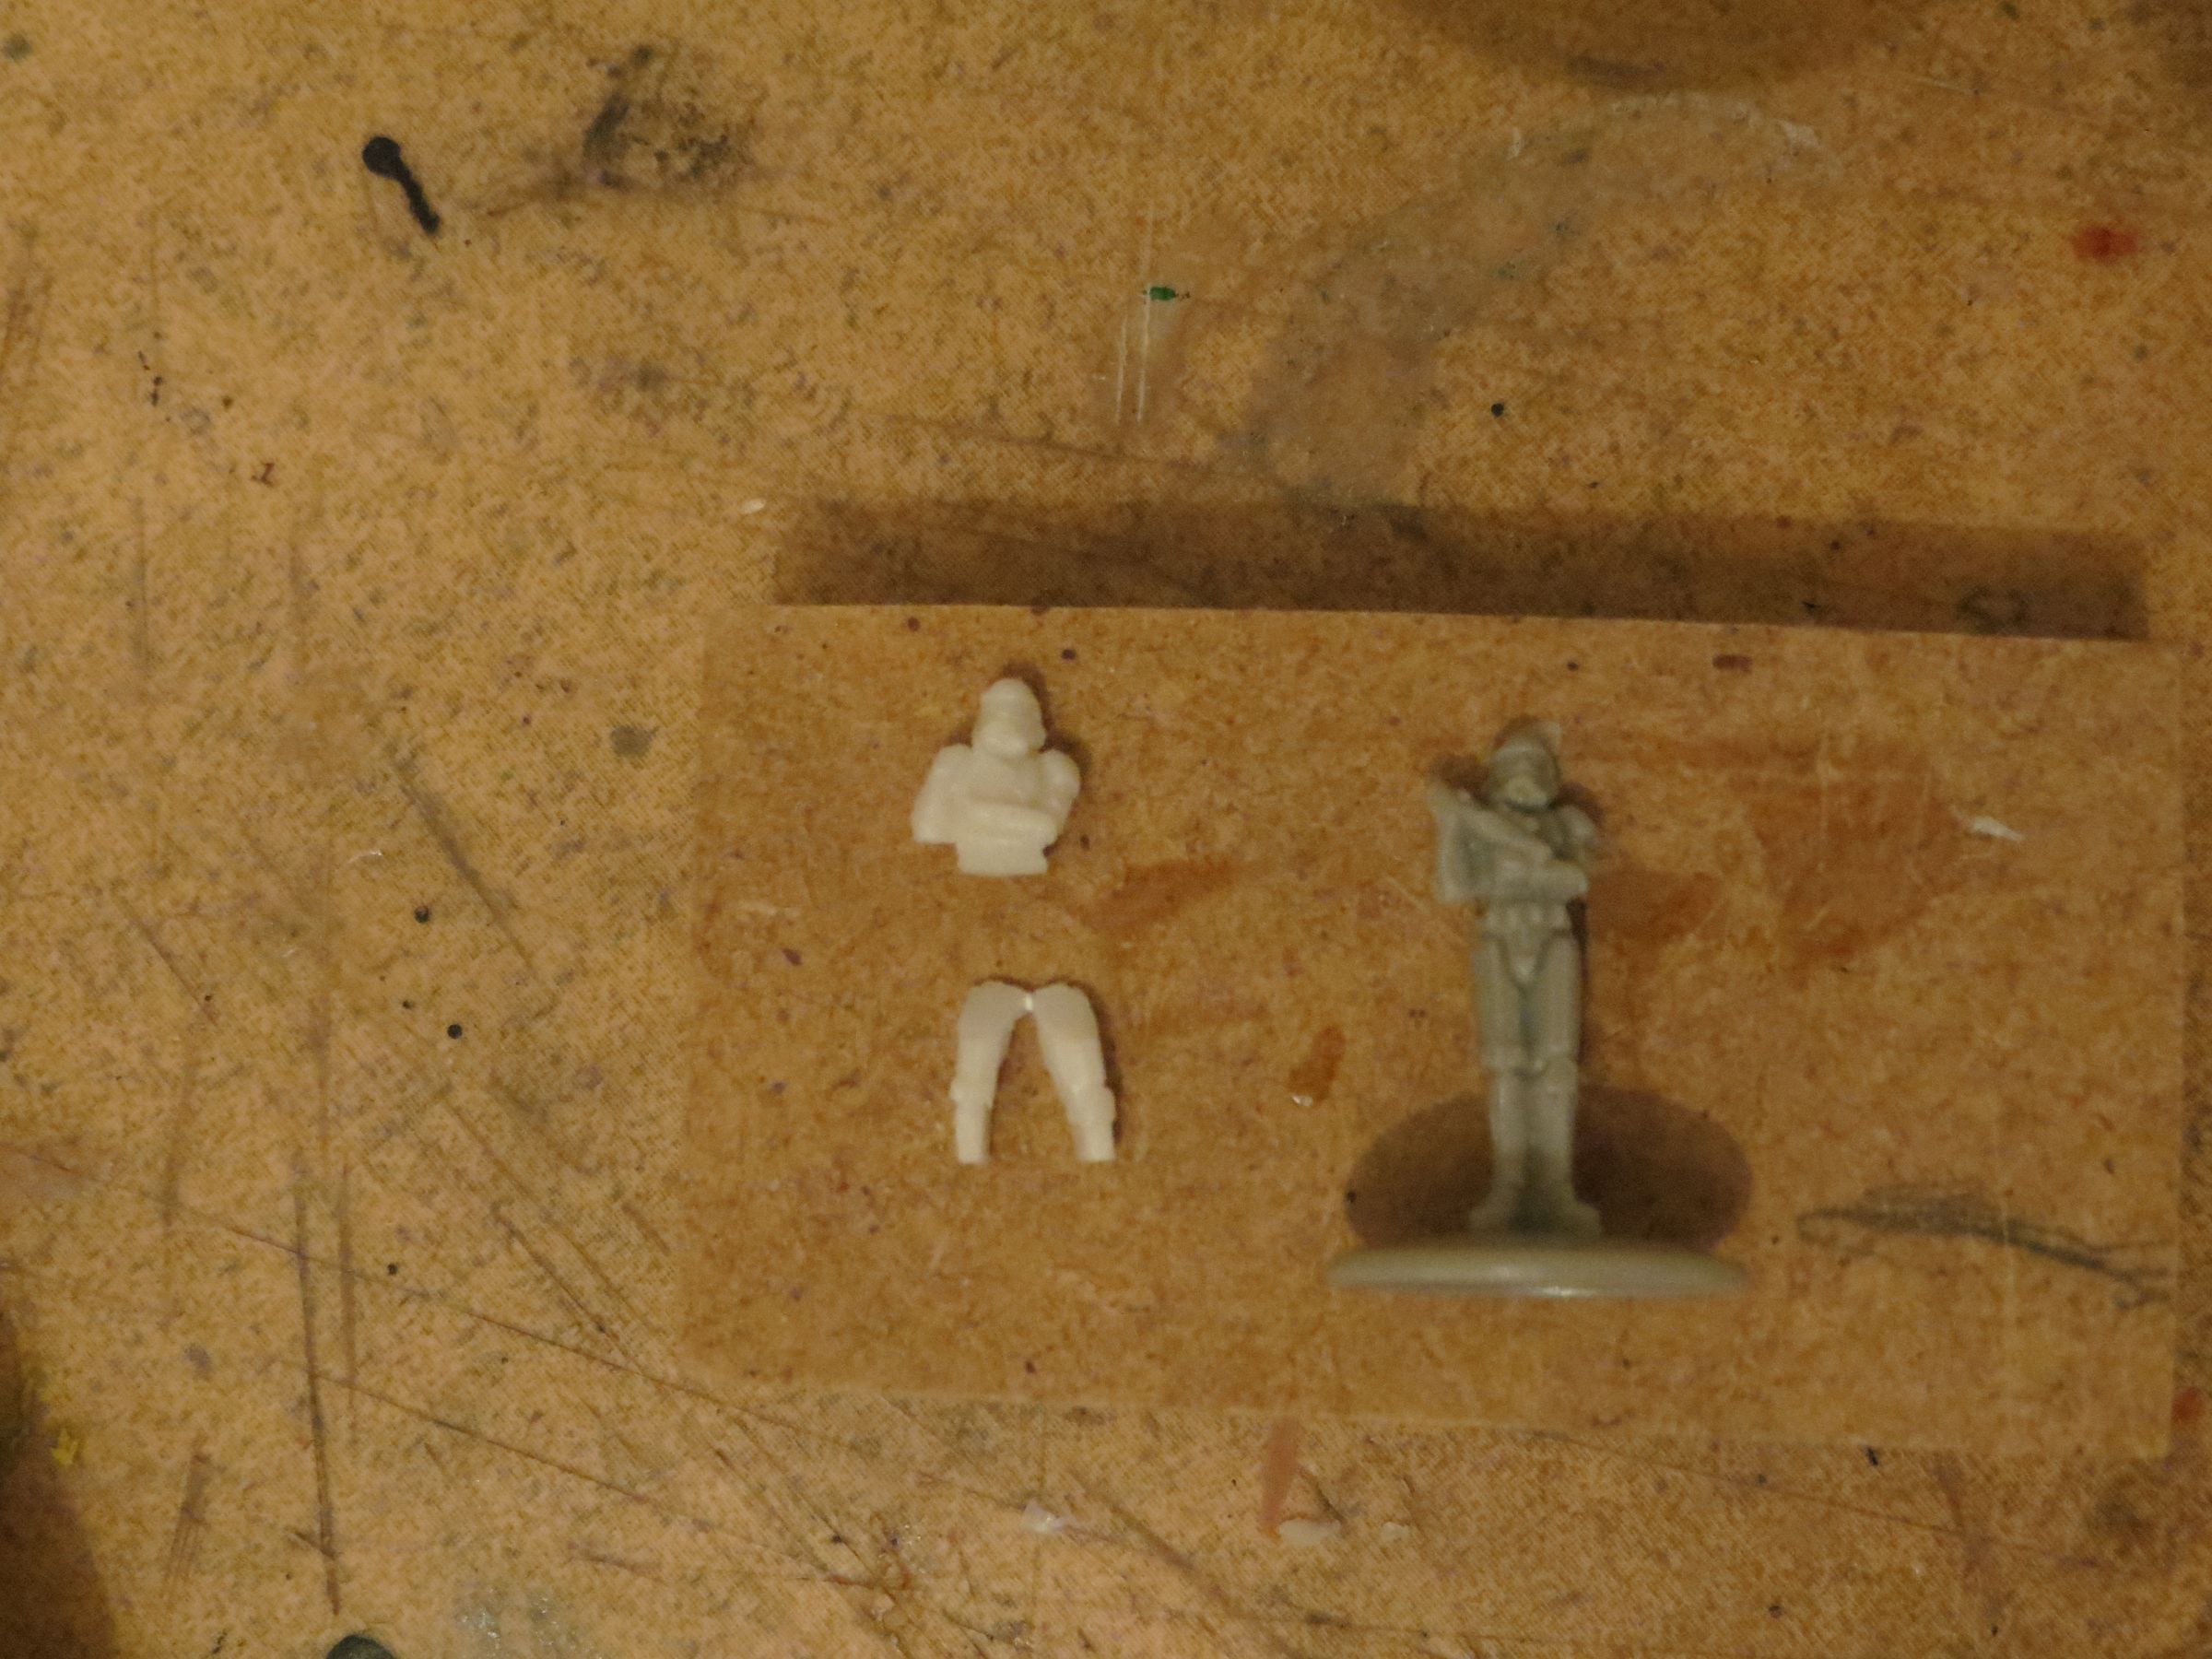


Bodies and legs are glued together and the forearms (which initially carried the weapon against the body) redone.
A coat of white primer (tamiya spray can).

they now need to be painted
lundi, 19 août 2013
Par olcabour le lundi, 19 août 2013, 18:24
There are two different liveries of this bomber : Anakin and clones. The yellow stripes are roughly reversed between the two. I opted for the clones version.
Anakin :

Clone :

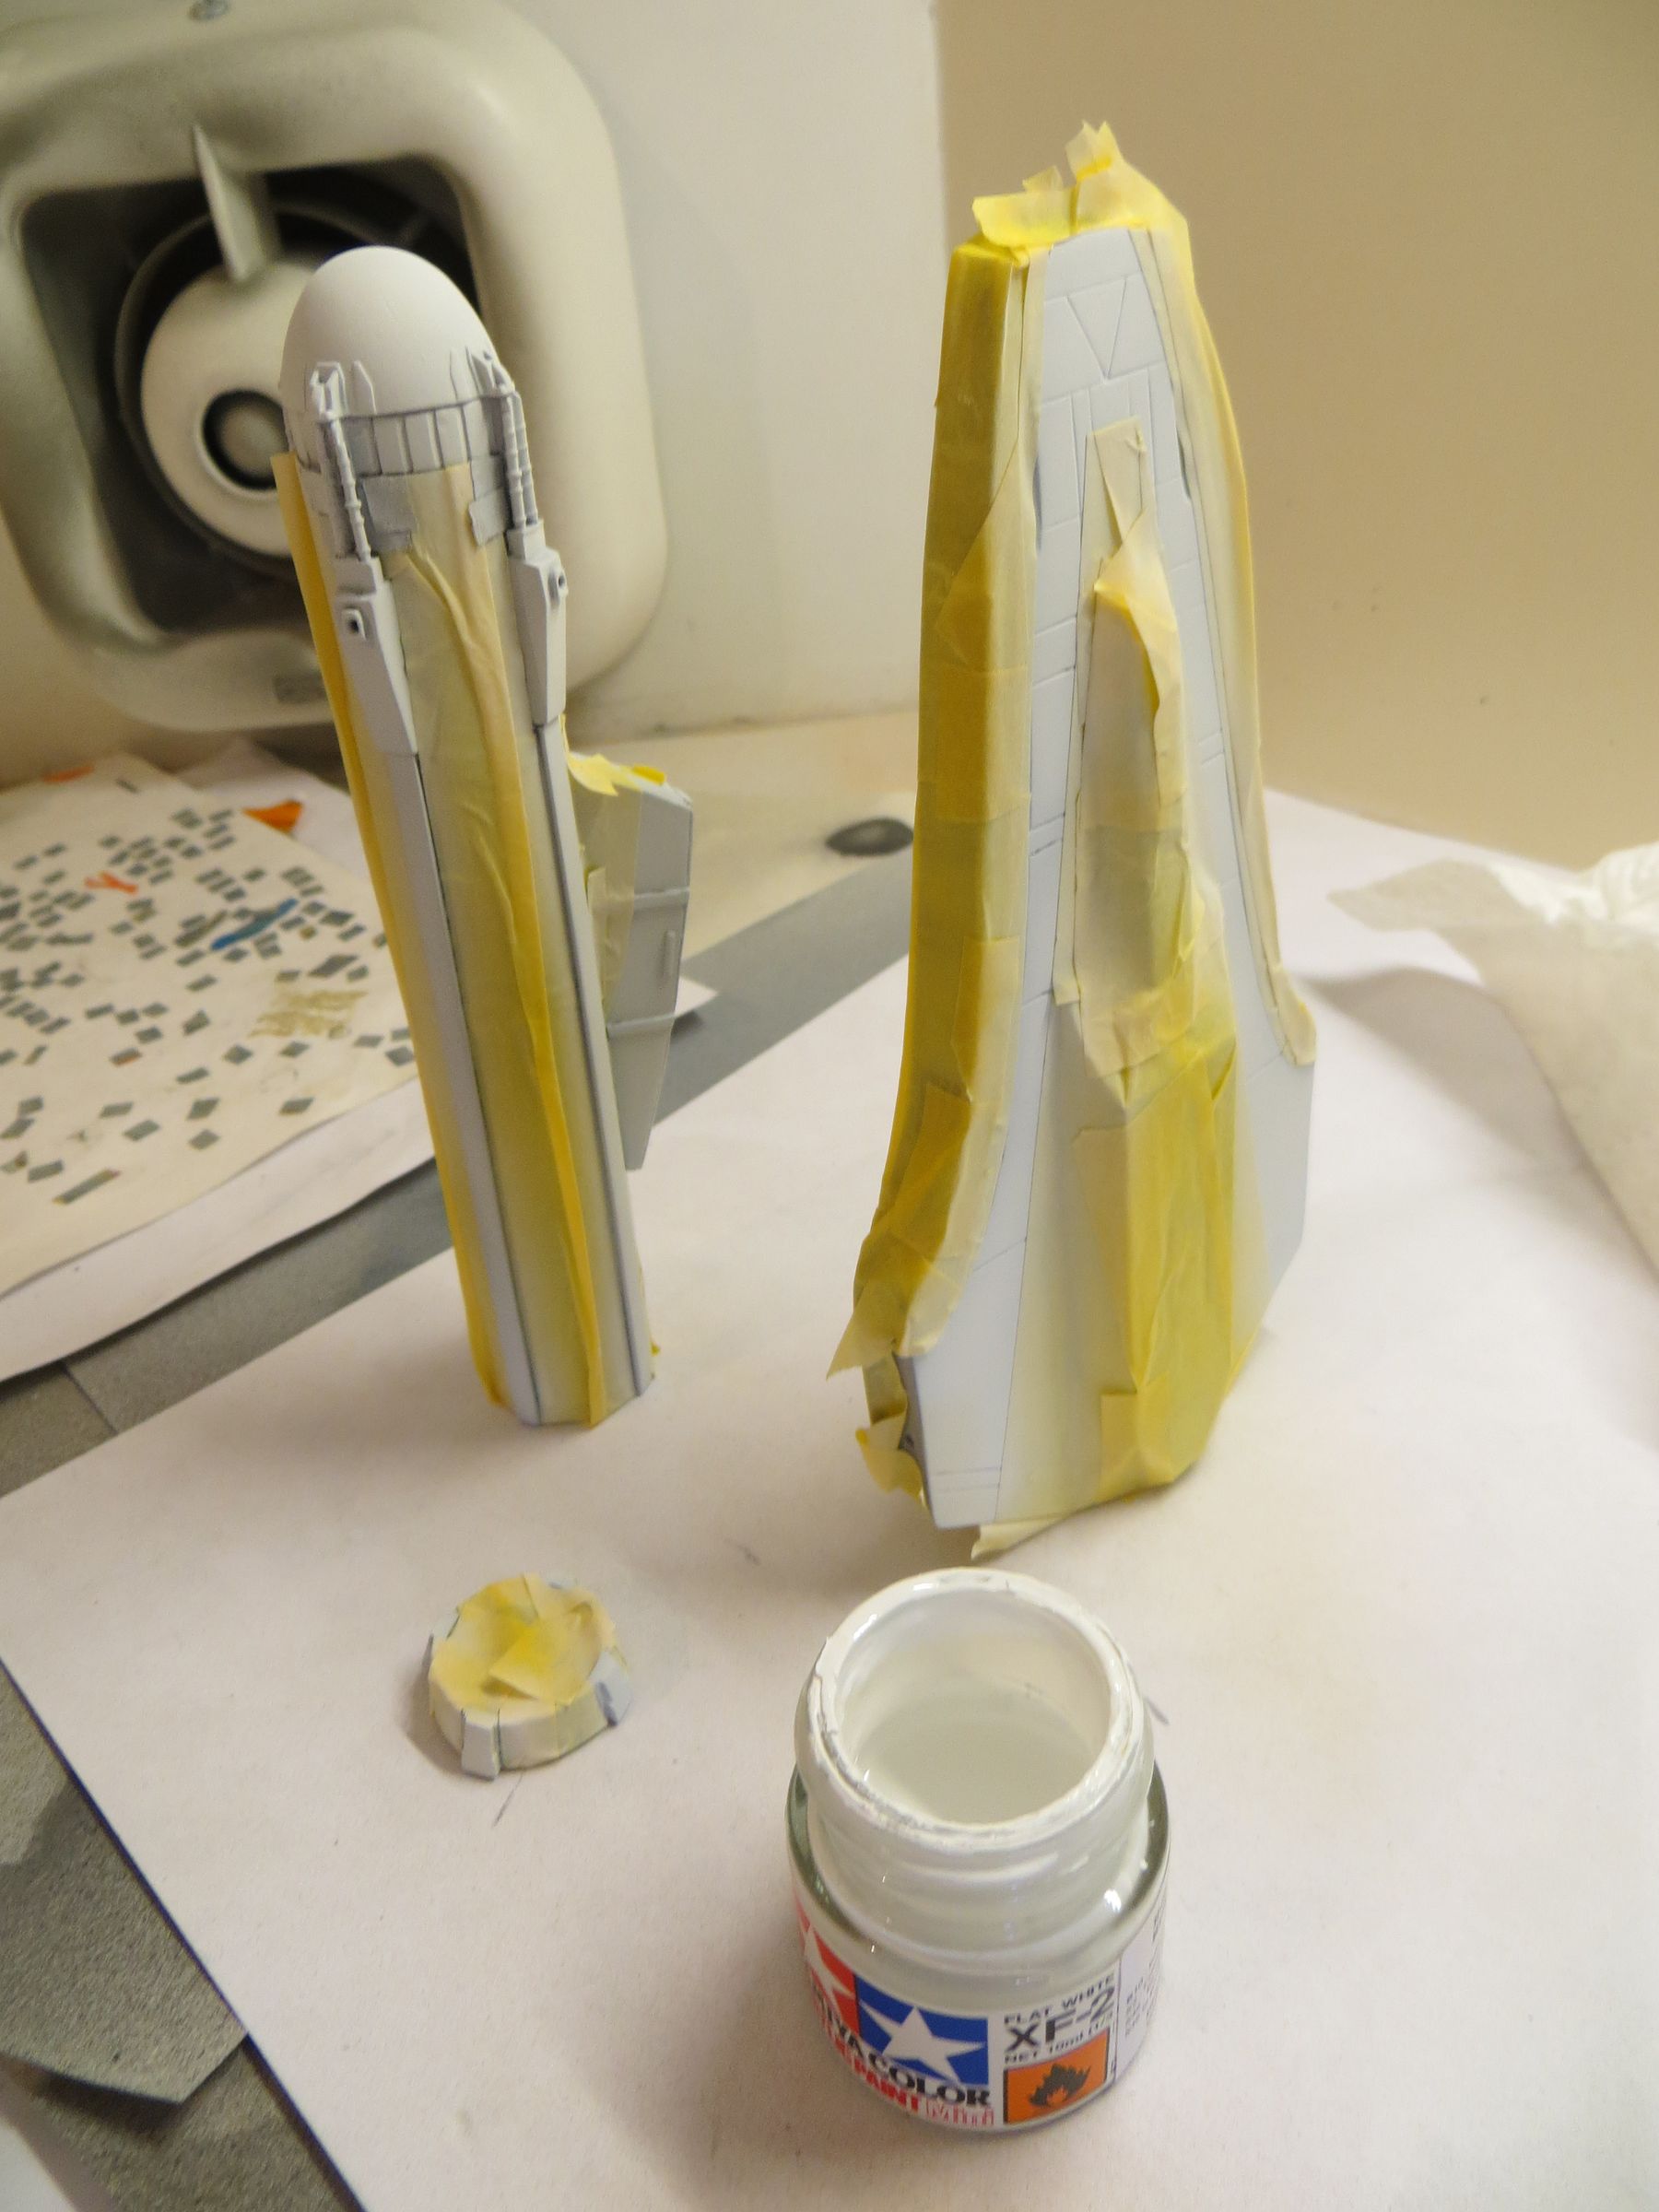
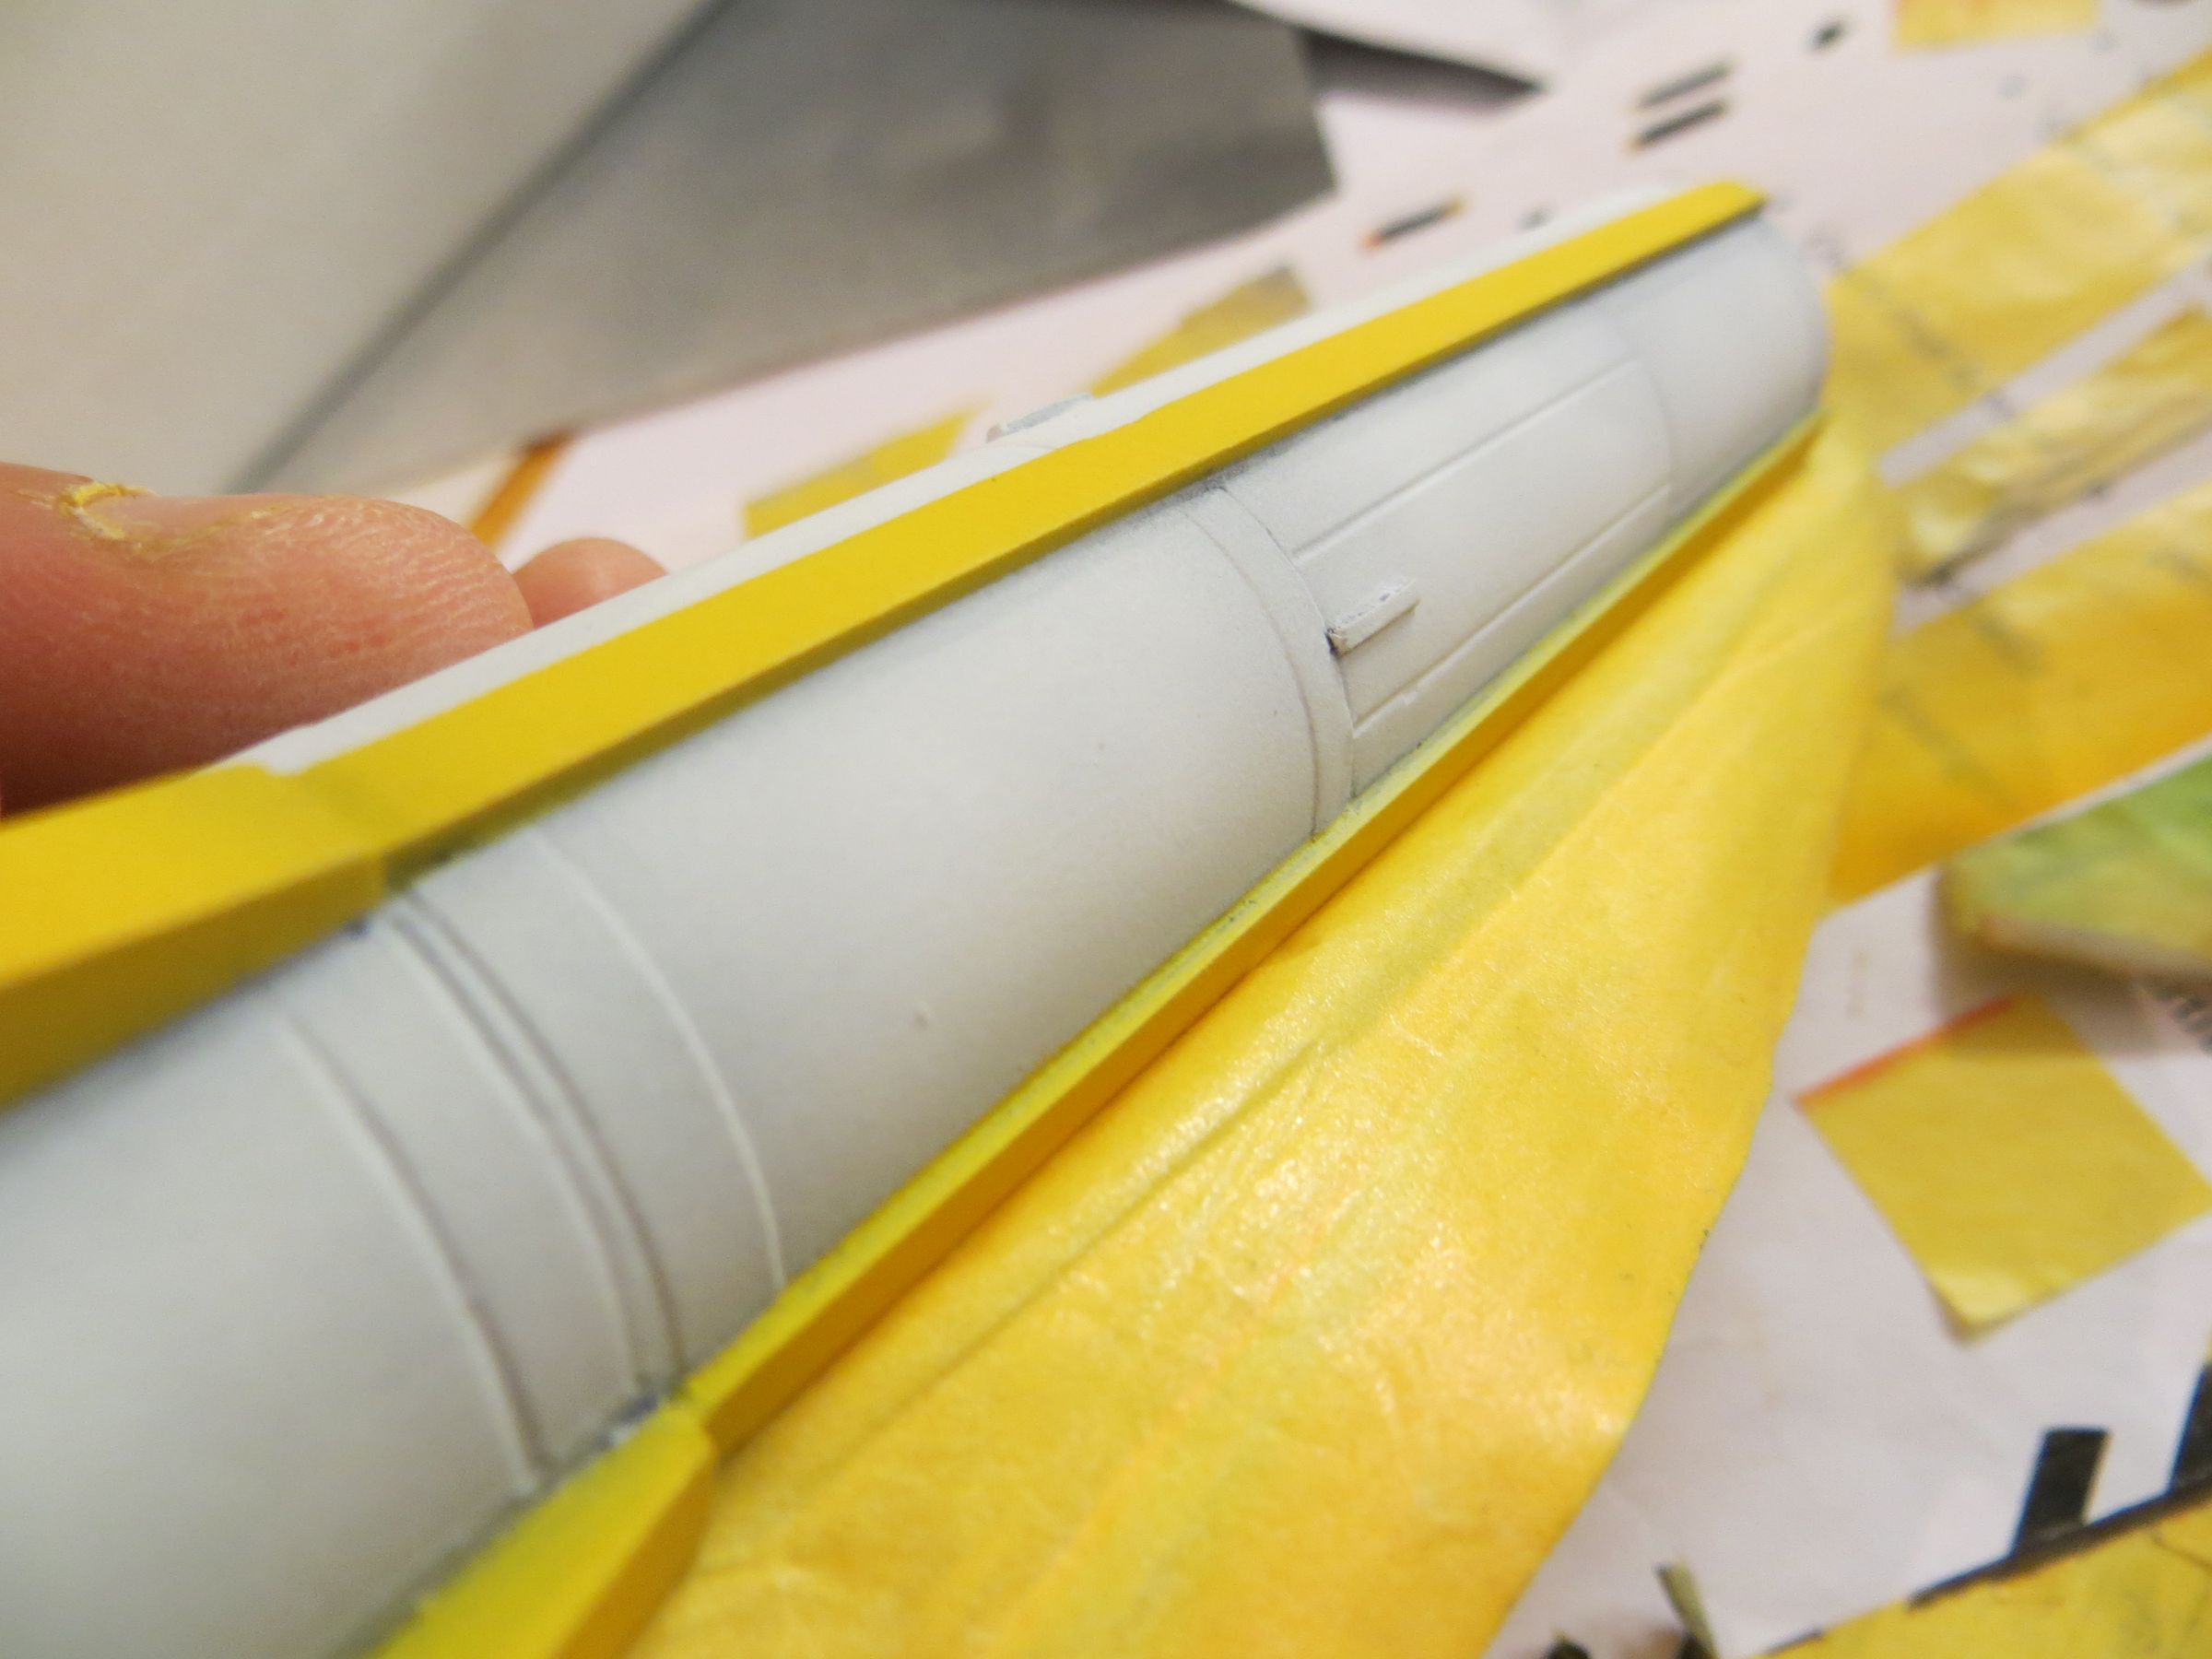
After masking the offwhite, I airbrushed a new thin coat of white, then the preshading needed to be highlighted, in Sky Grey this time, to stay light for the yellow.

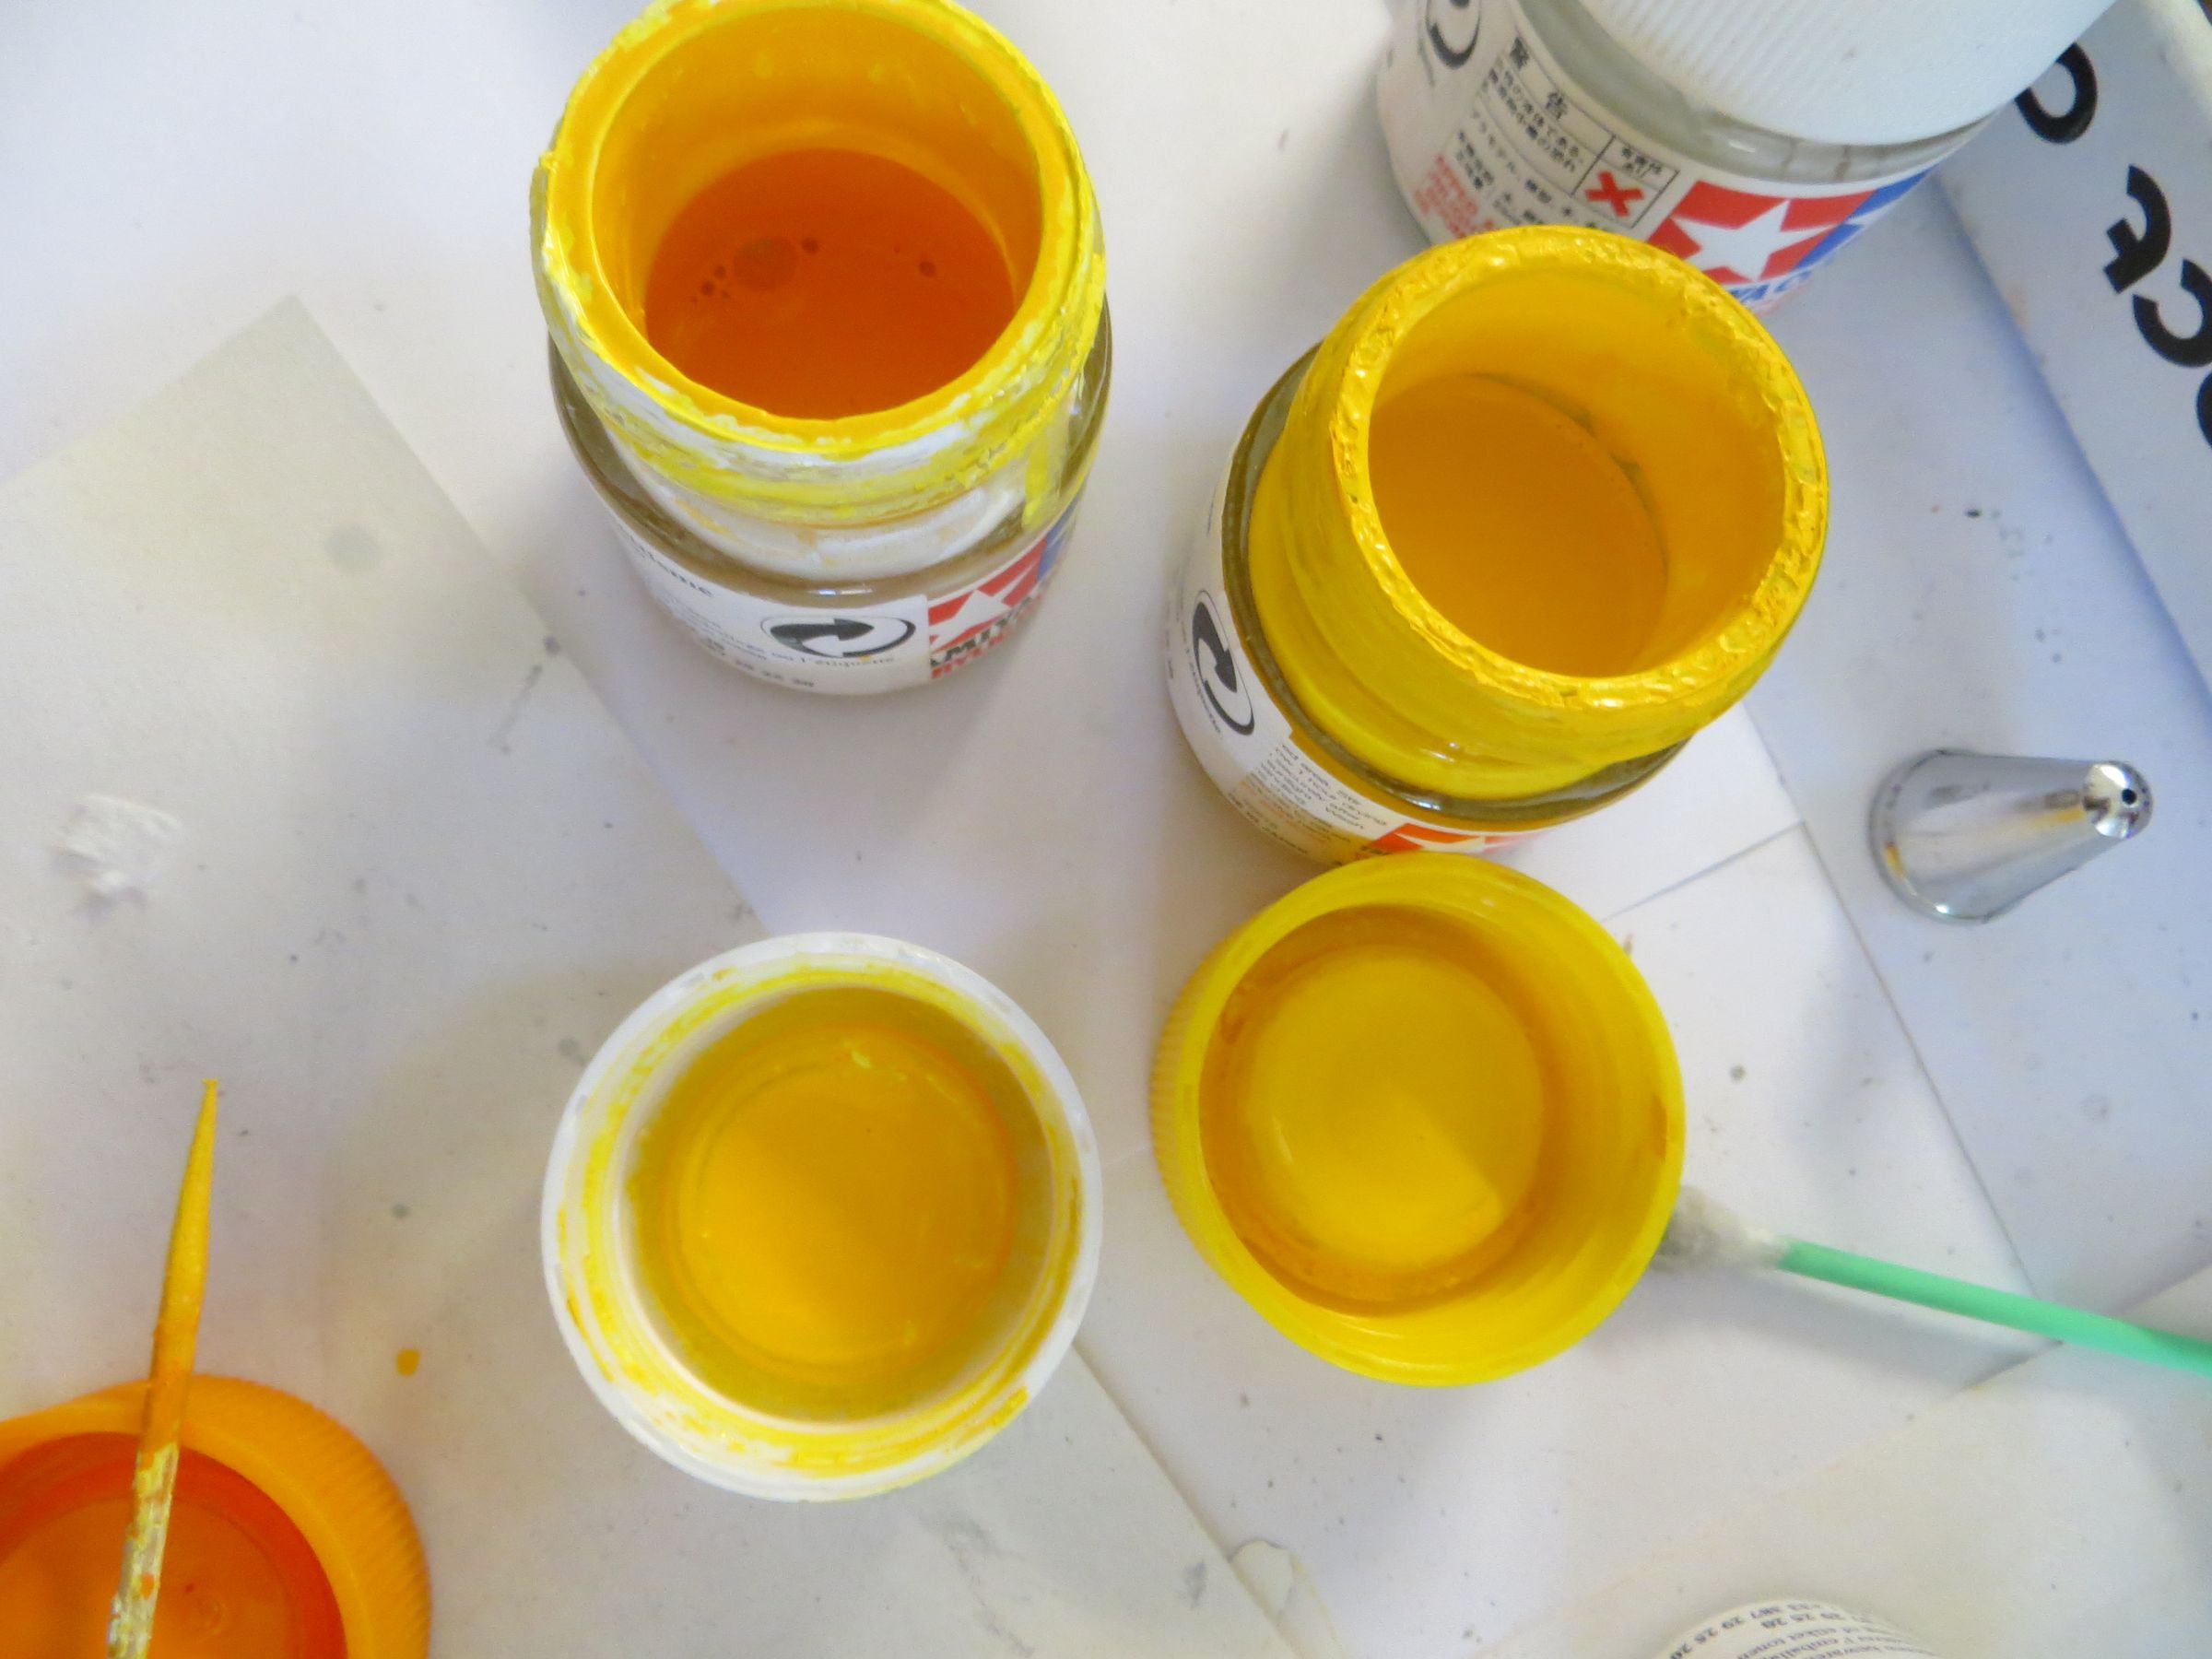
Yellow is complicated color if you want the preshading to work nicely. Yellow Tamyia is beautiful if the applied layer is thick and consistent. By cons, it tends to greenish with the preshading technics.

To remedy this, I pull the yellow to orange by adding gunze H24 Orange Yellow, and some matte white tamiya to make it a little more opaque.
After removing the tapes, I realize that my off-whitebase color is too gray, with fast masks I applied a thin mat white coat to mitigate it.
After | Before
A coat of future/klir protects everything.

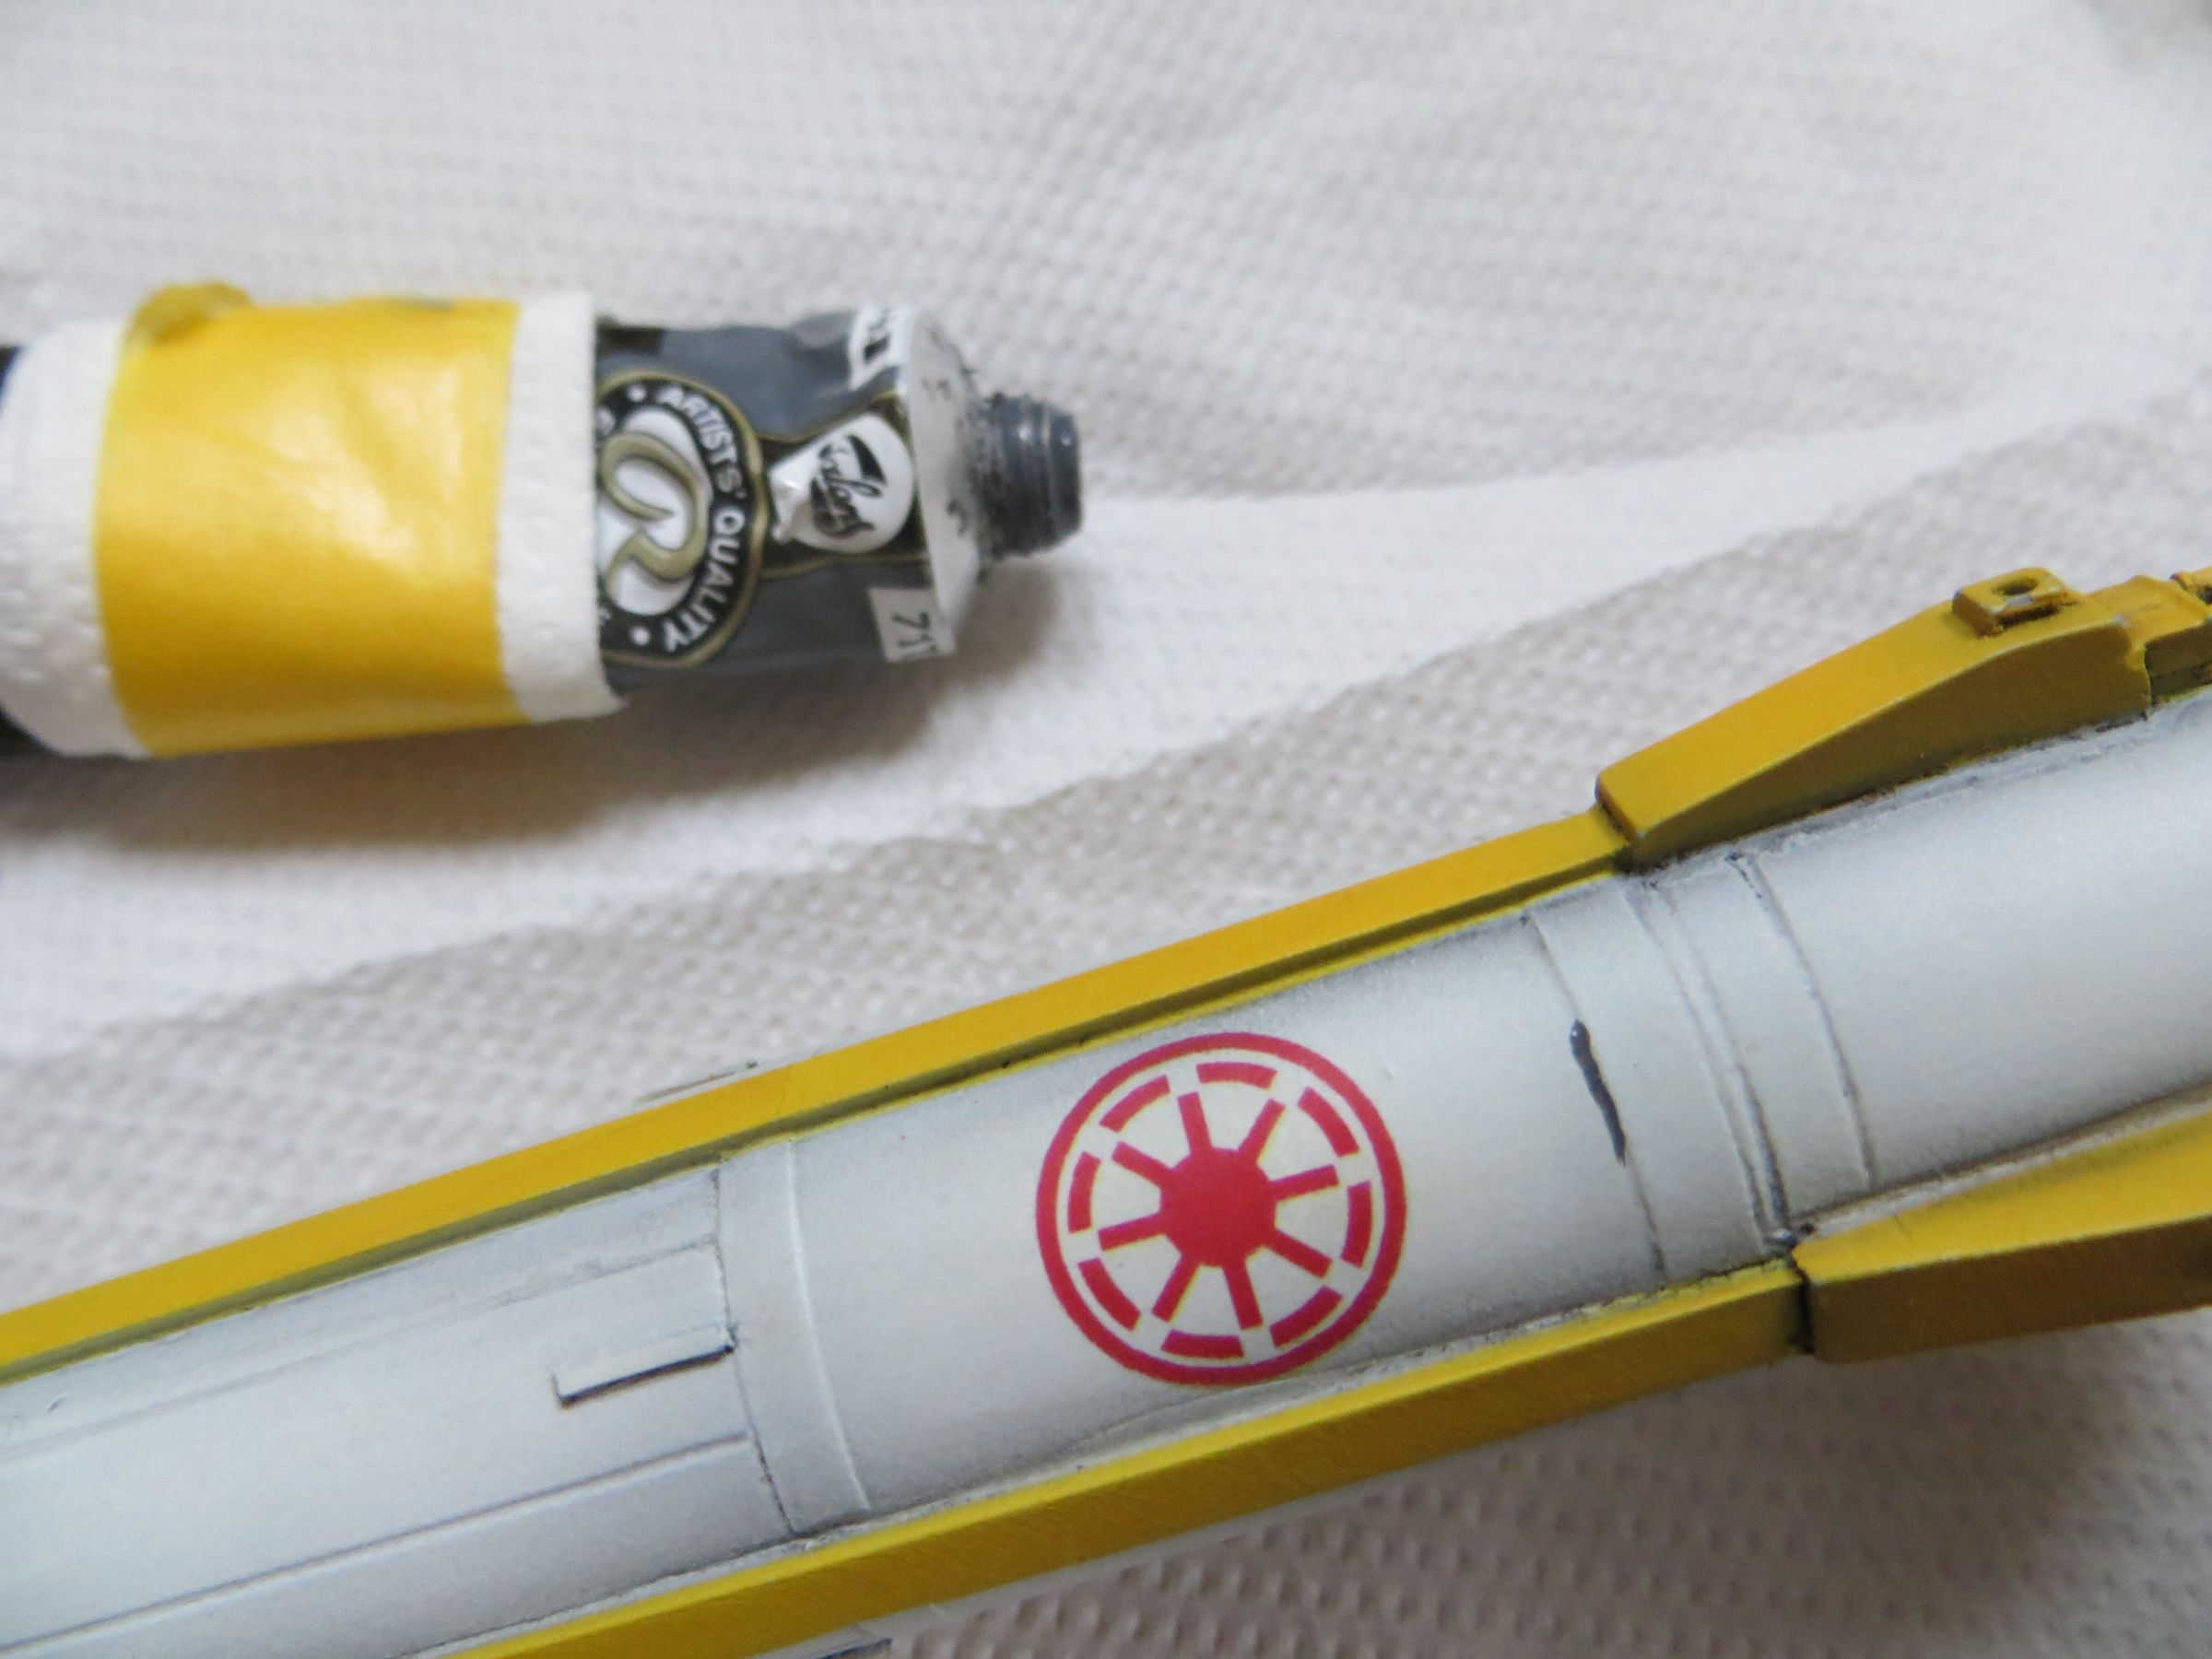
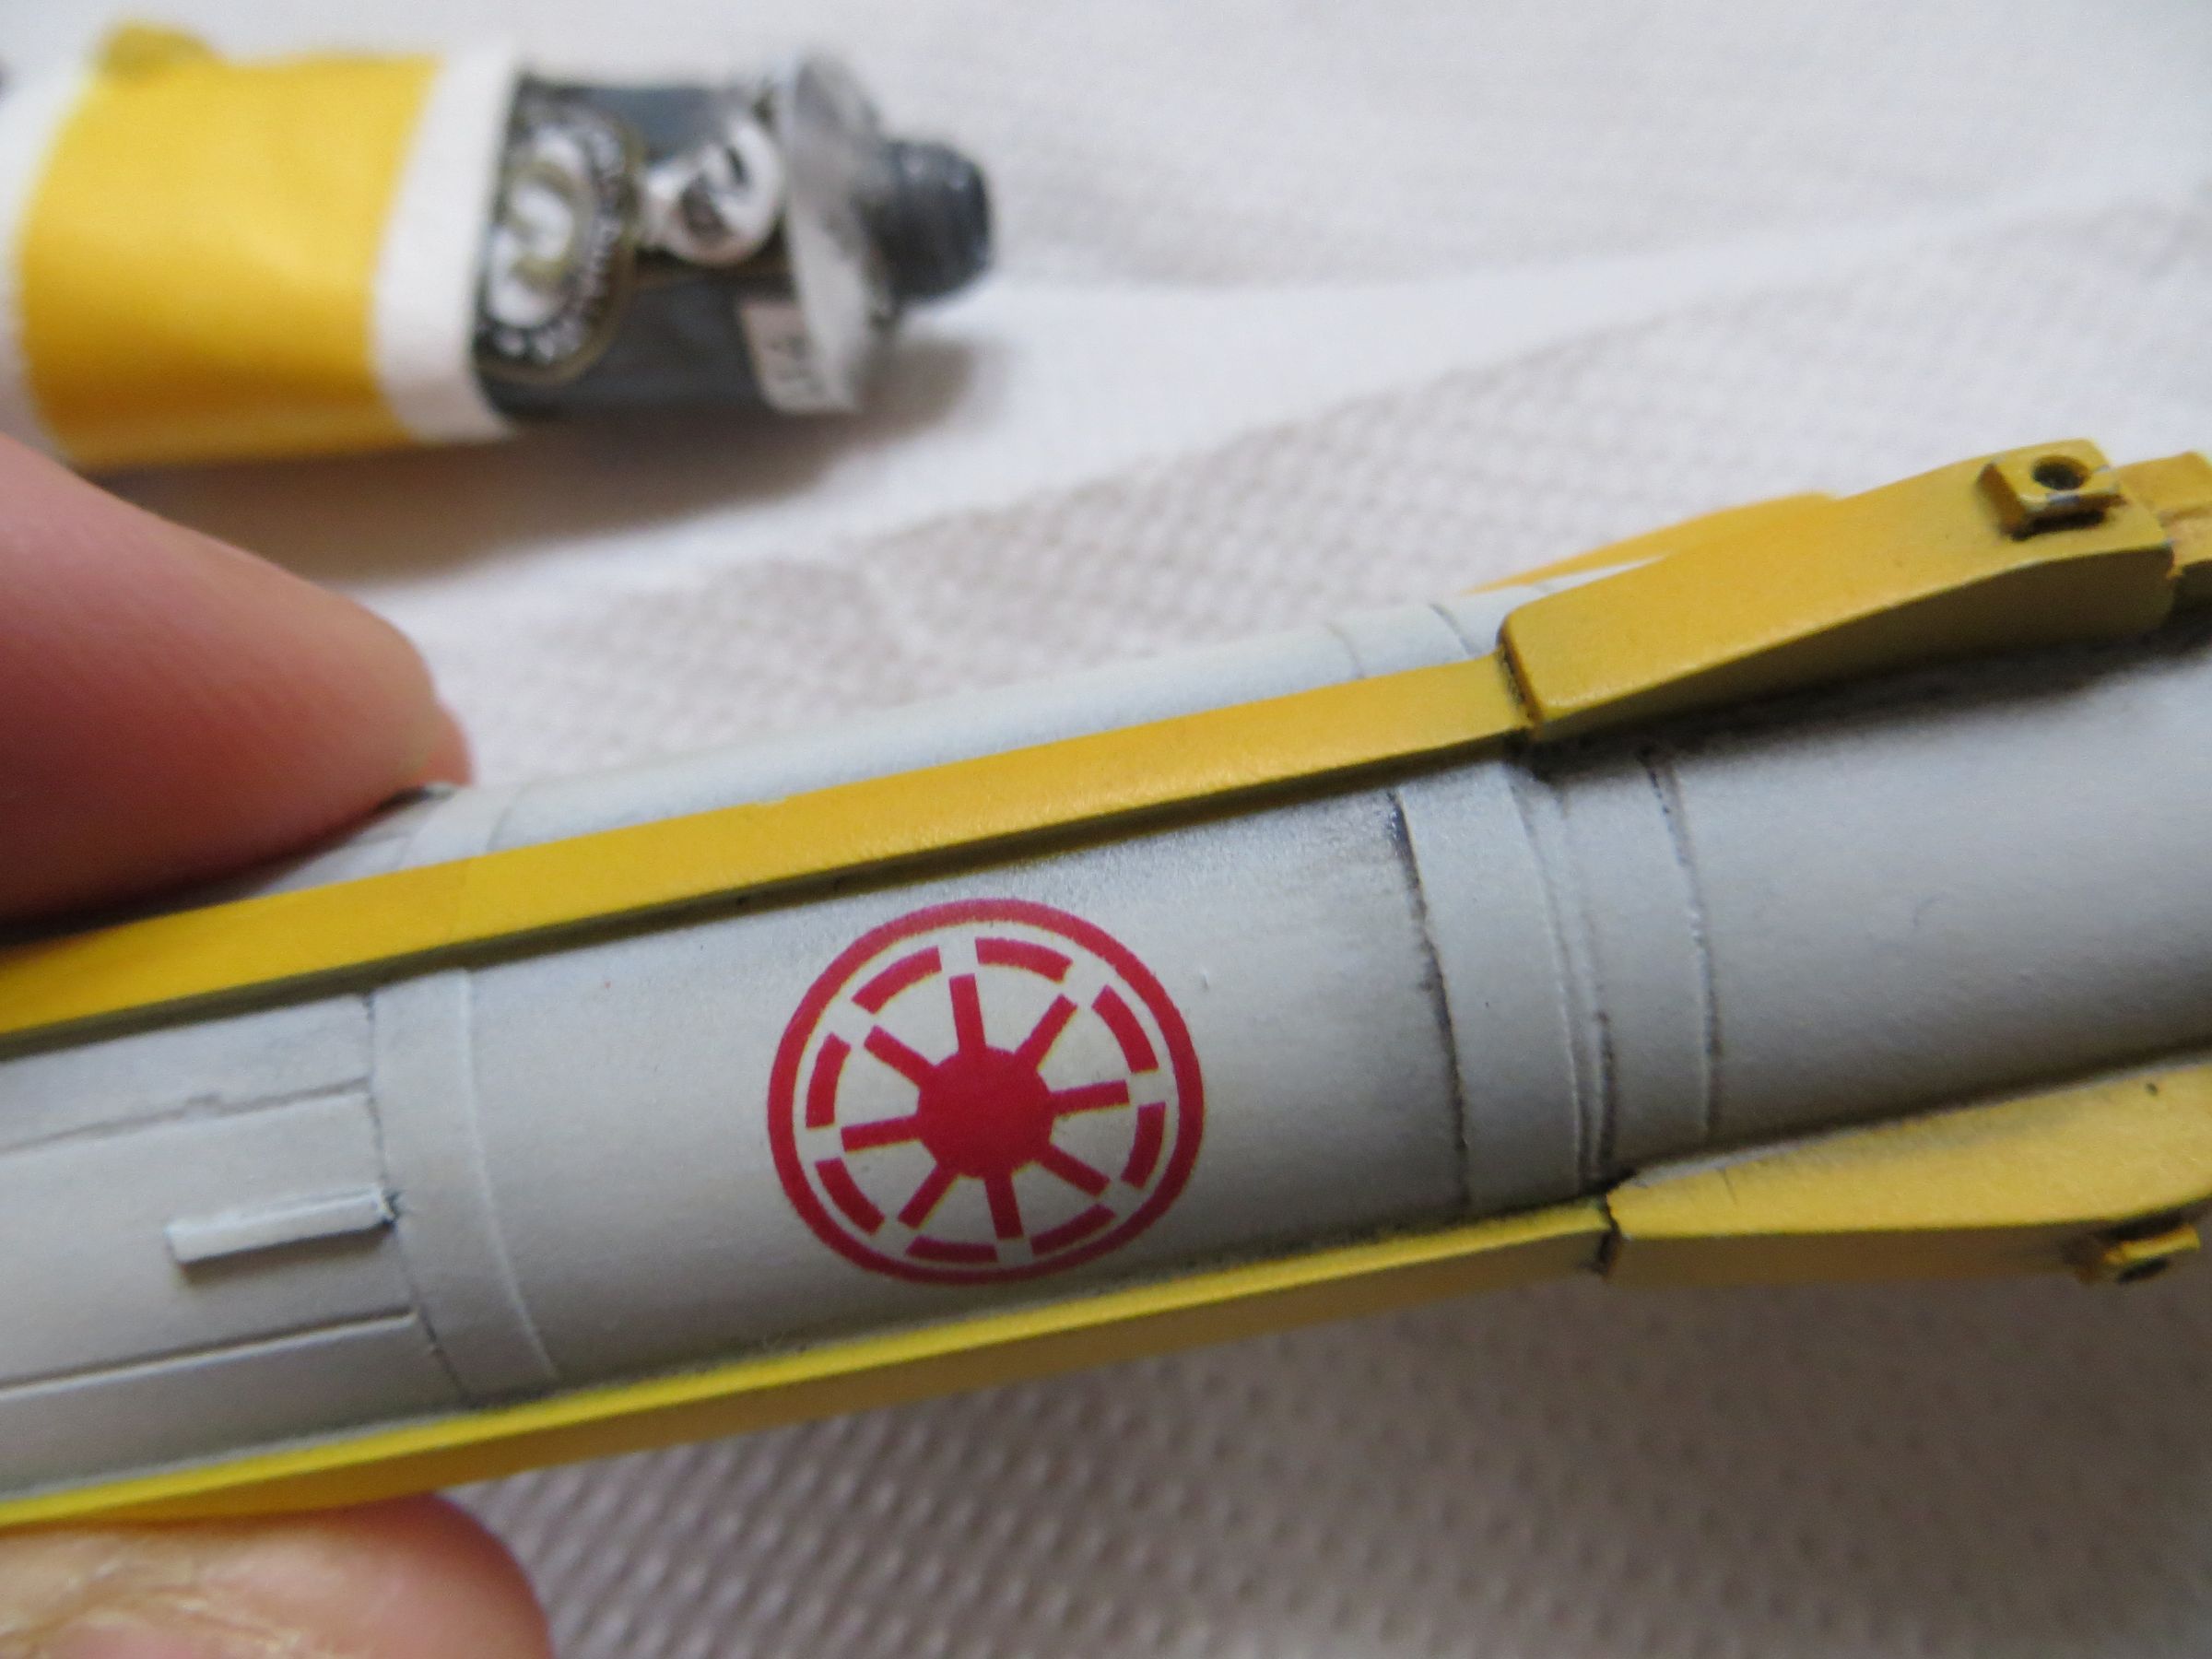
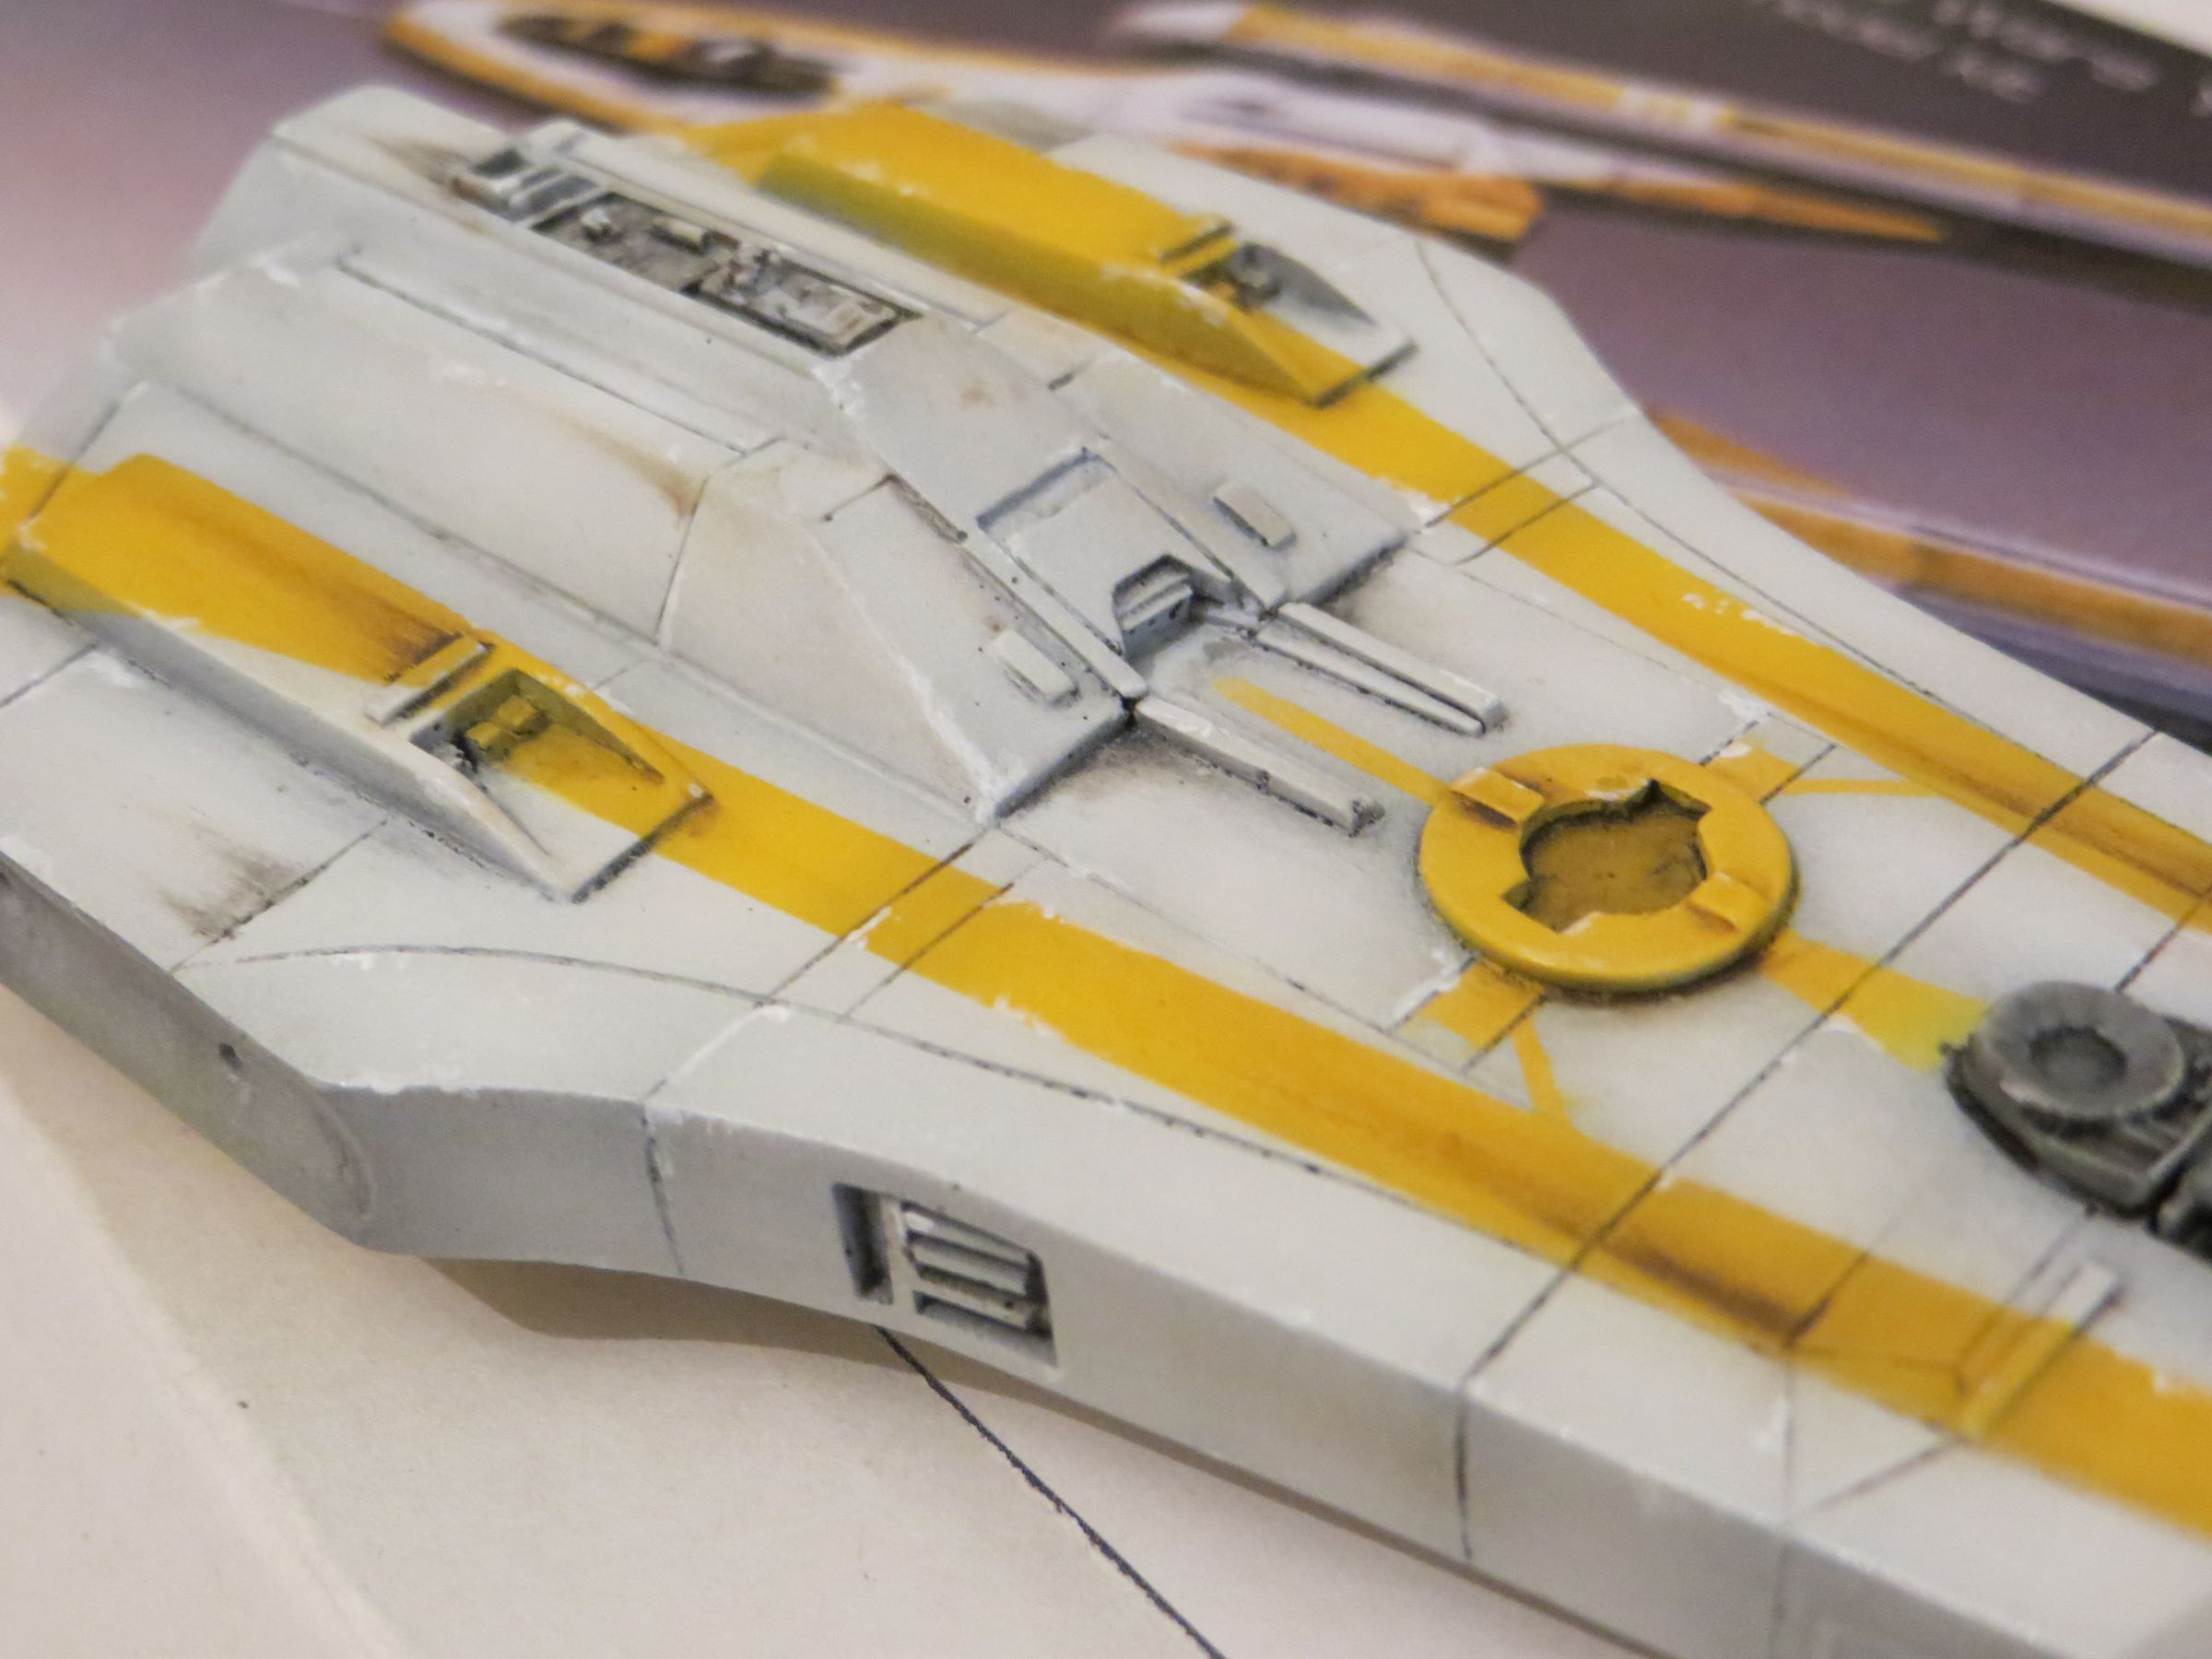
a black wash is applied in trying to ensure that it did not go too much on the yellow, otherwise staying light. It is then completed by a brown wash over the yellow.

I took the opportunity to make a few brown spots on the white, to give it a bit of color diversity.
putting a drop of paint
Quick and immediate wiping behind. This leaves a light streak and a bit of color over the white
Now the cockpit: base color stone gray, black juice, white drybrush and some buttons in white, red and yellow.

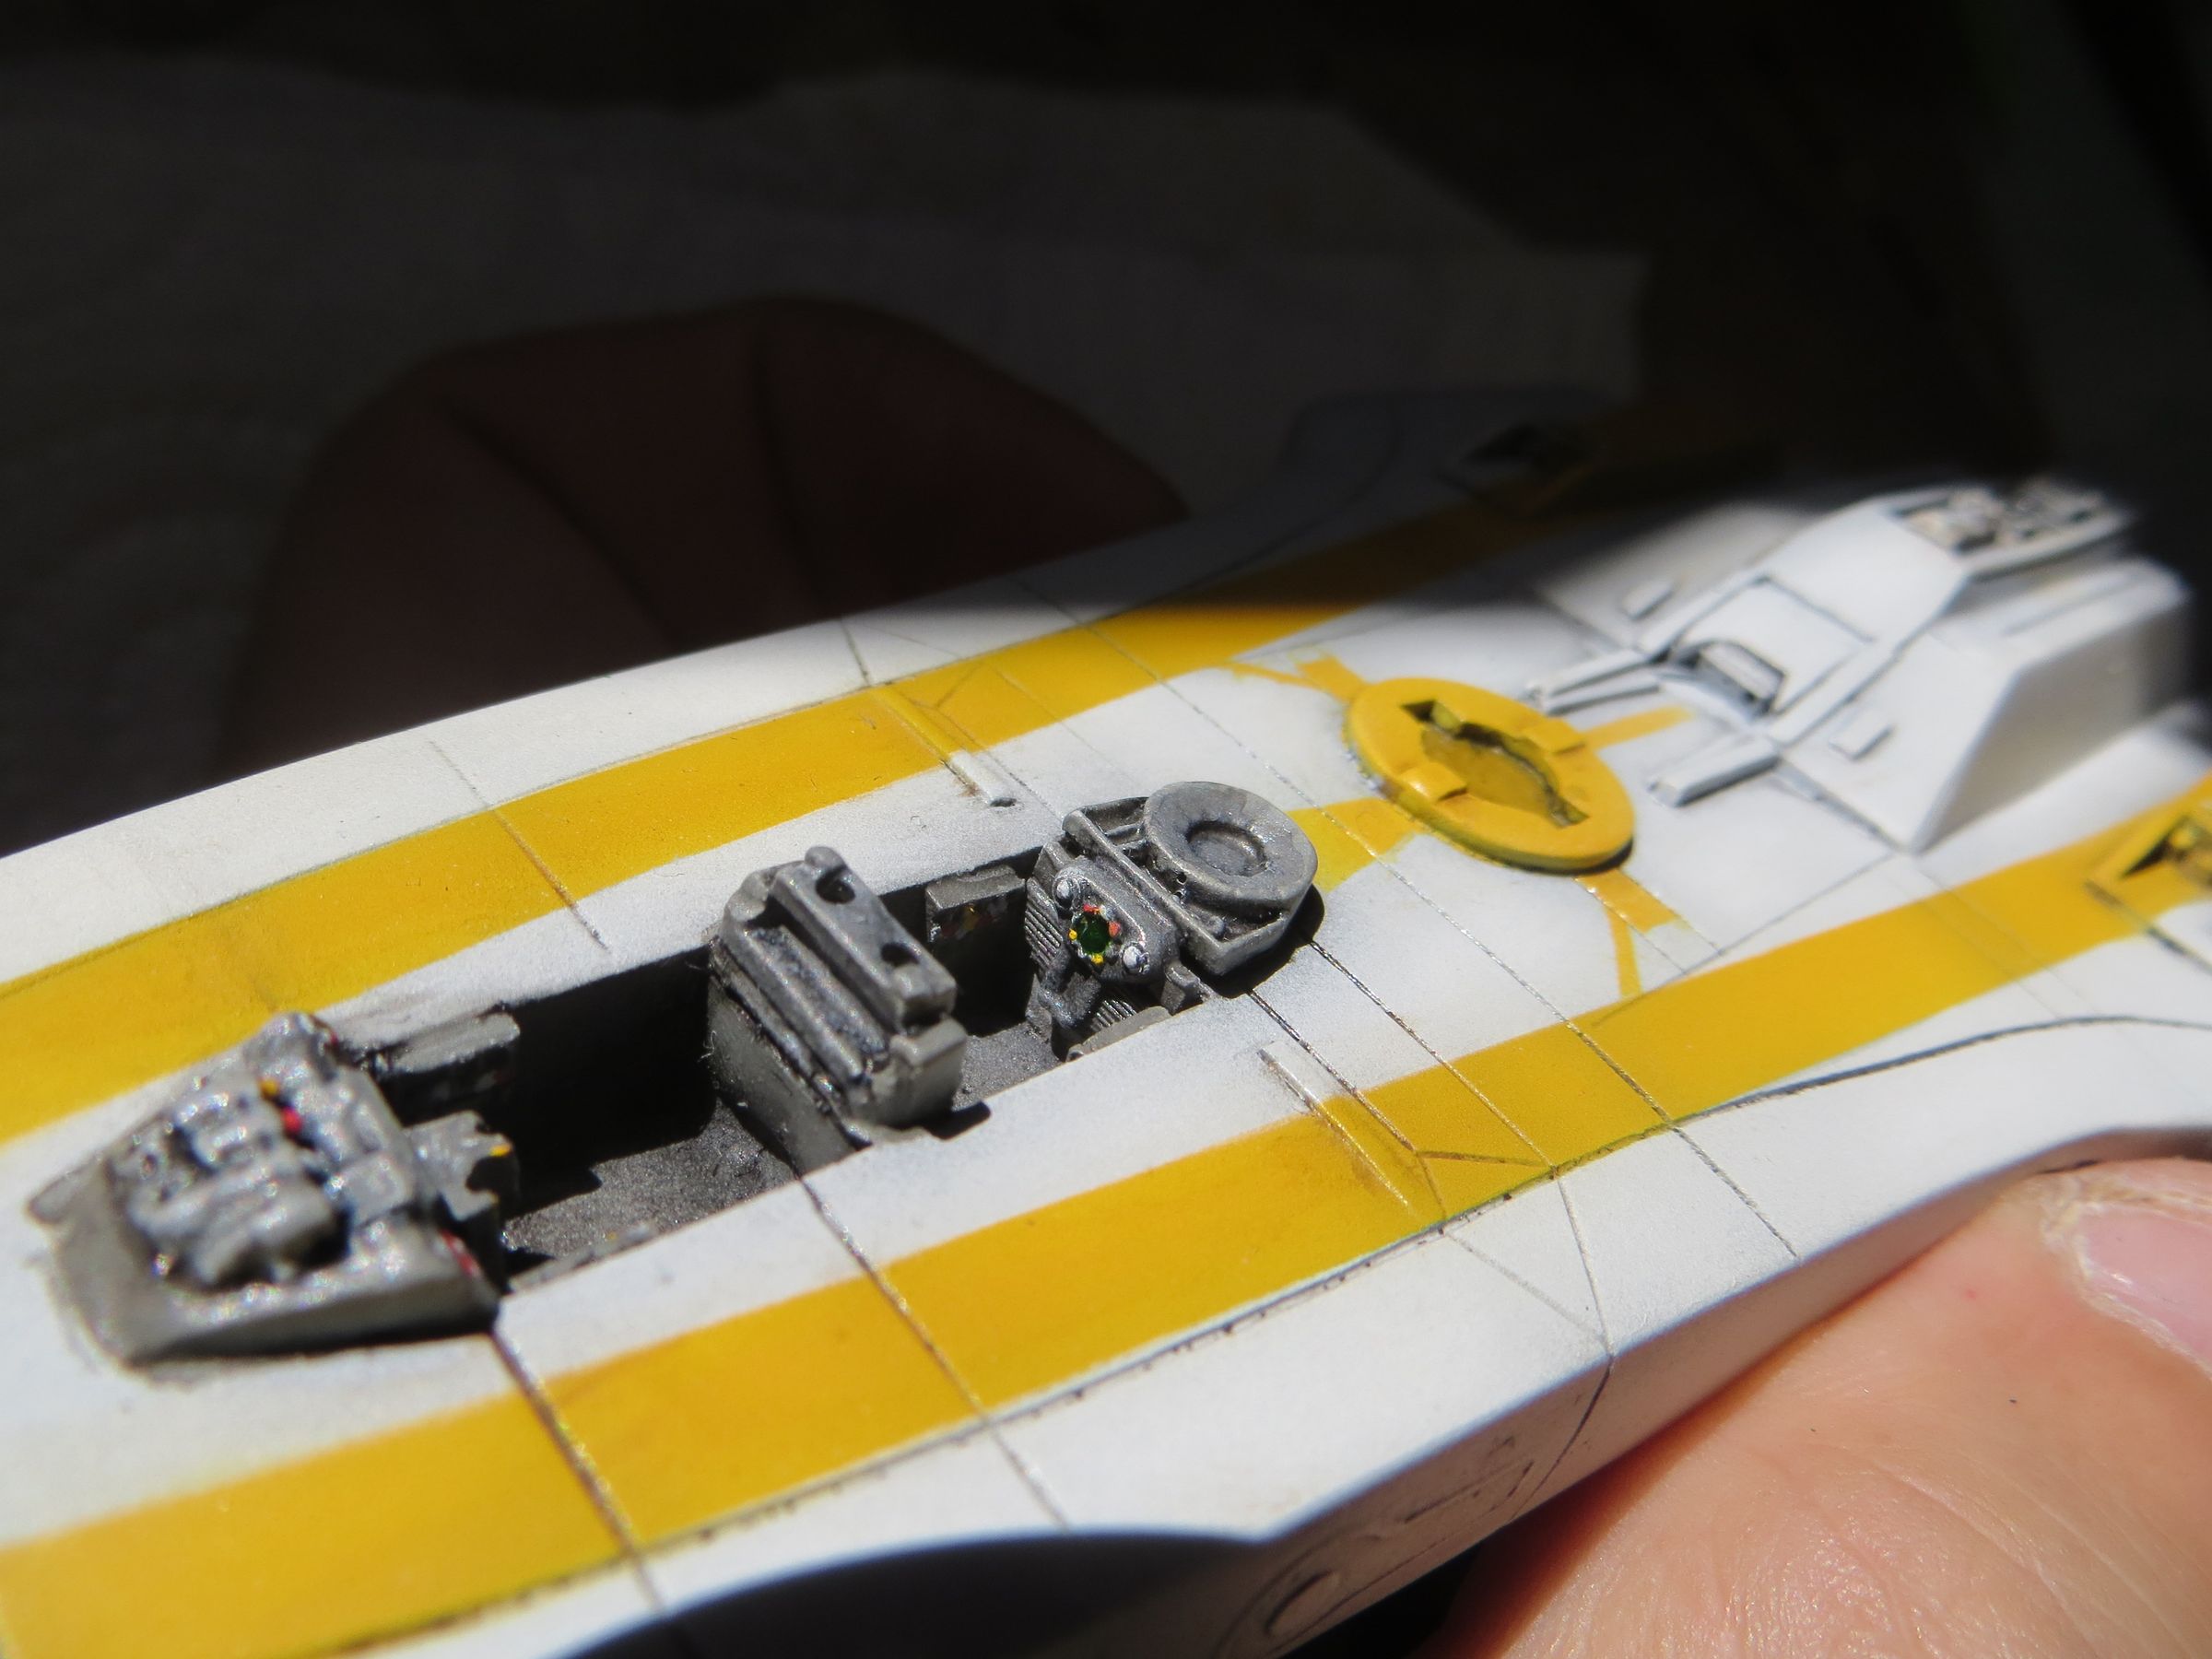
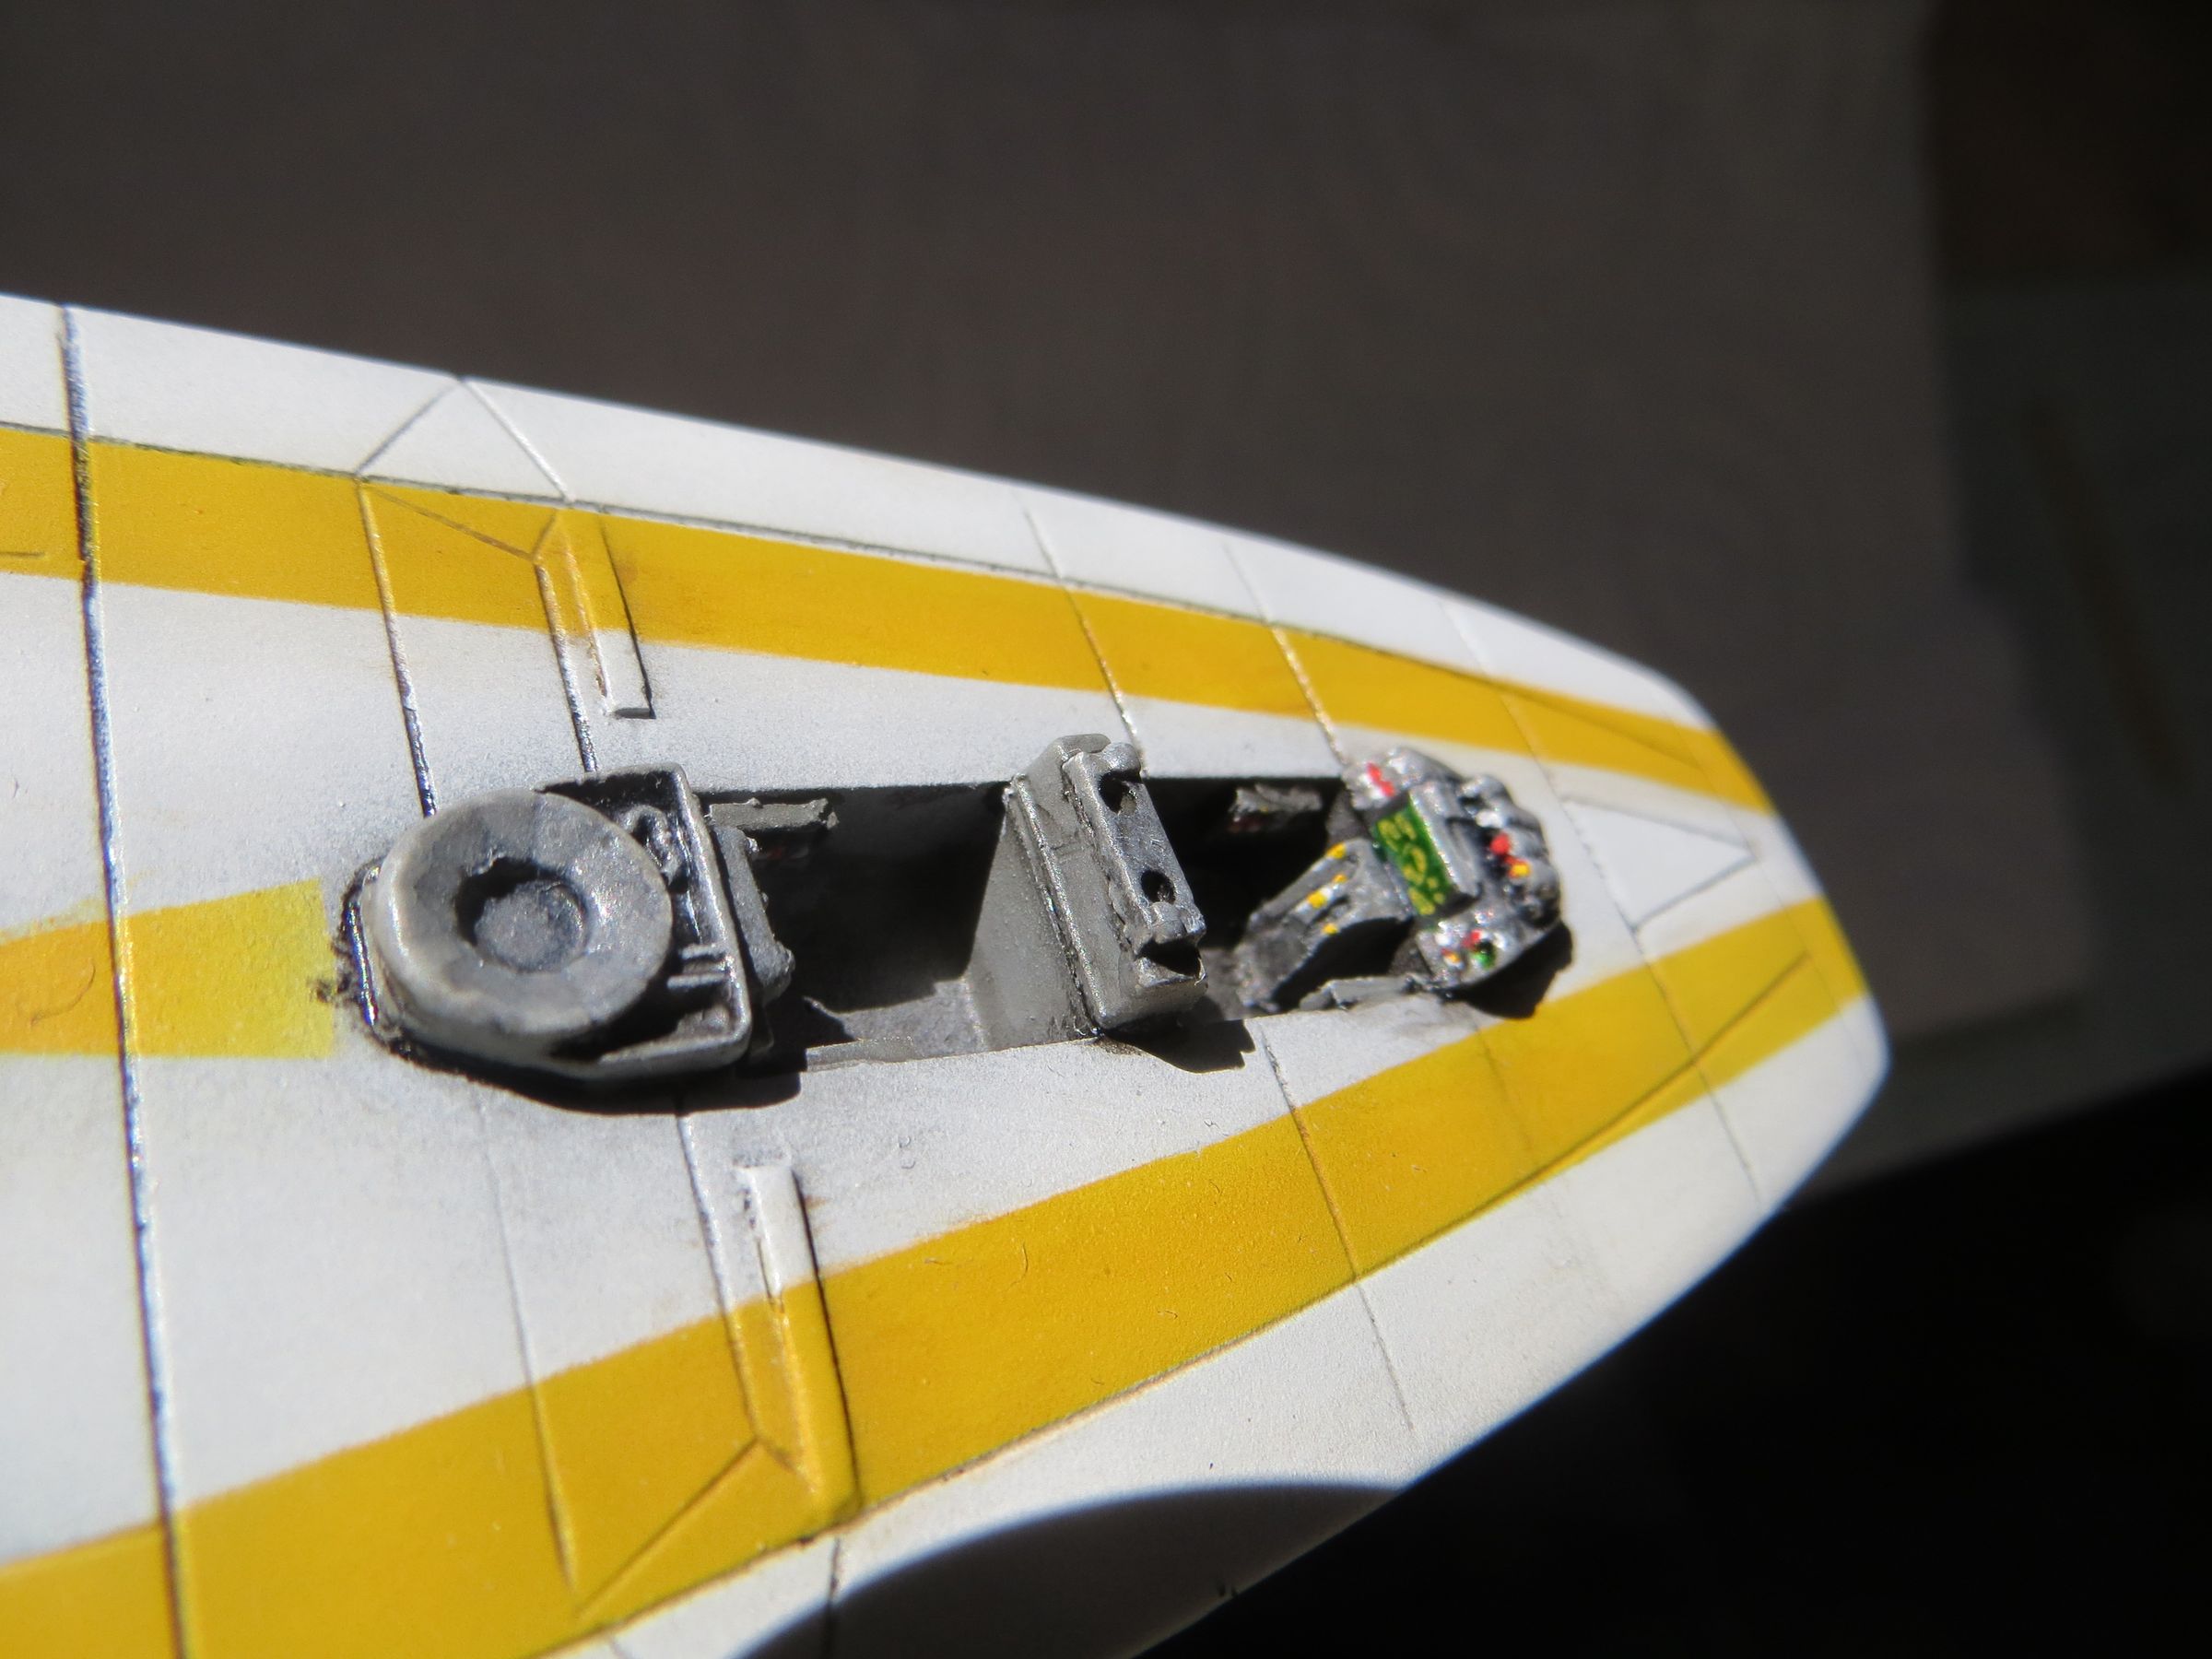
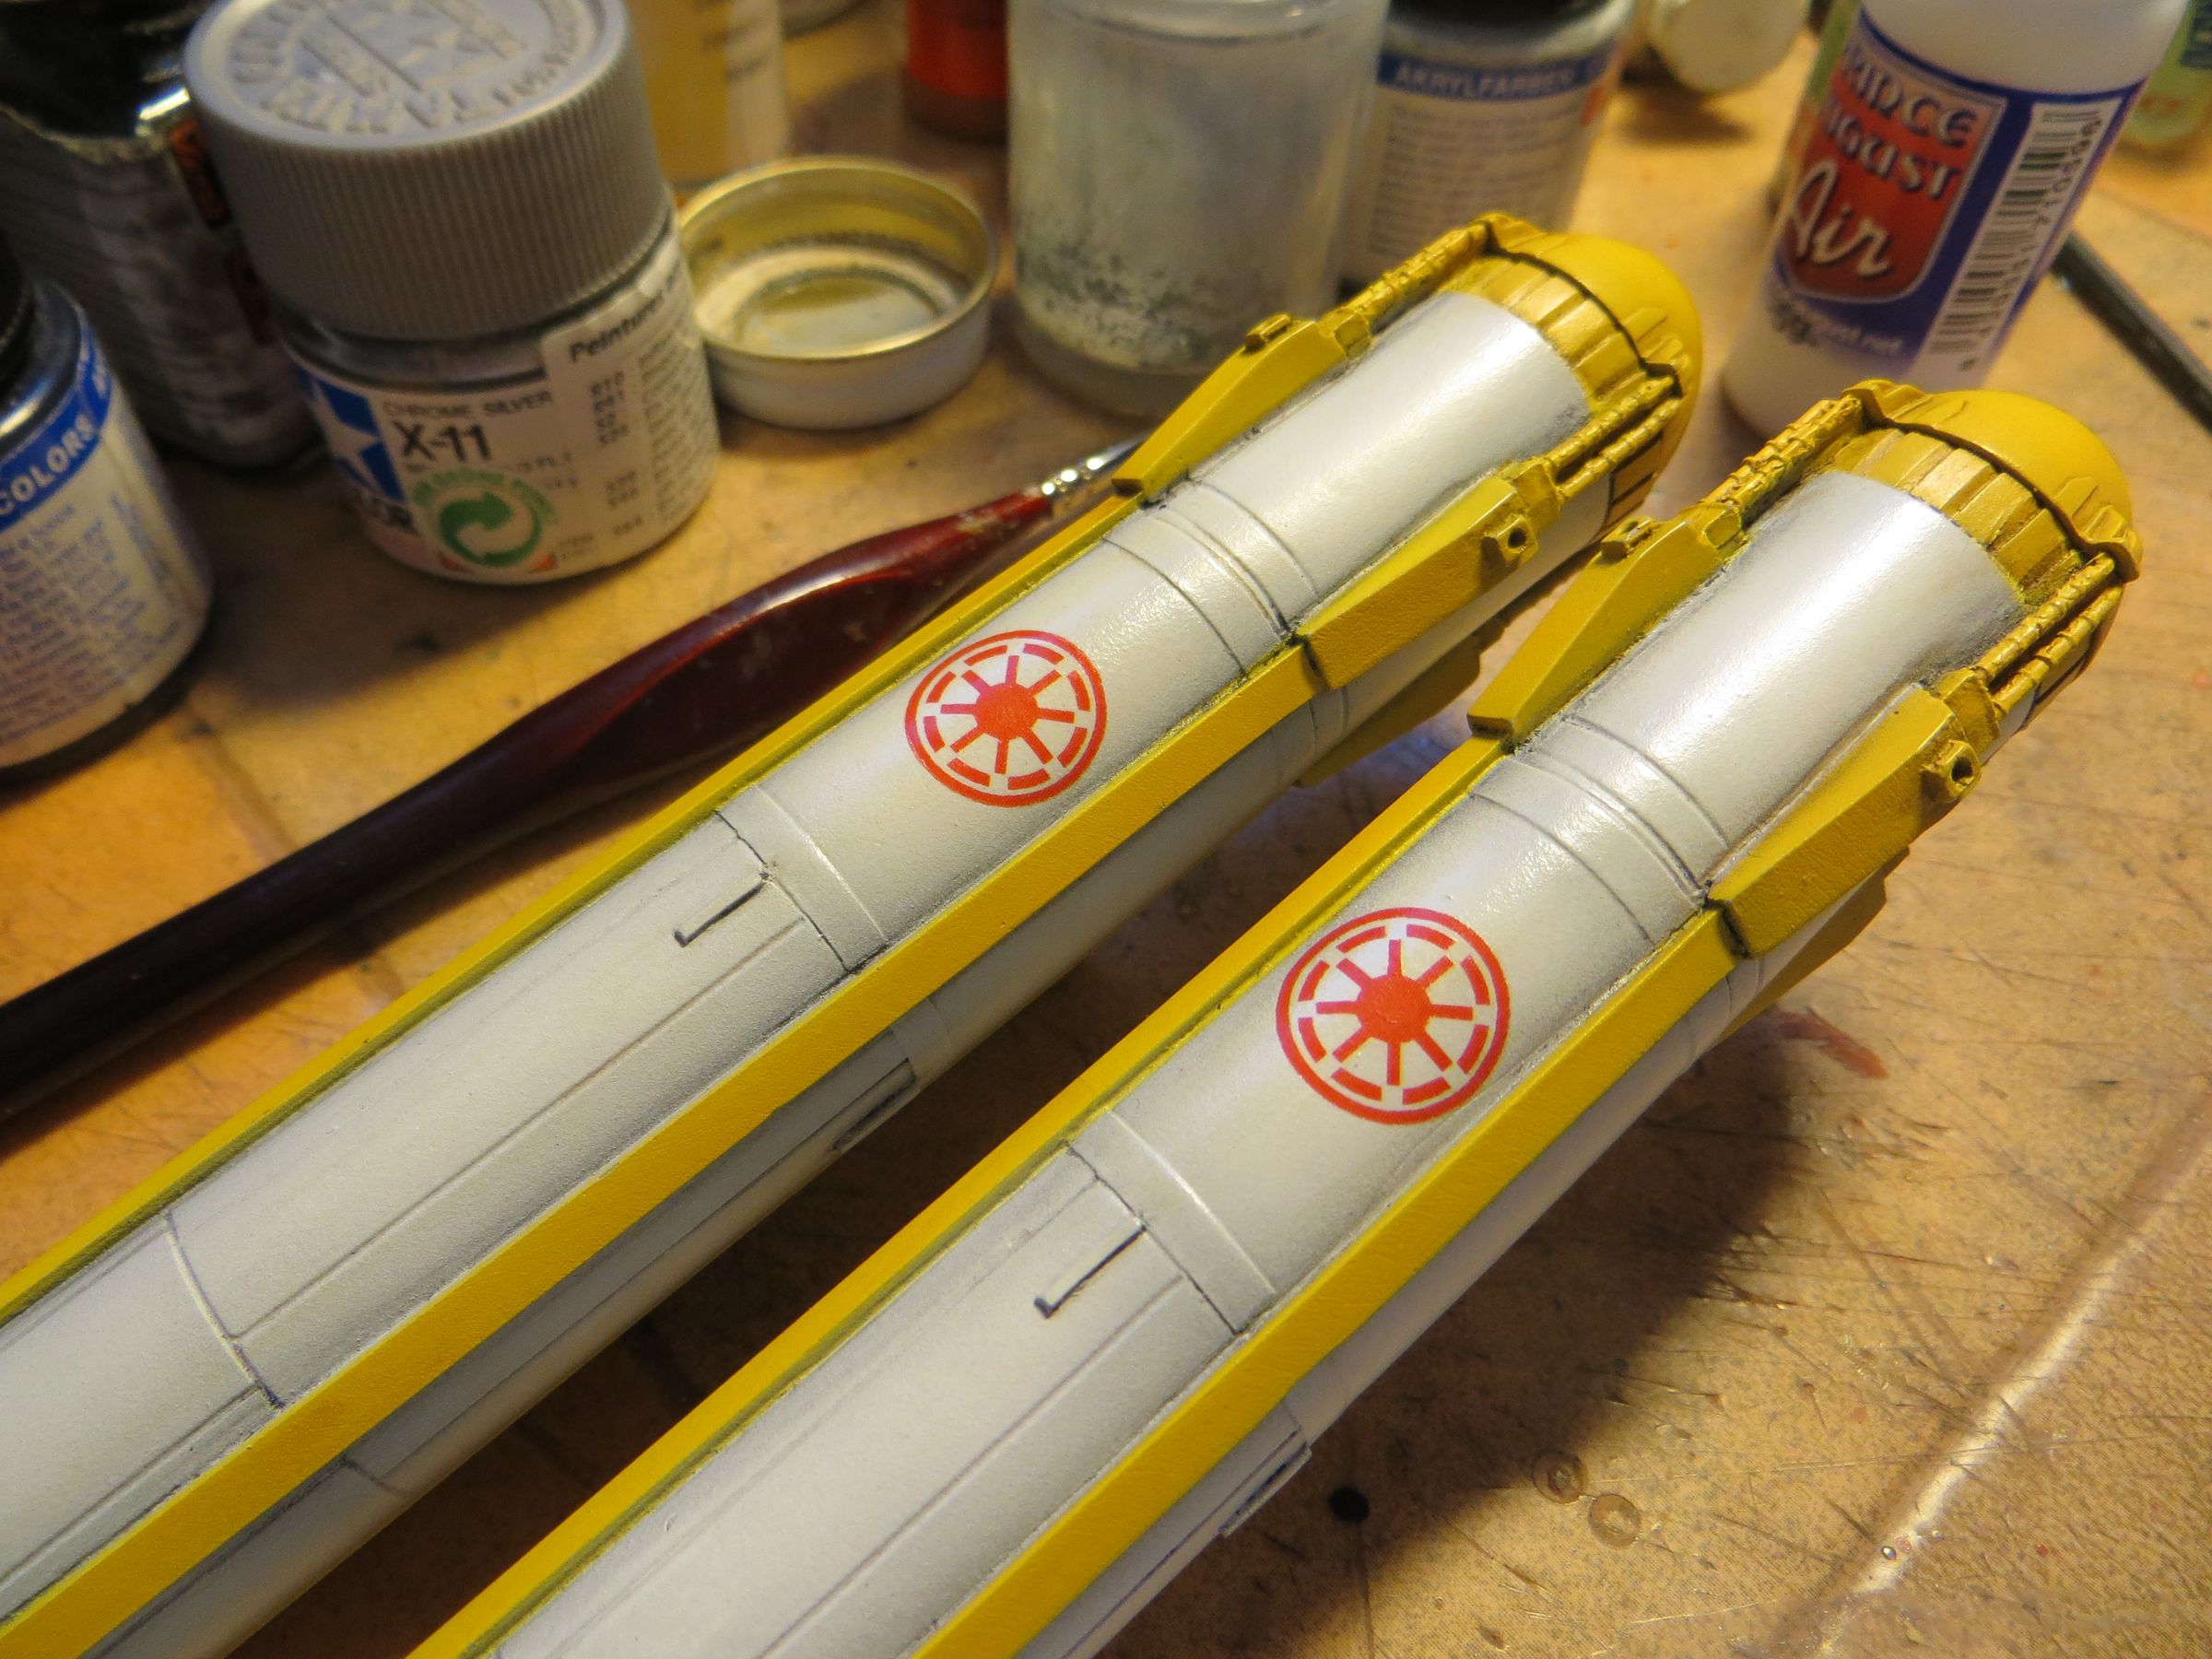
The decals are applied fairly easily after a new coat of Klir.
vendredi, 9 août 2013
Par olcabour le vendredi, 9 août 2013, 23:20
Back on the building of the Clone Wars Y-Wing, that was on pause for few monthes.
A black preshading is applied all over the paneling.
Rather than use a pure white, I went for an off-white mixture of tamiya XF-1 Mat White with few drops of tamiya xf-19 Sky Gray, and few drops of Klir/Future. The mixture is highly thinned and then airbrushed at very low pressure. This takes a little more time because you have to apply many thin layers, but you have total control on the result.
Left: still one or two thin coats. Right, it's done. For each one, the nozzle end remains to be done because I was holding them there (by the way, it allows to visualize the technique).
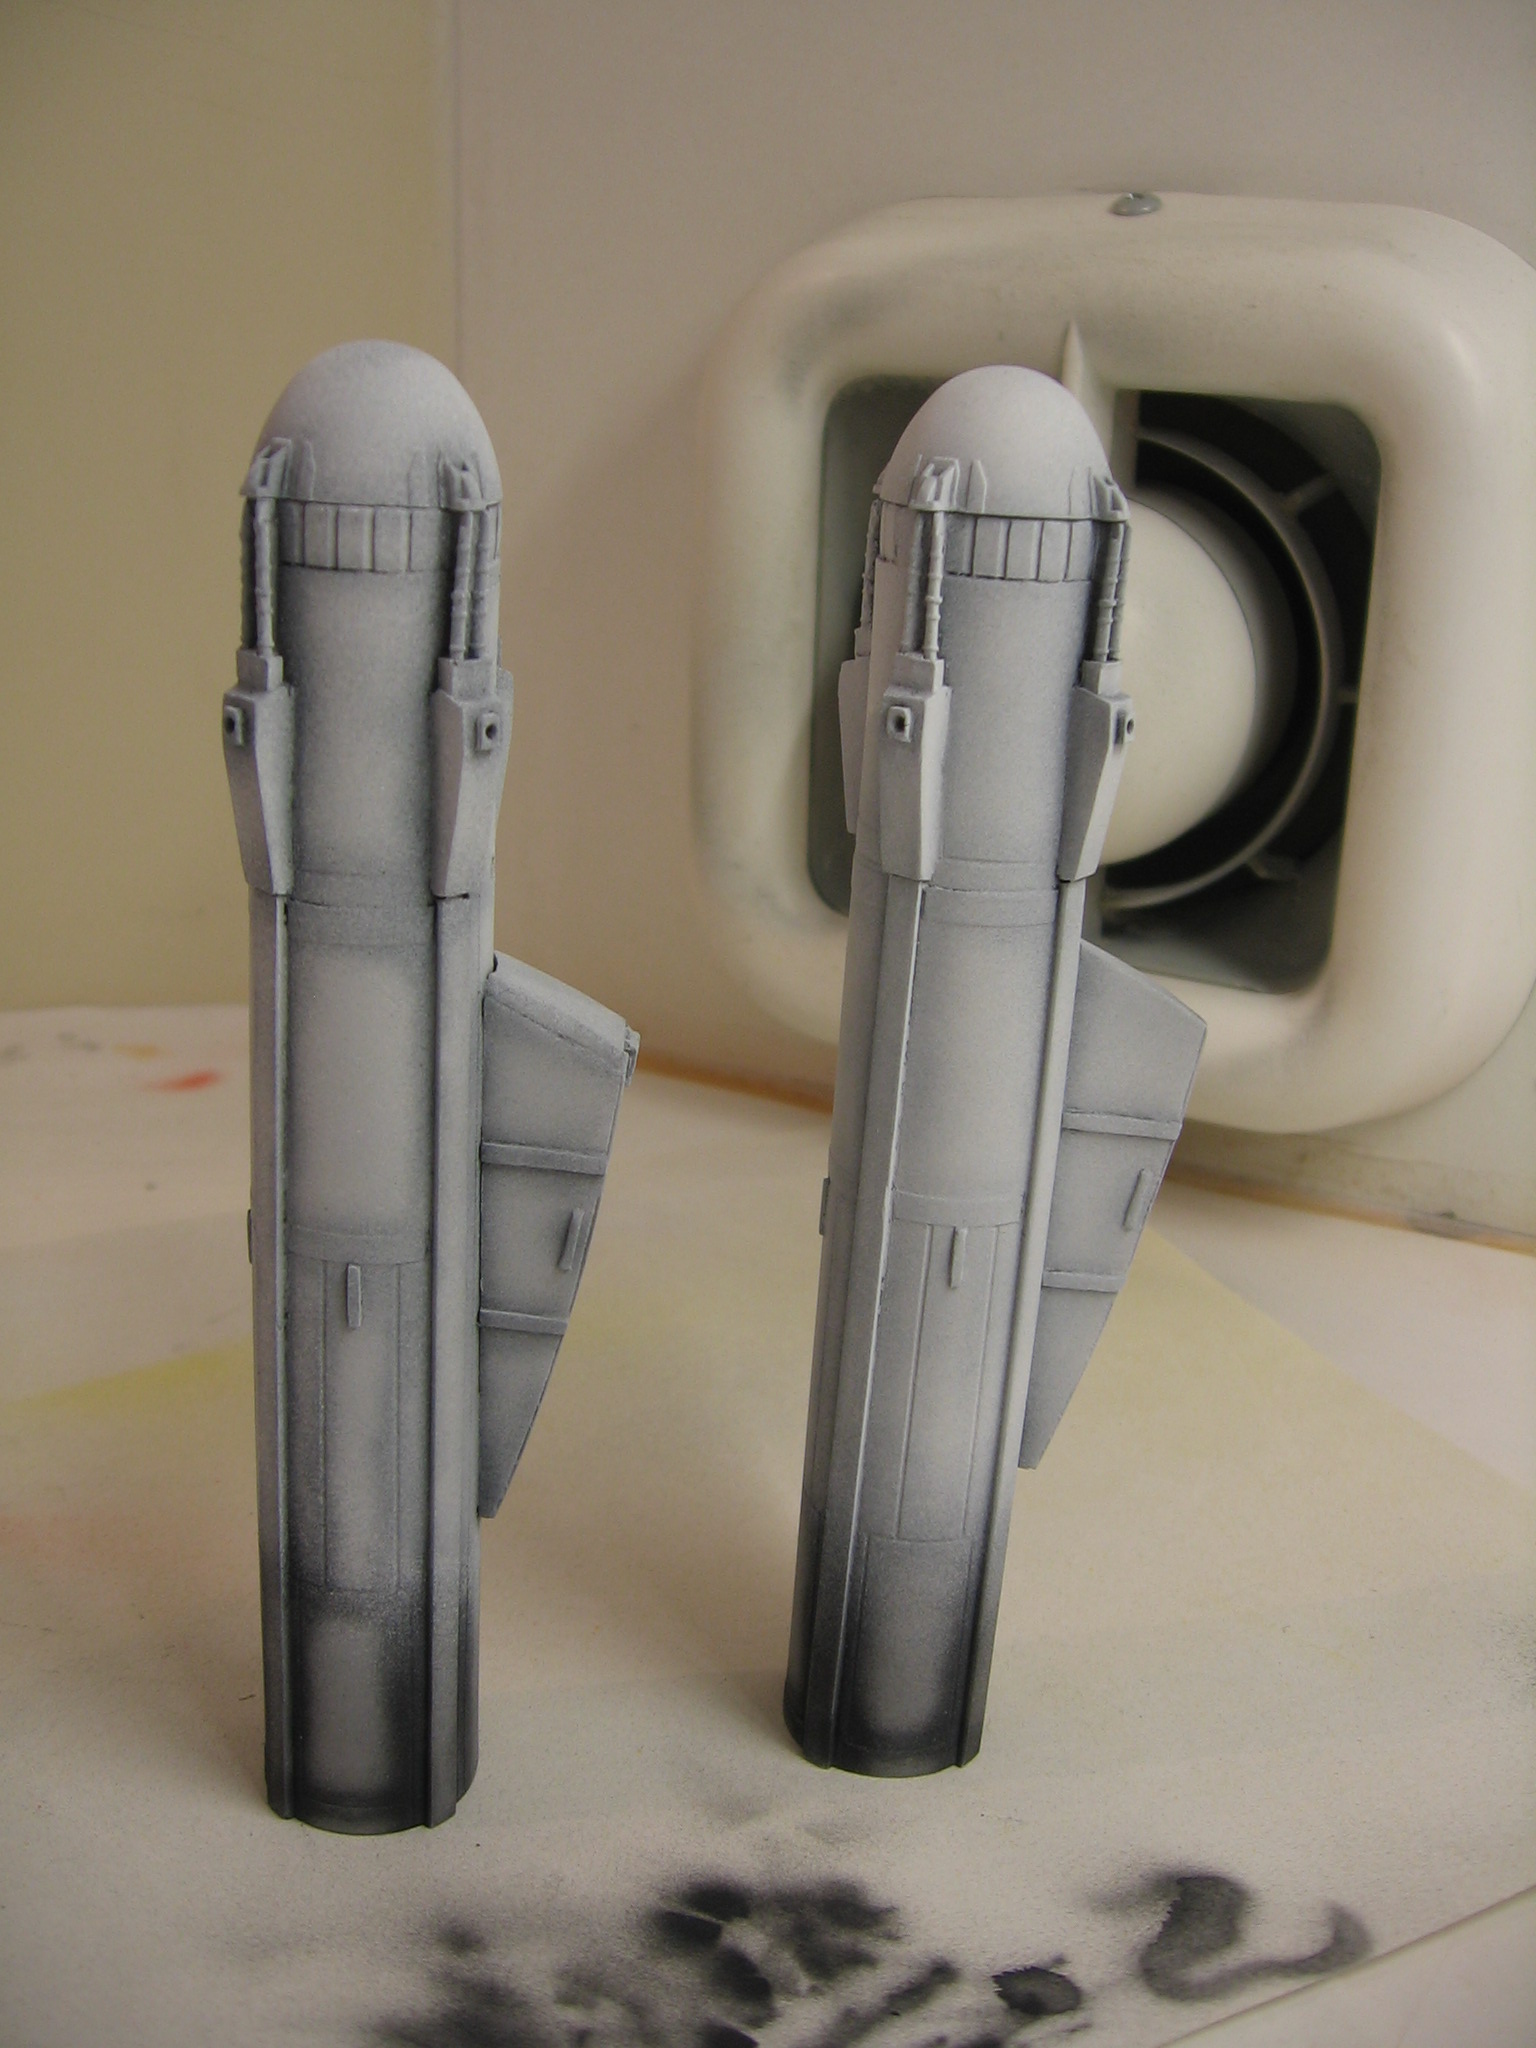
Here, the white is done.
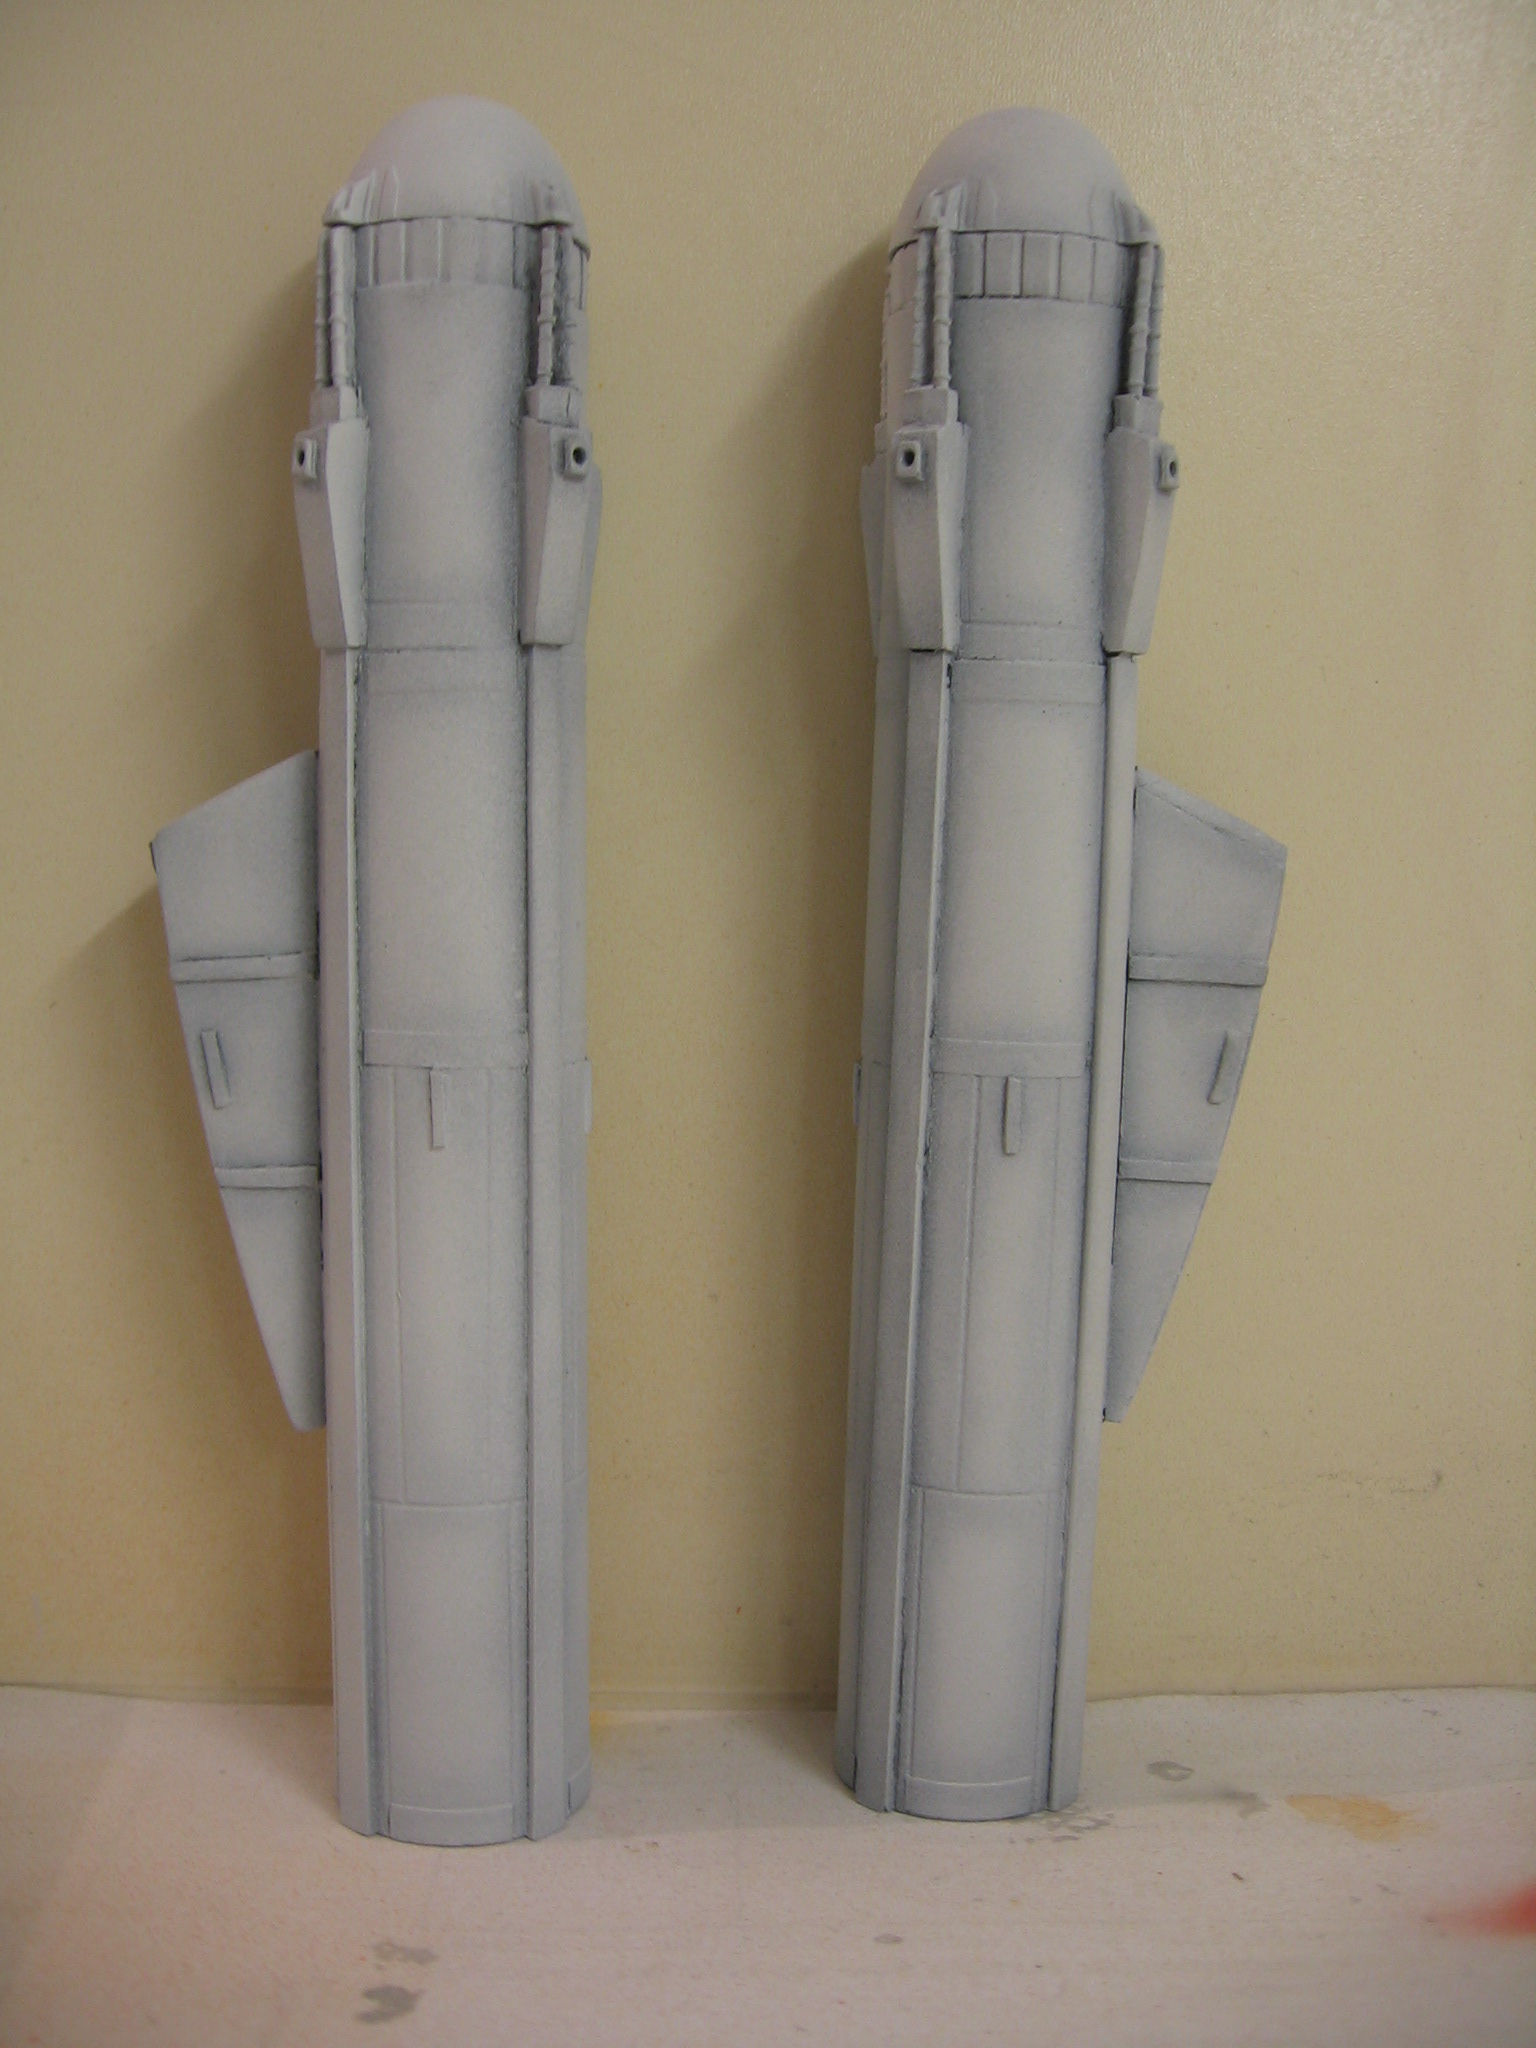

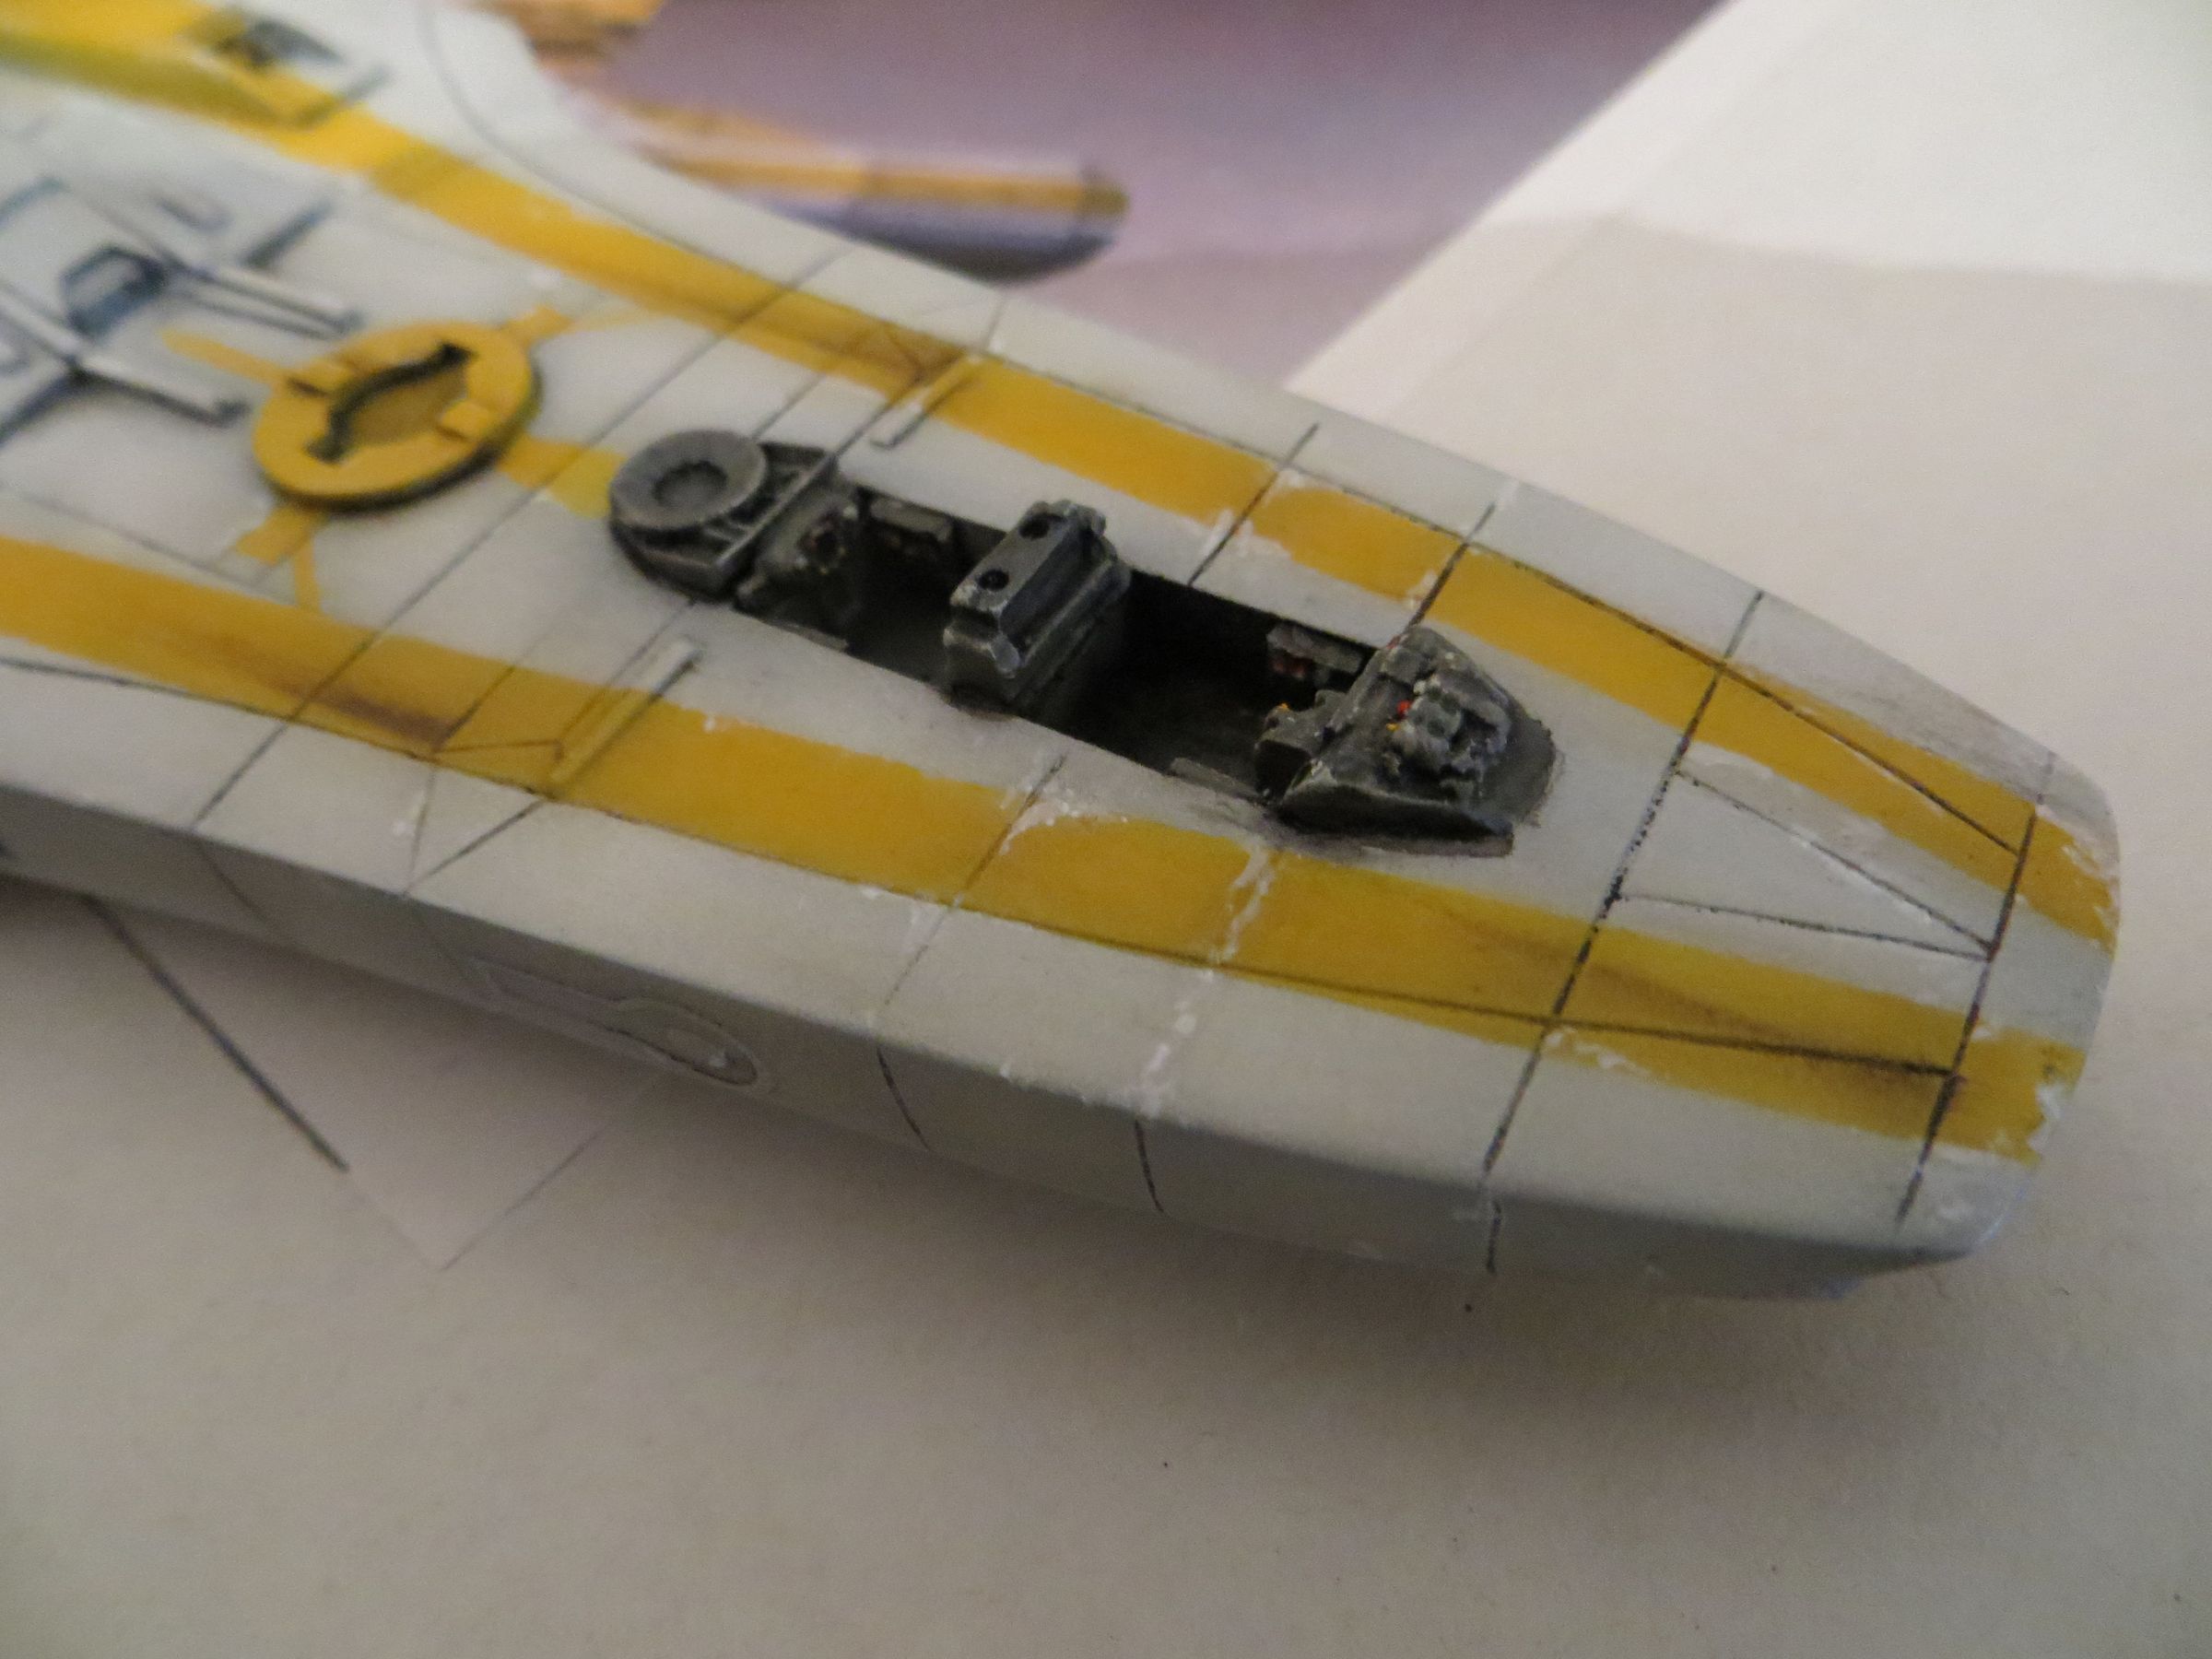
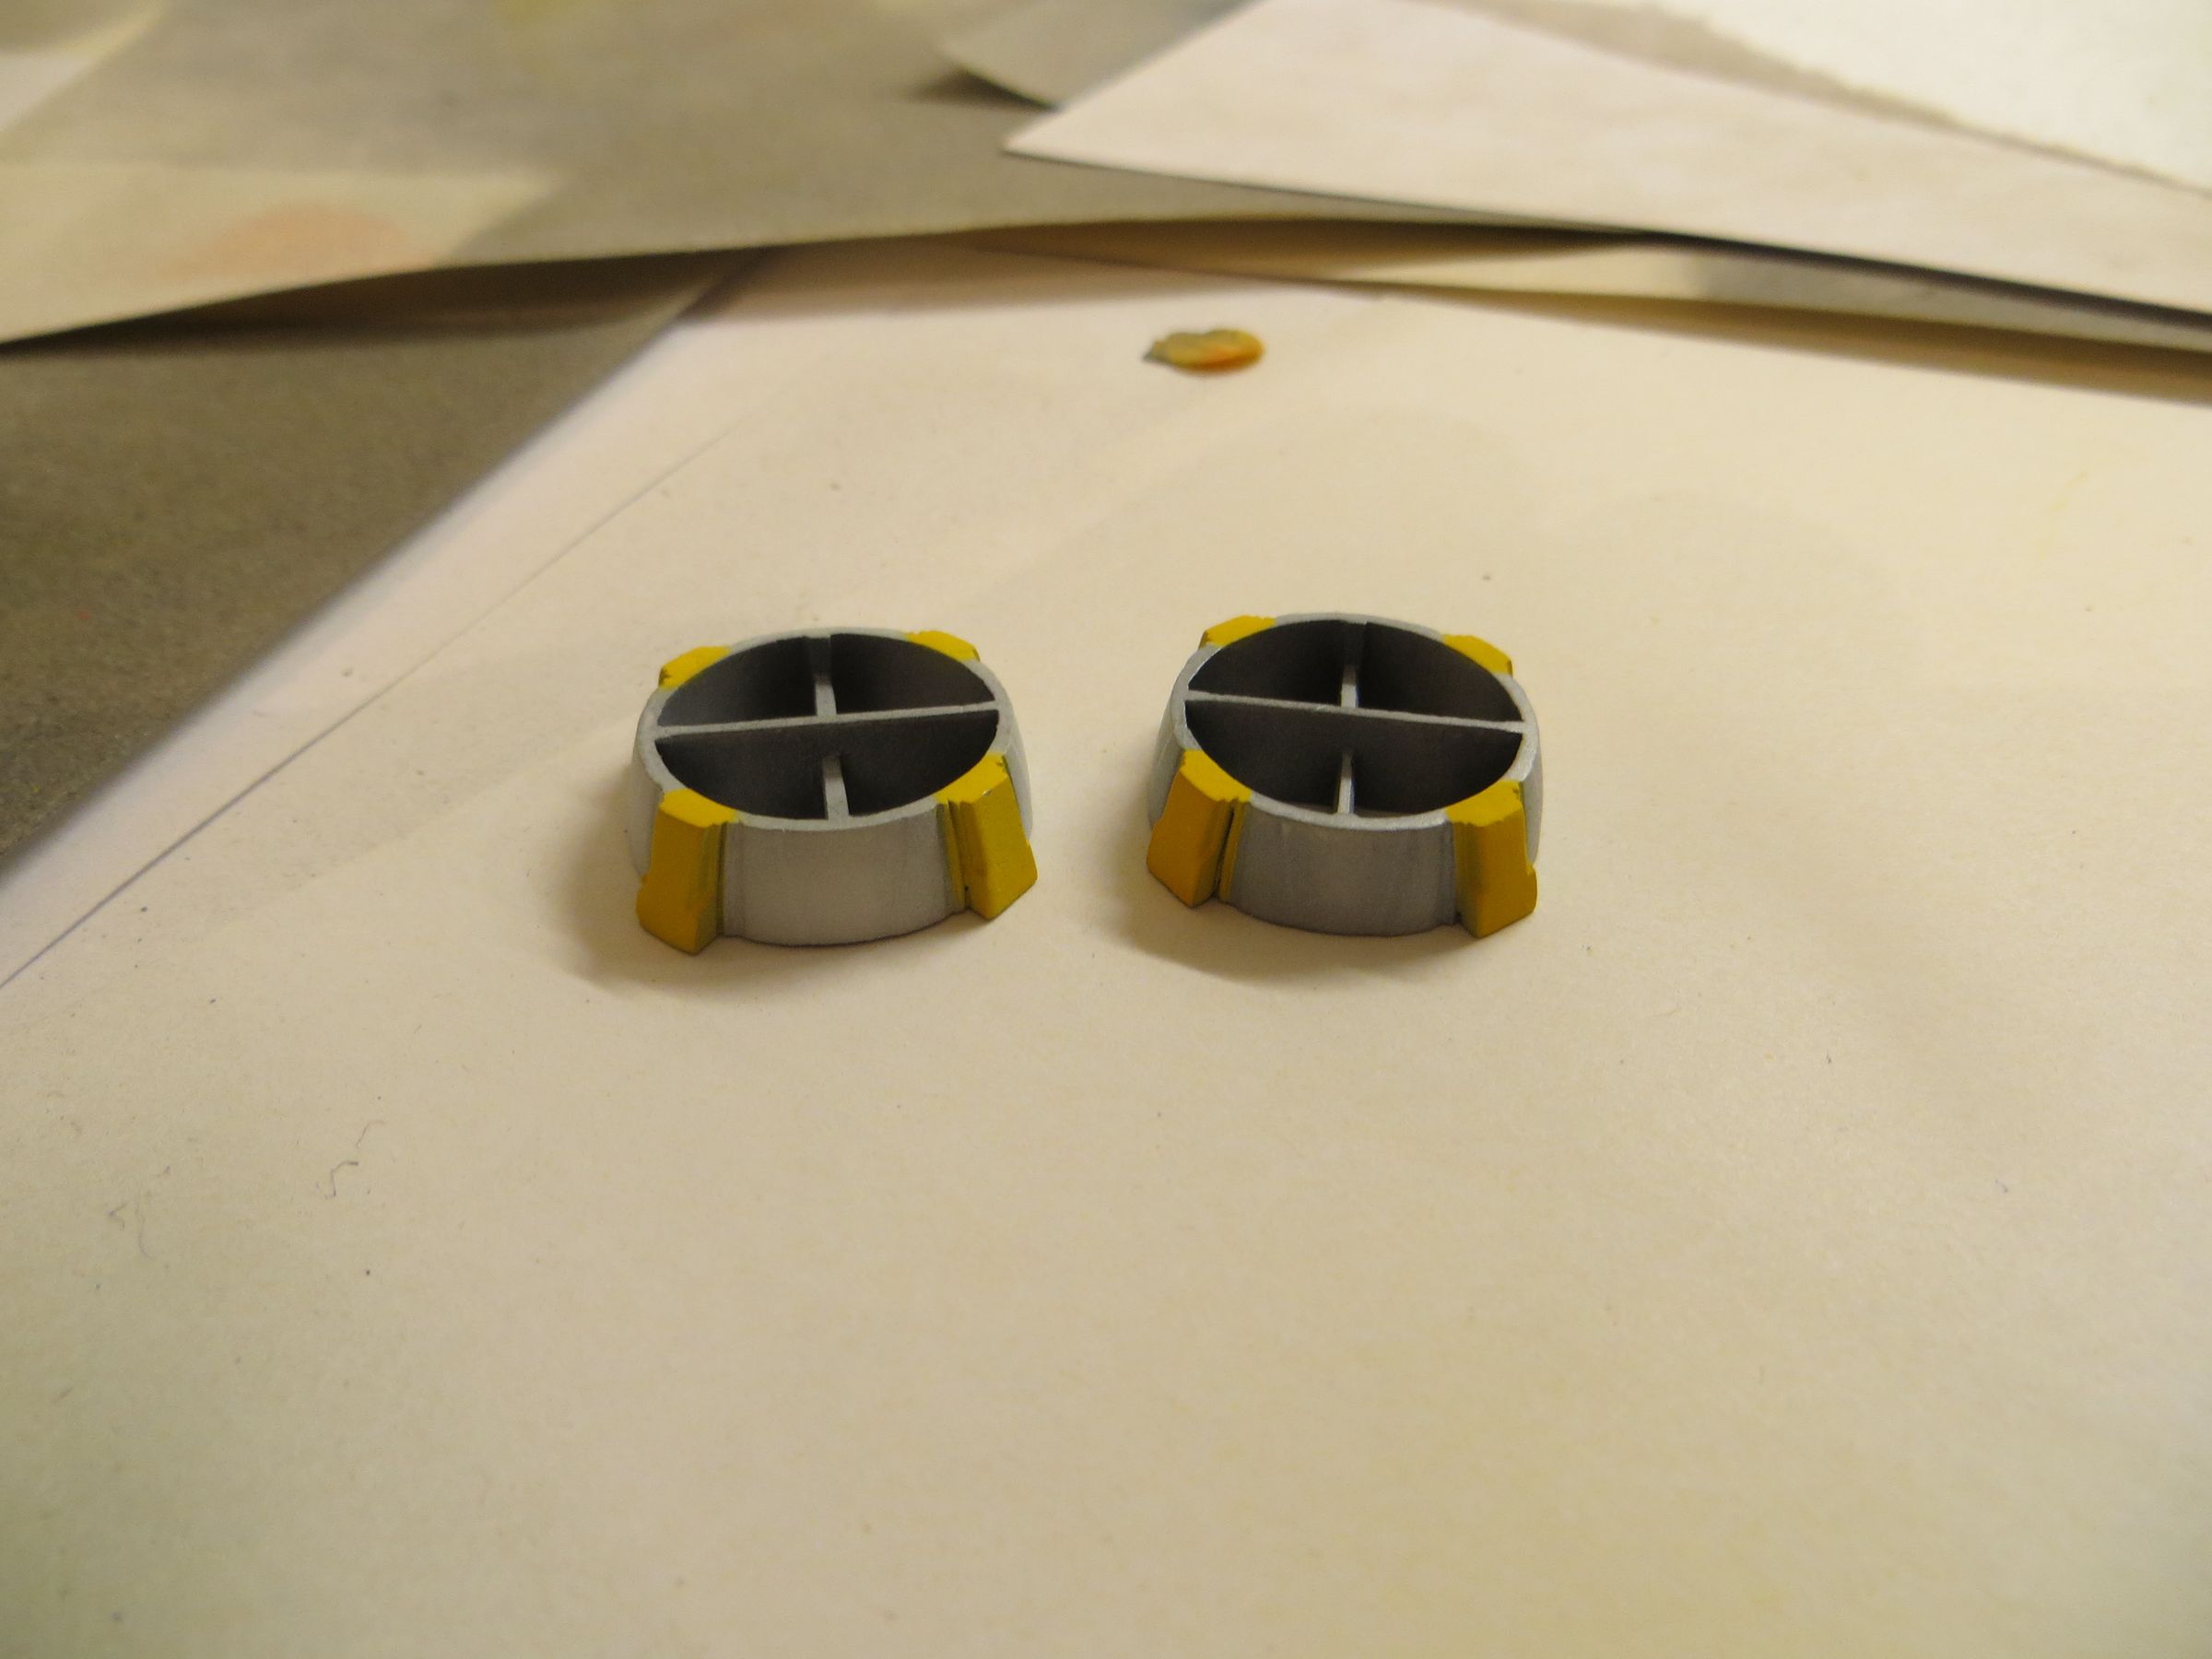
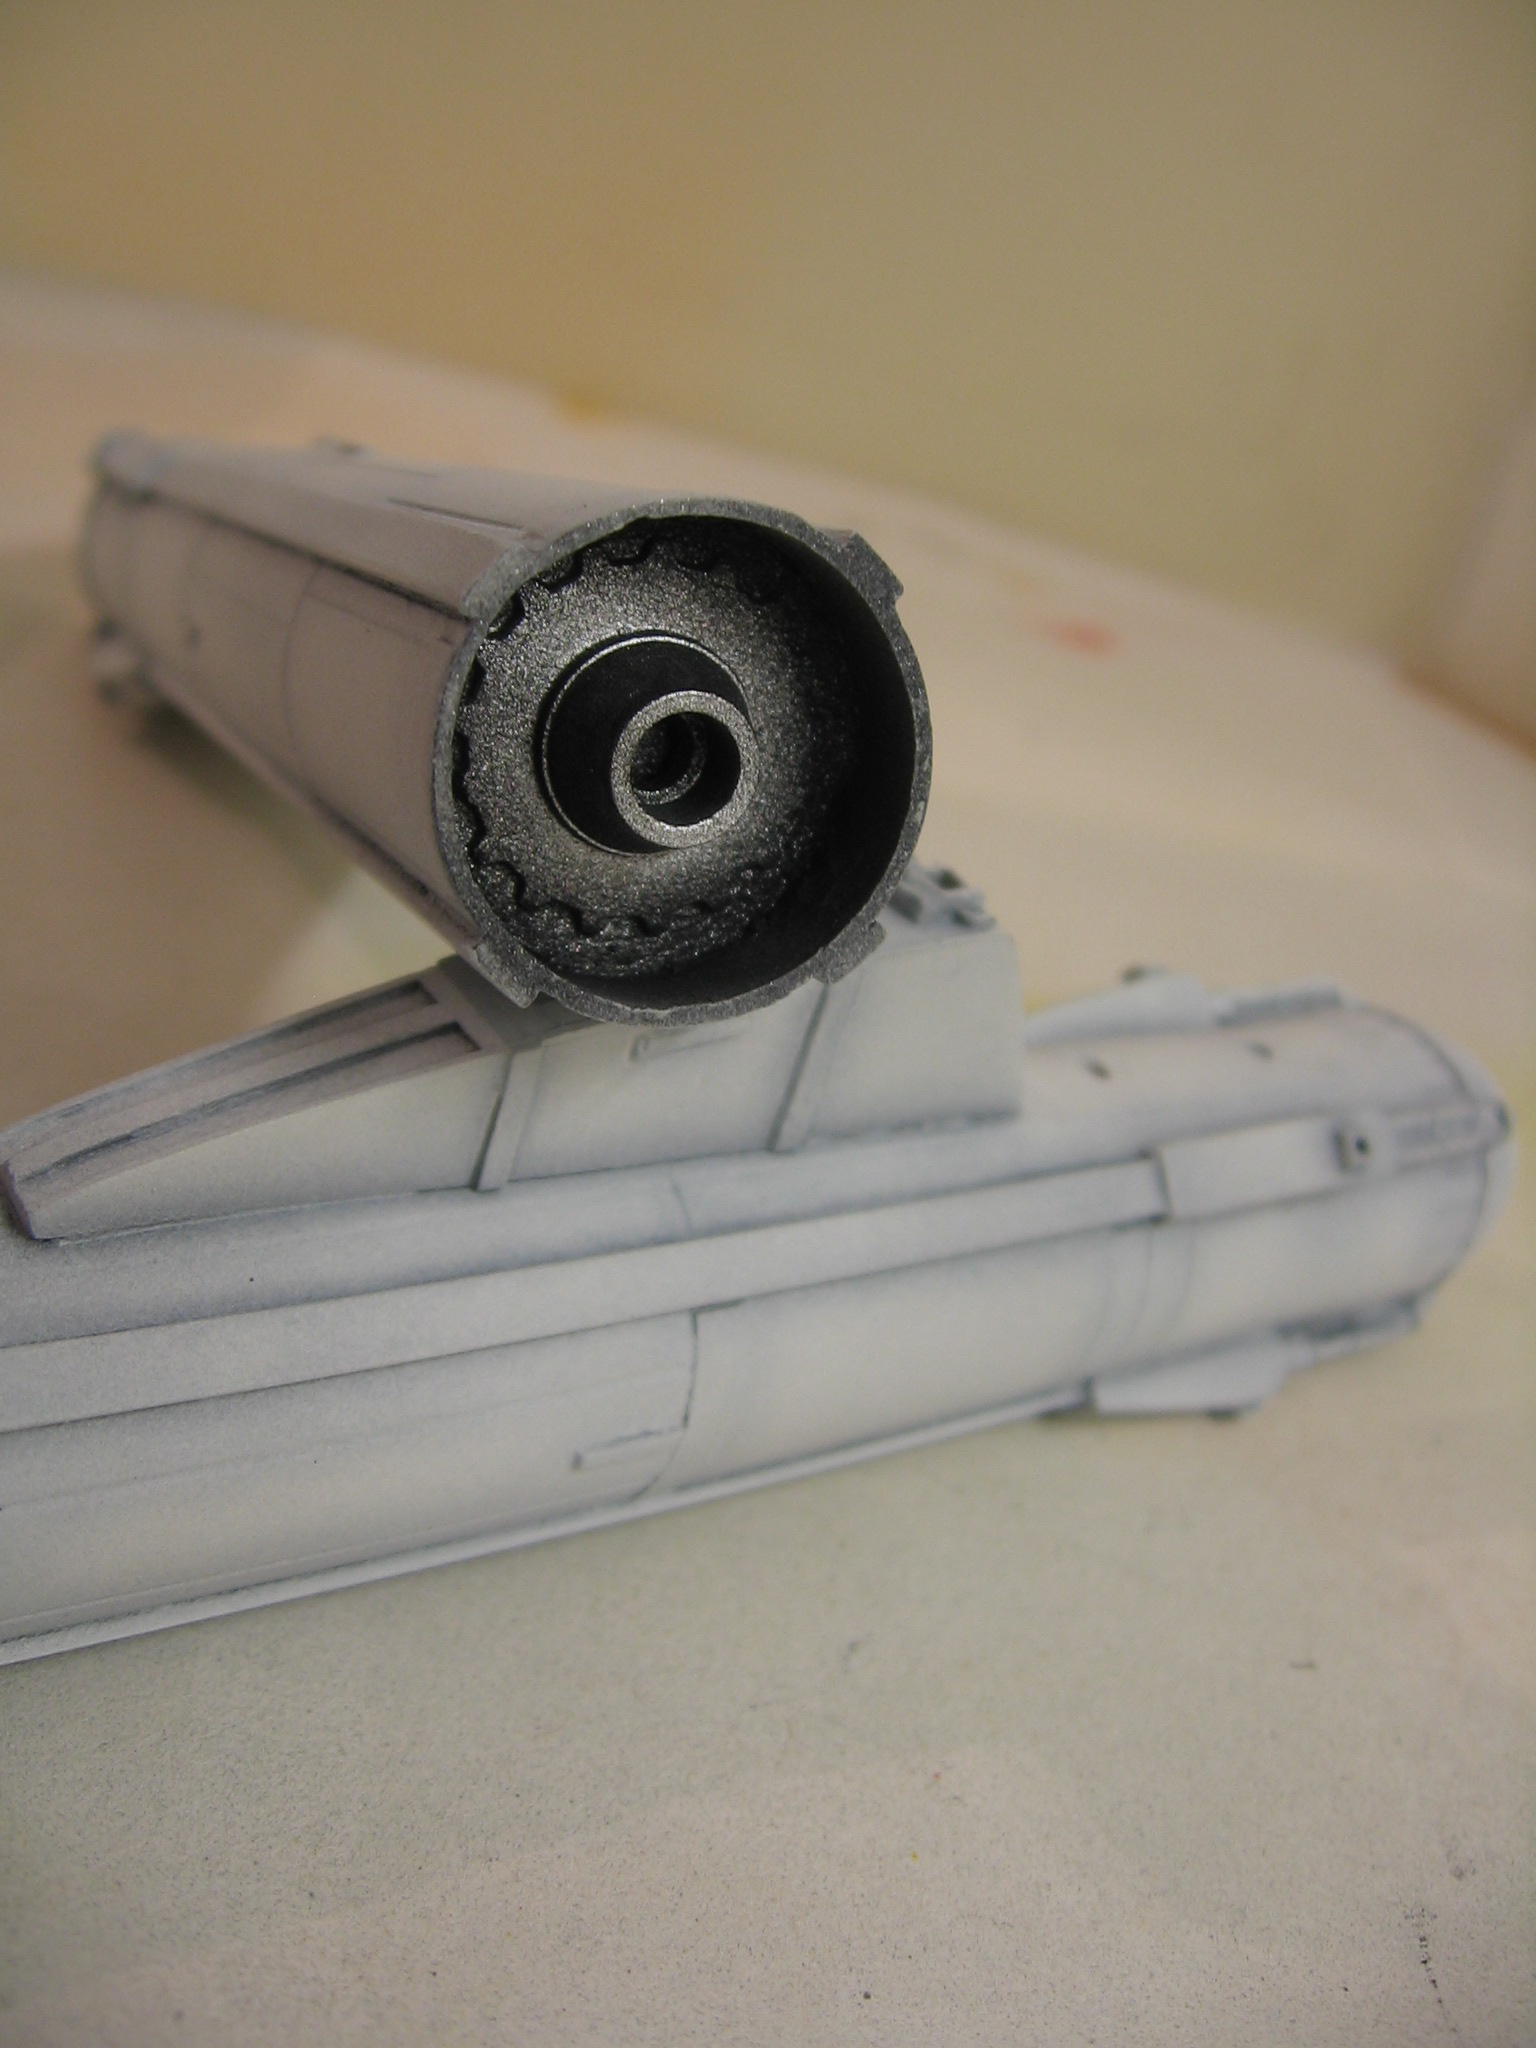
Engines and turret guns are covered with steel, then silver only on the nozzles. Machine guns will instead receive a silver drybrush
vendredi, 15 février 2013
Par olcabour le vendredi, 15 février 2013, 23:59
A first coat of primer small residual defects of molding.


The putty went out again

Well, it is ready for the paint(painting)


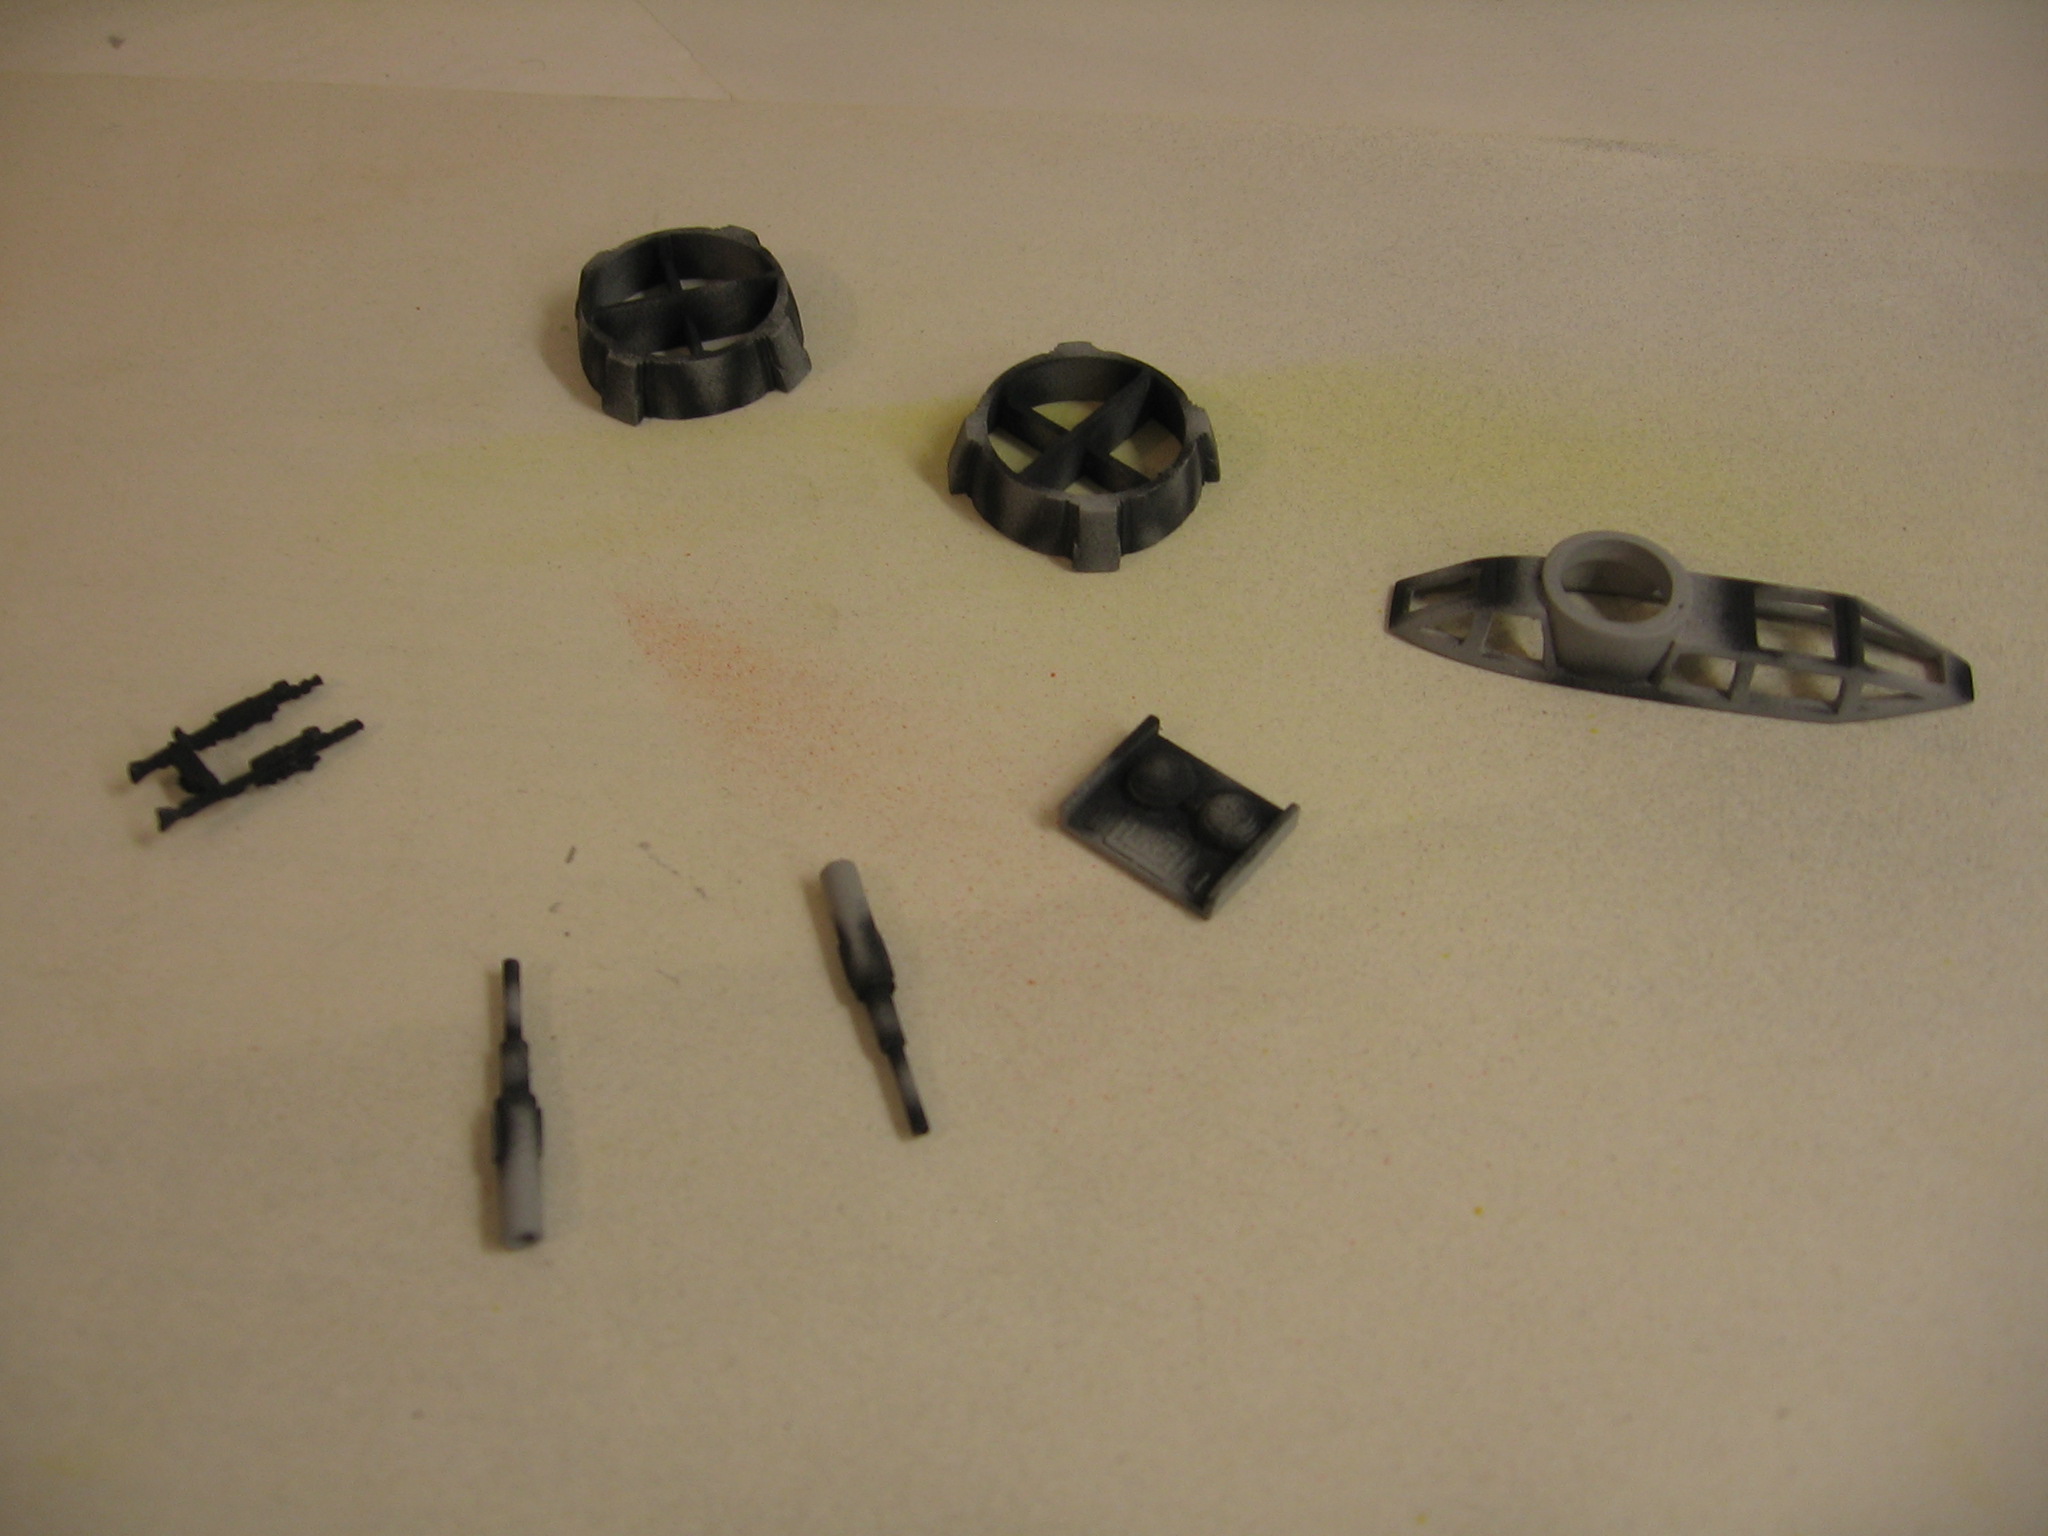
Here is the tank wheel added in thrusters, and which I had forgotten to photograph during assembly.

Par olcabour le vendredi, 15 février 2013, 23:56
As I said, first cleanings on the cabin revealed many bubbles and micro-bubbles hidden beneath the surface.

The bubbles are filled with small plastic rods glued with superglue. For micro bubbles, mastic is rarely effective, so I mixed it with extra fluid Tamiya glue.

The accumulation of bubbles on the nose resulting in large lacks, that I filled with resin offcuts and plastic profiles.

The canopy required a serious trimming. As I thought that the front was ended too abruptly, and seemed a bit short compared to the references available, I lengthened it with a piece of plastic profile. It allowed me to then extend the windshield, and make slimmer the frames.


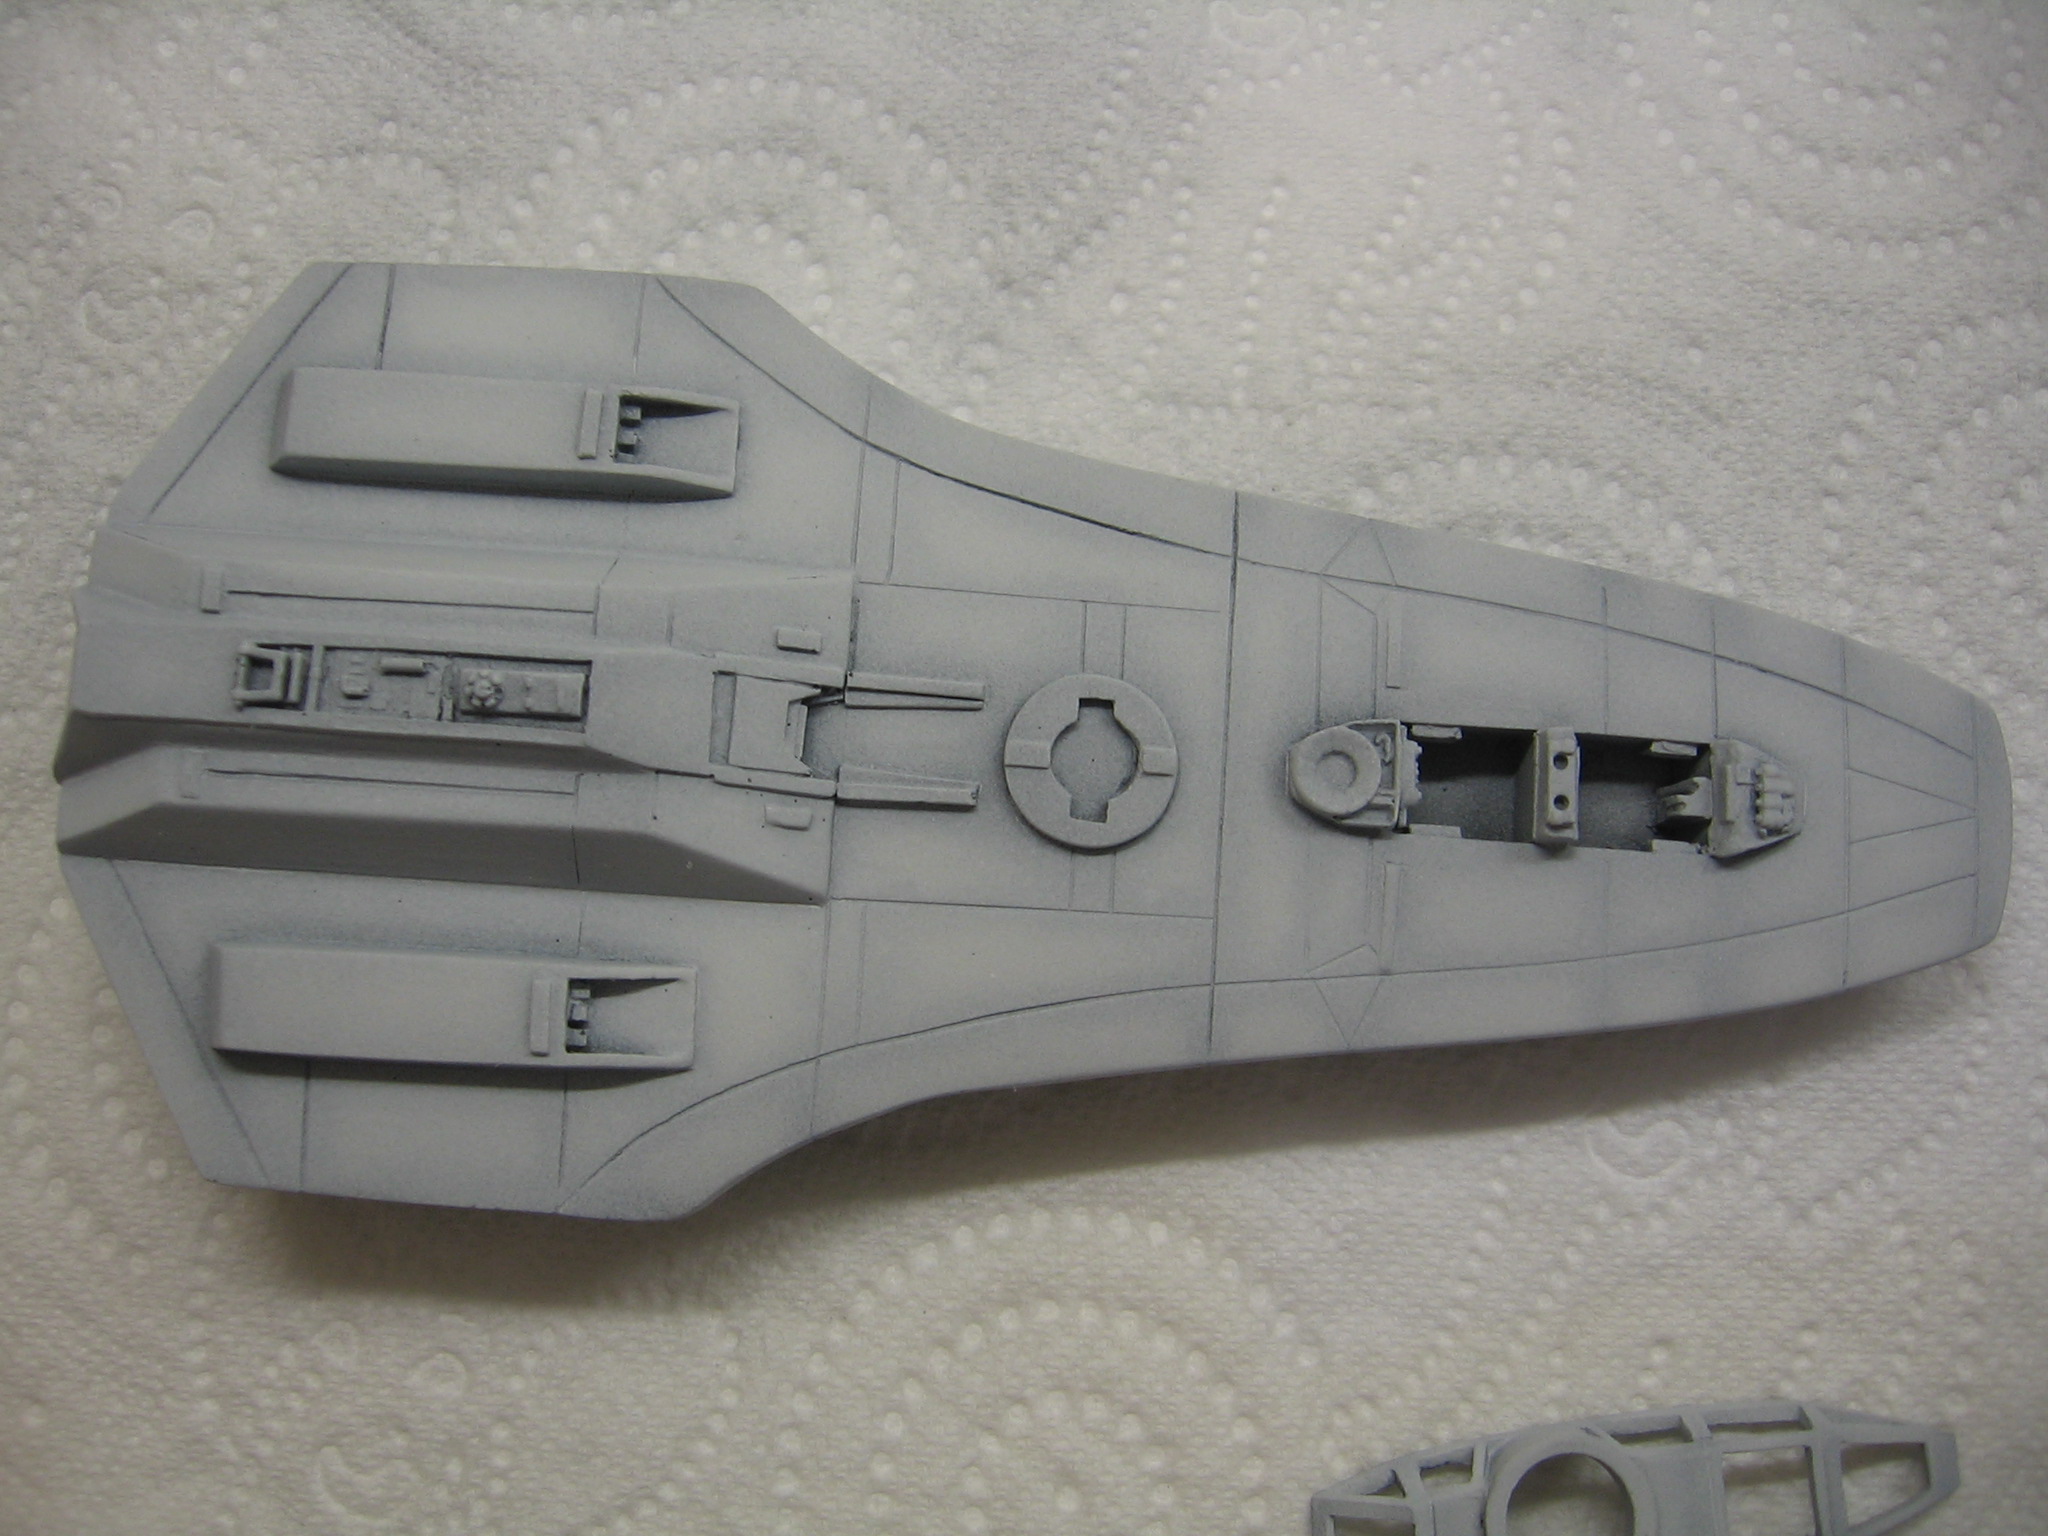
The panels lines are replaced and corrected here or there. Engines requires the same job as the fuselage: filling bubbles and gaps, graving, etc.. In the nozzles, the small directional fins are quite thin (a good point), but still need serious cleanings. For cons, the space behind is empty and clearly viewable. So, I detailed this area with a AFV wheel (for an 1/48 Panther) to simulate the nozzle. I did not try to be accurate here, just stay in the spirit of classical y-wing.
The turret canopy supplied in the kit is casted in full and transparent resin. So, this is finally more translucent and makes a horrible magnifying effect. I thermoformed a new bubble with the help of the resin part as a master, and some transparent plastic card heated over a candle.


The turret guns are incomplete, only molded on one side, and not long enough to be properly set in place. By the way, as I made a new bubble canopy, the internal mechanism needed to be completed. They are scratched with machine guns and suspension shafts 1/72 military kits.


The 2 front guns are really ugly, and not cylindrical. So I scratched new ones with plastic tubes and syringe needles.

Next is a little ride in the cockpit, where the side panels are simulated with 1/72 AFV tracks, and the gunner's instrument panel with a suspension part from a Italian AFV in the same scale. Incidentally, the backs of the pilot and gunner chairs needed to be shortened as the canopy could not be close on the cabin ...


The main assembly can now begin. Since there are not many parts, and engines will stay aside for easy painting, this step is rather fast ! It is essentially to ensure proper alignment and prepare metal rods to ensure proper bonding.
Par olcabour le vendredi, 15 février 2013, 23:49
Bought on StarshipModeler 2 or 3 years ago, a first and quick opening of the box made me think that this kit Sovereign Replicas resin is a quiet walk in the park.

Having decided to tackle it, a more detailed analysis was required. At first glance, the overall proportions seem correct. As it is a numerical model, cartoon style, I'm not going to focus on this point. However, the cockpit seemed very small (unless clones are legless cripple). The finished kit appears to be in the 23.5cm range, and resources give a length of 23.04 m for the full size. Well, finally it's a 1/100th scale kit...
The casting quality is not fantastic. There are a lot of bubbles and micro bubbles, mainly focused on the cabin. Micro bubbles will multiplied elsewhere during sanding ... All the nose of the ship suffers large bubbles hidden just beneath the surface, appearing once the cleaning of the part had begun.
The rest (in no specific order): - Raised details on the rear of the cabin seem a bit thick. - D2's head is 1/72 (So, unlike the kit !) - The panel lines are not symmetrical, not clean, and not enough pronounced. - The canopy is supplied without any transparent windows, and the frames are rather thick - The gunner turret gunner (the half-sphere on the rear of the cockpit, in the style of bombers of World War II) is cast in transparent resin but solid. It will therefore require a thermoformed replacement part. - The front guns are not well cast, so they will be redone in scratch, and those of the turret are molded as a single face (one side casting only) - No pilot or gunner are provided - No landing gear
Number of parts18 Decals 2 Sorry, I do not have "out of the box" pictures this time